Showing posts with label Dairy-free. Show all posts

Monday, September 14, 2015

Easy Granola

Easy Granola is quick, delicious, and a great addition to breakfast!

Today, I was in a granola mood. I've been meaning to make a batch for approximately 1 billion days or something like that. :) This morning as I was doing dishes, putting dinner in the crockpot, and making breakfast, I thought...why not? And so I did. And it was easy and delicious. I adapted a recipe from Alton Brown - the biggest change is that I cut the brown sugar out all together. My goal was to make something healthy for us to put on our plain greek yogurt for breakfast parfaits. I think granola is ridiculously flexible in the flavor department and I'm looking forward to experimenting more! This would also be a cinch to make gluten free with gluten free oats and it's naturally dairy free.

Easy Granola

EASY GRANOLA

3 cups old-fashioned oat
1 c. pecans, chopped
1 c. almonds, chopped or slivered
3/4 c. plus a little more coconut
2 tsp. cinnamon (I actually used cinnamon plus which has a mix of spices)
1/4 oil
1/4 plus 2 TB. maple syrup
3/4 tsp of salt

Preheat oven to 250 degrees. Combine the oats, nuts, coconut, and cinnamon in a bowl. In a separate bowl, mix together the oil, syrup, and salt. Pour the liquids over the dry and stir until thoroughly combined. Evenly spread the mixture on a large bar pan. Bake for 1 hour 15 minutes until golden brown - stirring every 15 minutes. Let cool and store in an airtight container

That's it! Super easy, super delicious and totally adaptable. Next time I will add a couple of teaspoons of vanilla extract to the wet ingredients. You can add raisins after it comes out if you like that. I'm dreaming of all the variations - orange almond, apple cinnamon, vanilla coconut, cranberry spice...

Monday, April 28, 2014

Curried Red Lentils

Curried Red Lentils are a healthy and easy dish for weeknight dinners!


What?! A post?! You probably thought we had forgotten what those were... :) In truth, we have been working on re-launch and are a couple of months behind where we hoped to be. Our lives have taken unexpected turns and have not allowed as much time as we would like for blogging. We do plan to be back on a semi-regular basis. We are excited to have a new look (still in progress). We have changed blog platforms, so please make sure to clear your past history (media cache) to make our site function for you (i.e. searching). Please know that we are still a work in progress and bear with us. We hope it will be worth it. On to the post for today...

These days, I need quick, healthy, and easy meals. Life with four kids - all with varying needs - leaves less time for meal planning and execution. These curried red lentils are always a hit, can be ready in 45 minutes or less, can be easily adapted, and are nutritionally great. This can also be made gluten-free, vegan, vegetarian, and dairy-free. While I have changed this recipe a fair bit and generally double it for my family, the original inspiration came from one of my favorite cookbooks, More With Less. I serve this over brown rice - just put it in your rice cooker with plenty of time to fully cook.

Curried Red Lentils
Red Curried Lentils

CURRIED RED LENTILS

1 c. red lentils (you can use brown or french, but texture will be different & cooking time maybe longer)
2 1/2 c. chicken, beef, or vegetable broth
1 bay leaf
1 tsp. salt

Bring to a boil and simmer for 20 minutes.

In a separate pan sauté together for 5-10 minutes:

1/4 c. butter, olive oil, or coconut oil
1 onion, diced
2 stalks celery, diced
2 carrots, peeled & diced
2 cloves garlic, minced

Add:

1 1/2 - 2 Tb. curry powder

Combine the veggie mixture and the lentils.

Add:
2 Tb. fresh lemon juice
2-3 Tb. fresh cilantro (plus more for serving)

Cook on low for just a few minutes stirring frequently to allow flavors to combine. Remove bay leaf before serving. Top with fresh cilantro and serve over rice, quinoa, or couscous.

Monday, August 12, 2013

Chocolate Teff Brownies

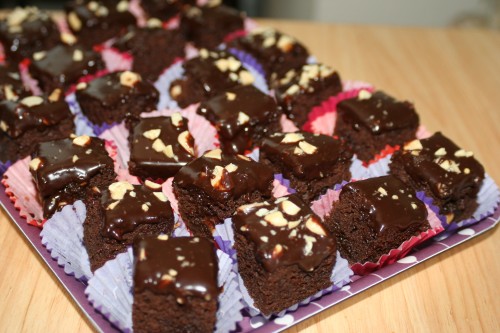
My husband and I were invited to a cook-out recently. He knew the couple hosting the event; I didn't know anyone. I volunteered to bring a dessert so that there would be something gluten-free available for my husband. A look through my pantry and through my favorite cookbook (as you likely know by now!), Nourishing Meals, and I settled on some Chocolate Chip Teff Brownies with an added dairy-free ganache. They were absolutely delicious and received rave reviews from the party goers.

Chocolate Teff Brownies

CHOCOLATE TEFF BROWNIES
(from Nourishing Meals by Alissa Segersten)
Print This Recipe

Dry Ingredients
1 c. teff flour
1/4 c. tapioca flour
1/3 c. cocoa powder
1 tsp baking powder
1/2 tsp baking soda
1/4 tsp sea salt

Wet Ingredients
1/2 c. dates, pitted
1/4 c. ground flaxseeds
1 1/4 c. boiling water
1/2 c. coconut oil
1/2 c. coconut sugar
2 tsp vanilla

Mix-in
1/2 c. chocolate chips

Preheat oven to 350ºF. Grease a 7 x 11 baking dish.

In a mixing bowl, whisk together the dry ingredients. Set aside.

Place the dates and ground flaxseeds into a blender; pour the boiling water over them. Let sit for 10 minutes. Then add the rest of the wet ingredients and blend until smooth and creamy.

Add the wet ingredients to the dry and quickly whisk together. Add the chocolate chips and continue to whisk until thoroughly combined.

Pour better into pan and bake for 20-25 minutes.

Chocolate Ganache Frosting

3 oz chocolate chips
1/4 c. coconut milk
2 Tbsp maple syrup

Place all ingredients into a small pan and heat over low. Stir continuously until melted and thickened, just about 2 minutes. Remove from heat and let cool for about 5 minutes. Do not chill. Drizzle over brownies.

Or, if you would like a thick, creamy, spreadable frosting then let the ganache thicken at room temperature for about 3 hours.

Monday, August 5, 2013

Spinach Pesto Pasta

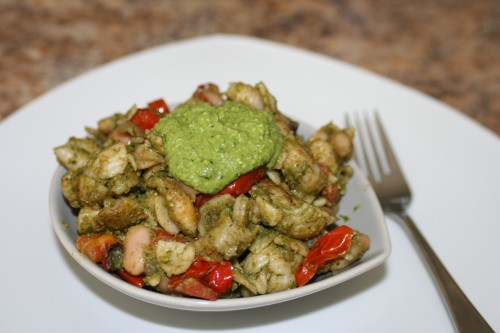
I love a good pesto during the summer. In the past I have not had particularly great success with making my own pesto. I just never felt like I got the flavor and texture correct. And now, since going dairy-free, I have to consider pesto without the Parmesan cheese. I decided to mesh a couple of recipes together to create this dairy-free pesto to go over a roasted tomato and white bean pasta dish. It was delicious! And the leftover pesto is great for topping homemade pizza or using for a pita bread dip.

IMG_1765

SPINACH PESTO
Print This Recipe


2 1/2 c. baby spinach
1/2 c. fresh basil leaves
1/2 c. walnut pieces
2 cloves garlic, minced
juice of one lemon
2 Tbsp nutritional yeast
1/4 c. olive oil
salt and pepper to taste
1/8 tsp cayenne pepper

Add the spinach, basil, walnuts, garlic, and lemon juice into the bowl of a food processor. Pulse until everything is broken down into small pieces. Add the nutritional yeast, olive oil, salt, pepper, and cayenne. Whirl until the pesto is smooth.

Monday, July 29, 2013

Whole-Grain Freezer Waffles

I recently started a full-time job. With an hour of commute time each day, I knew my meal prep time was going to be disappearing. So, the week before work began I spent time making some muffins, granola bars, pita breads, and waffles for the freezer. I intended to get a lot more frozen than that, but it was a start.

The waffles are delicious and work from freezer to toaster. And this week when I didn't know what I was going to fix for supper, we enjoyed breakfast for dinner. These are gluten-free, whole-grain, and egg-free!

For the waffles, I used a recipe from my go-to cookbook, Nourishing Meals. First make a batch of dry mix (which keeps in the pantry for up to 4 months, so make as many batches you want!). Then make the waffles. I made a triple batch, which made 26 waffles in my rather small waffle maker.

Gluten-free Waffles

WHOLE-GRAIN FREEZER WAFFLES
(from Nourishing Meals by Alissa Segersten)
Print This Recipe

DRY MIX
1 1/2 c. brown rice flour
1 c. teff flour
1 c. millet flour
1 c. tapioca flour
1/2 c. quinoa flour
4 tsp baking powder
2 tsp baking soda
2 tsp cinnamon (opt.)
1 tsp sea salt

Place all ingredients into a large bowl. Using a wire whisk, mix well. Place into an airtight container. Makes 5 cups or 5 batches of waffles.

WAFFLES
2 Tbsp waffles
2 Tbsp very hot water
2 Tbsp unsweetened applesauce
2 Tbsp melted coconut oil
1 Tbsp maple syrup
1 c. milk (I used almond milk)
1 c. Waffle mix

Place the ground flax seeds and hot water into a medium-sized mixing bowl; quickly whisk together until the flax forms a thick gel. Sometimes this doesn't happen right away so keep whisking until the gel forms. Add the applesauce, coconut oil, maple syrup, and milk and whisk together well. Then add the waffle mix. Whisk together until the batter is smooth.

Heat waffle maker and cook according to waffle make directions.

If you plan to freeze them, cool completely and then layer between pieces of waxed paper and place in freezer bags.

Friday, July 19, 2013

Chocolate Coconut Milk Ice Cream

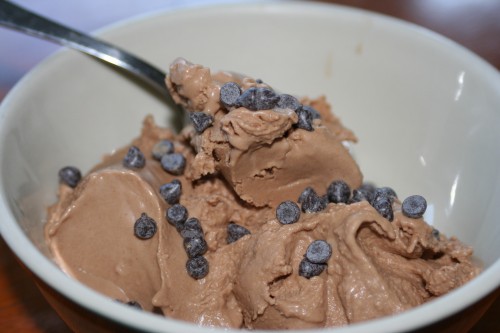
Here's a delicious treat for your weekend! This is a recipe that I posted a long while back, but it is buried in a post with another recipe. And since it is quick and fairly healthy, I decided to re-post. Plus, it's summer, so who doesn't love some ice cream?!

I should note that the original recipe is  not mine; however, I do not remember where I found it. This time around I did add a 1/2 teaspoon of almond extract, which was a nice twist.

IMG_1763

CHOCOLATE COCONUT MILK ICE CREAM
Print This Recipe


2-14 oz cans full-fat coconut milk
2/3 c. sugar or agave nectar (I used coconut sugar)
1/4 c.  unsweetened cocoa powder
1 1/2  tsp vanilla extract (feel free to replace 1/2 tsp of vanilla with 1/2 tsp almond extract)

Place all ingredients in a blender and blend thoroughly. Refrigerate for 30 minutes.

Pour into the bowl of an ice cream freezer and freeze according to the manufacturer’s directions. Serves 4.

Monday, May 27, 2013

Dairy-free Queso

I cannot in the least take credit for this recipe. When it comes to homemade, vegan cheese alternatives, I am still very much in the learning stage. But, as I explore the dairy-free world, I'm always happy to find a good recipe. And maybe before too long I'll be adept enough to create my own dairy-free "cheese" recipes.

I made a batch of this cashew queso recipe, with two notable alterations: I did not add the miso because I didn't have it on hand and I added a 1/2 tsp of chipotle chile powder for a smoky undertone. Additionally, I made sure to include the optional nutritional yeast. While the recipe is a little labor intensive, I felt like it was worth the effort. Plus the queso keeps and re-heats well. (Note: if you do use the miso, check to make sure it is gluten-free if you need that. As I understand it, not all miso is gluten-free.)

Cashew Queso Nachos

For a quick weeknight meal I made nachos (something we rarely eat, but certainly enjoy) by topping tortilla chips with a spiced pepper, onion, and bean mixture and some queso. I broiled it all for a couple of minutes and then added some guacamole (makes any Mexican dish tastier!) and green onions. It was delicious!

Monday, May 13, 2013

Gluten-Free Pita Bread

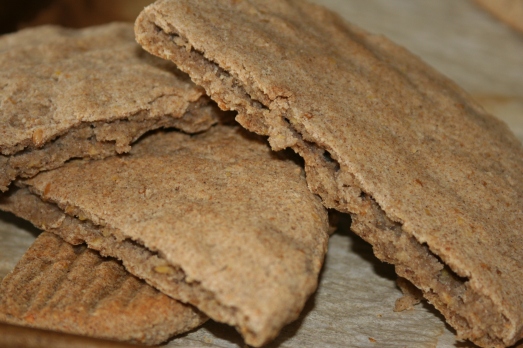
These pita pockets can be made in about 25 minutes. They are dairy-free, egg-free, yeast-free, and gluten-free. And despite all that "free-ness" they are delicious. We enjoy them dipped in hummus, as mini pizza crusts, or as pockets to stuff with veggies for a sandwich.

I have found that these don't create their own "pockets" very well, which just means I have to cut them open myself, not a big deal to me. I also love that these freeze well, so I often make a double batch and freeze half. I like to freeze some in pocket form and some just whole.

The original recipe calls for using just sorghum flour and sweet rice flour. I have successfully replaced up to a 1/4 cup of the sorghum flour with teff flour or brown rice flour. I also sometimes add some herbs or spices depending on what I plan to use the pitas for (ie adding Italian seasonings when I use them for pizza crusts).

Gluten-Free Pita Bread

GLUTEN-FREE PITA BREAD
(from Nourishing Meals)
Print This Recipe

1 1/4 c. warm water
6 Tbsp ground flax seed
2 Tbsp extra virgin olive oil
1 Tbsp apple cider vinegar

1 1/2 c. sorghum flour
1/2 -- 3/4 c. sweet rice flour (in the mountains here I always have to add the larger amount of flour, but start with the lesser amount first)
1/2 tsp sea salt
1/2 tsp baking soda
Herbs or spices, opt.

Preheat the oven to broil/550°F. Line one or two baking sheets with parchment paper. Position the oven rack in the center of the oven, not right underneath the broiler.

In a medium bowl, whisk together the warm water and ground flax seed. Let rest for about 5 minutes to thicken. Then whisk in the olive oil and apple cider vinegar.

Add the dry ingredients to the wet and use a fork to mix together. You should be able to form a ball of dough that is not too sticky or too dry. If the dough is sticky add in extra sweet rice flour (up to the additional 1/4 cup). If the dough is dry, add a little water.

Divide the dough into 5 equal pieces (I've done 6 smaller pitas or 4 larger pitas too, depending on what I'm using them for). Using wet hands, roll each piece of dough into a ball and then flatten with your hands until they are 5-6 inch circles. Place onto the parchment lined baking sheet. If you're using a large baking sheet, you should be able to fit all the pitas on there (they don't spread much). Otherwise use two baking sheets.

Bake for 10-12 minutes, flipping each pita after 6 minutes. The pitas bubble slightly and get golden around the edges when done. After they are cooled, slice them in half and cut the bread to form a pocket.

If not using right away, layer these between waxed paper and store in a sealed container. Or freeze.

Monday, May 6, 2013

Baked Pasta Chee

This recipe hearkens back to my childhood. My mom used to make this and we all loved it. It's a healthy, tasty, baked, non-dairy mac-n-cheese-type recipe. And it has become a staple dinner at our house. I make it every couple of weeks and we enjoy the leftovers for lunches.

The original recipe comes from an unusual cookbook called Ten Talents. To add extra healthful benefits I've altered the recipe to include veggies. Any chance I can get to add more veggies to a dish, I'll take. I've listed the veggies I most often use, but feel free to substitute with your favorites, or what you have on hand.

One note, the sauce includes an uncommon ingredient, nutritional yeast. Nutritional yeast flakes are often used to add a "cheesy" taste to non-dairy "cheese" recipes. It can be found at a health food store and there really isn't any substitute for it. (Active dry yeast and brewer's yeast are not anything like nutritional yeast.) I hope you might consider trying this dish despite the ingredient list, it's worth the effort.


(Finally, I realize this is not the prettiest of pictures. But I promise it tastes delicious!)

Baked Pasta Chee

BAKED PASTA CHEE
(adapted from Ten Talents)
Print This Recipe

1 lb pasta of choice (use brown rice pasta for gluten-free)
1 c. raw cashew pieces
1 c. water
1/3 c. fresh lemon juice
2 Tbsp sesame seeds
1/4 c. nutritional yeast flakes
1 1/2 tsp salt
1 tsp onion powder
1/2 tsp garlic powder
1/2 tsp smoked paprika (opt.)
1/8 tsp black pepper
1/4 c. olive oil
4 mushrooms
1/2-1 bell pepper
1 big handful baby kale
1 c. diced tomatoes

Preheat oven to 350°F.

Cook pasta according to package directions. Drain.

While pasta is cooking, make the sauce. In a blender add cashews, water, lemon juice, sesame seeds, nutritional yeast, salt, and spices. Blend until smooth while slowly adding the olive oil through the top. Then add the veggies and canned tomatoes and blend again.

Mix the drained pasta and sauce together and pour into greased baking dish. If desired, top with seasoned bread crumbs. Bake for 30-40 minutes to heat through.

Serve with a salad for a satisfying meal.

Wednesday, May 11, 2011

On the Side: Chicken-Apple Sausage

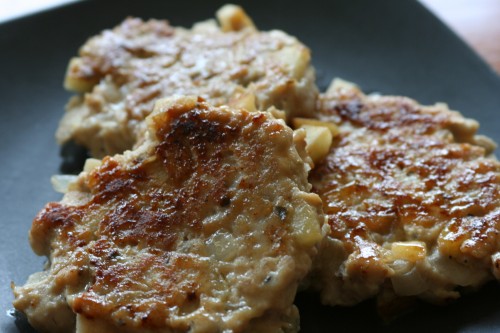
A few months ago I purchased a pound of ground chicken for the purpose of making homemade chicken sausage. But I couldn't get it made in time, so I froze the meat until an opportune time. An opportune time arrived in the form of a long weekend with my husband and I dug out the recipe I'd planned to make. Served alongside some eggs and asparagus, these sausages were delicious. And since you're making them yourself and know all the ingredients included, they are certainly healthier than your average sausage.


CHICKEN-APPLE SAUSAGE
(from The Simple Art of EatingWell)
Print This Recipe


2 teaspoons oil
1 small onion, diced
1 medium sweet apple, peeled and diced
1 pound ground chicken
1 Tablespoon of finely chopped fresh sage (or 1 tsp dry)
1 Tablespoon light brown sugar
1/2 teaspoon fennel seeds, chopped (optional)
3/4 teaspoon salt
1/4 teaspoon freshly ground pepper

Heat oil in a large non-stick skillet over medium heat. Add onion and cook, stirring, until beginning to soften, about 2 minutes. Add apples and cook, stirring, 2 more minutes. Transfer to a large bowl and cool for 5 minutes. Wipe out the pan.

Add chicken, sage, sugar, fennel (if using), salt and pepper to the bowl with the apples and onions. Gently mix to combine.

Generously coat the pan with cooking spray and heat over medium. Using a 1/3-cup measure, scoop 4 portions into the pan, flattening each into a 3-inch patty. Cook until the patties are browned and cooked through, about 3 minutes per side, adjust the heat as necessary to prevent burning. Coat the pan with cooking spray again and repeat with remaining sausage mixture.

Wednesday, April 27, 2011

Weekend Fare: Coconut Lime Chicken

I've recently been experimenting with using coconut milk in cooking and baking and I'm excited with the results! (I am referring to the coconut milk in the can, such as Thai Kitchen brand.) In honor of my recent experience with this versatile ingredient, I wanted to share with you two recipes: Coconut Lime Chicken and Chocolate Coconut Milk Ice Cream.

The chicken is incredibly tender (although the photo shows a whole piece of chicken make sure to cube it because the result is much more tender!) and the almond butter dipping sauce adds a delicious twist. The ice cream is amazing and so simple! It's unbelievably creamy. I adapted it slightly from a recipe I found online and promptly forgot where I found it. :)

Both of these recipes are gluten-free and dairy-free.


COCONUT LIME CHICKEN
(from The Whole Life Nutrition Cookbook)
Print This Recipe

2 large boneless chicken breasts, cut into 1-inch cubes
coconut oil, for sauteing

Marinade:
2 Tablespoons coconut milk
2 Tablespoons lime juice
2 Tablespoons wheat-free tamari (or soy sauce)

Almond Lime Dipping Sauce:
6 Tablespoons almond butter
1/4 cup freshly squeezed lime juice
1/4 cup coconut milk
1-2 Tablespoons tamari (or soy sauce)
1 Tablespoon agave nectar or honey
1-2 cloves garlic, crushed

Place the chicken breast pieces into a bowl and cover with the ingredients for the marinade. Stir together to coat evenly. Let chicken marinate for 30 minutes.

Heat a 10-inch skillet or wok over medium-high heat. Add about one Tablespoon of coconut oil. Then add chicken pieces. Saute, stirring frequently, for about 3-5 minutes, or until chicken is cooked through.

Place the dipping sauce ingredients into a bowl and whisk together until mixture is thickened and well combines. Alternatively, sauce can also be warmed on the stove in a small pot over low heat.

To serve, divide dipping sauce into four small bowls and serve alongside chicken. (Brown rice and stir-fried veggies make a great side!) Serves 4.


CHOCOLATE COCONUT MILK ICE CREAM
Print This Recipe

1-14 ounce can coconut milk (not light)
1/3 cup sugar or agave nectar (I used coconut sugar)
2 Tablespoons unsweetened cocoa powder
3/4 teaspoon vanilla extract

Place all ingredients in a blender and blend thoroughly. Refrigerate for 30 minutes.

Pour into the bowl of an ice cream freezer and freeze according to the manufacturer's directions. Serves 2.

Wednesday, April 20, 2011

Simple Supper: Bacon-Wrapped Salmon

Salmon is a staple simple supper in our house. (If you have an Aldi close by, that's the perfect place to buy salmon at $4 a pound in their frozen food section!) I usually just wing the seasoning, but occasionally I like to try out a "real" recipe. :)

This recipe is delicious and so simple. In just 20 minutes supper was on the table. The bacon keeps the salmon super moist. And seriously, who doesn't love bacon-wrapped food?!


BACON-WRAPPED SALMON
(adapted from Epicurious.com)
Print This Recipe


4 center-cut pieces skinless salmon fillet (about 1 1/2 inches thick)
1/2 teaspoon salt
1/4 teaspoon black pepper
4 teaspoons whole-grain mustard
4 bacon slices
Special equipment: 4  metal skewers (which I didn't have, but would have made it all easier!)

Preheat broiler and place broiler pan about 4-6 inches from heat.

Pat fish dry and sprinkle with salt and pepper, then spread curved sides with mustard. Lay 1 bacon slice lengthwise along top of each fillet, tucking ends of bacon under fillet (ends will not meet). Thread 1 skewer through length of each fillet, entering and exiting through bacon to secure it.

Arrange fish, bacon sides down, on preheated rack of broiler pan and broil 3 minutes, then turn over and broil until fish is just cooked through and bacon is crisp, 3 to 4 minutes more.

(Cooks Note: If you are using frozen fillets, let them thaw slightly first so they cook evenly.)

As a bonus, I'm going to share a roasted asparagus "recipe" to cook and serve alongside the salmon.

LEMON PARMESAN ROASTED ASPARAGUS
Print This Recipe


asparagus, woody ends removed
olive oil
salt
lemon-pepper
Parmesan cheese
fresh lemon juice

Break off woody ends from asparagus. Wash and pat dry. Lay asparagus in a single layer on a rimmed baking sheet. Drizzle with olive oil, sprinkle with salt and lemon pepper. (Use your discretion with quantities.)

While salmon is broiling, slide asparagus into oven. When you take out the salmon to flip it over, remove asparagus and sprinkle with Parmesan cheese, continue to broil until salmon is cooked through. Just before serving, sprinkle asparagus with fresh lemon juice.

(Cooks Note: If you're not making this alongside the salmon, preheat oven to 425°F instead of to broil. You'll have to cook just a couple minutes longer.)

Monday, August 9, 2010

Market Fresh: Cherries

Cherries are perhaps one of my very favorite fruits. I like them sweet or tart and I am hard-pressed to pass up a piece of cherry pie or a jar of preserves. The flavor and texture of this wonderful fruit amaze me every summer. I'm content enough to just sit with a bowl of cherries and eat them by themselves but I wanted to share some different uses for them. And yes, there is a cherry salsa - I thought it only fitting after the yummy blueberry salsa Heather posted a couple of weeks ago! My two-year-old gobbled it down though we all liked it!

I found and adapted these recipes from a couple of cherry grower websites. They were all delicious and showcase cherries in some different ways. It was fun using them in a couple of more savory dishes and the honeydew and cherry salad was very refreshing! Hope you enjoy!


CHERRY ROMAINE SALAD w/SMOKED TURKEY
Print This Recipe

1 head Romaine lettuce, medium-chopped
1/2 cup crumbled feta cheese
1/4 cup diced green onion or chives
1 can (11-ounce) mandarin oranges
1 cup smoked turkey, diced
2/3 cup sweet cherries, washed, pitted and halved (I used Ranier)
balsamic vinaigrette (recipe below)
Balsamic Vinaigrette:
1/3 cup extra-virgin olive oil
2 tablespoons balsamic vinegar
1 tablespoon dijon mustard
1 teaspoon honey
1/4 teaspoon salt
freshly ground pepper to tasteToss all salad ingredients together except cherries in a large bowl.Whisk all Balsamic Vinaigrette ingredients together in a bowl. Drizzle balsamic vinaigrette over salad, reserving 1 tablespoon of vinaigrette, and toss salad. Drizzle remaining vinaigrette over cherries and toss to coat. Arrange salad on individual plates and sprinkle with cherries.Serves 4


MINTY CHERRY & HONEYDEW SALAD
Print This Recipe

1/4 honeydew melon, seeds and skin removed, and cut into 1/2" cubes
1/4 cup minced fresh mint plus mint sprigs for garnish
2 tablespoons light honey
1 1/2 cups pitted fresh cherries
lemon juice
juice of 2 limes

Put the cantaloupe, honeydew melon, and minced fresh mint in a bowl and turn several times. Put the honey in a bowl with the lemon juice and stir until the honey dissolves, a minute or two. Pour this over the melons and turn several times. Add the cherries, turning them in as well. Pour the lime juice over all, garnish with mint sprigs and serve.

Serves 6


FRESH CHERRY SALSA
Print This Recipe

1 cup pitted fresh sweet cherries (I used a combination of bing & ranier cherries)
2 tablespoons chopped fresh basil
2 tablespoons finely chopped green peppers
1 teaspoon lemon juice
1/4 teaspoon grated lemon peel
1/8 teaspoon salt
dash bottled hot pepper sauce

Chop cherries in food processor or manually. Combine all ingredients; mix well. Refrigerate at least 1 hour. Makes 2 servings.

Tuesday, February 9, 2010

International Cuisine: Chinese Main Dishes

We love to order take-out every once in awhile. These recipes made me realize that I should make Chinese at home more often!


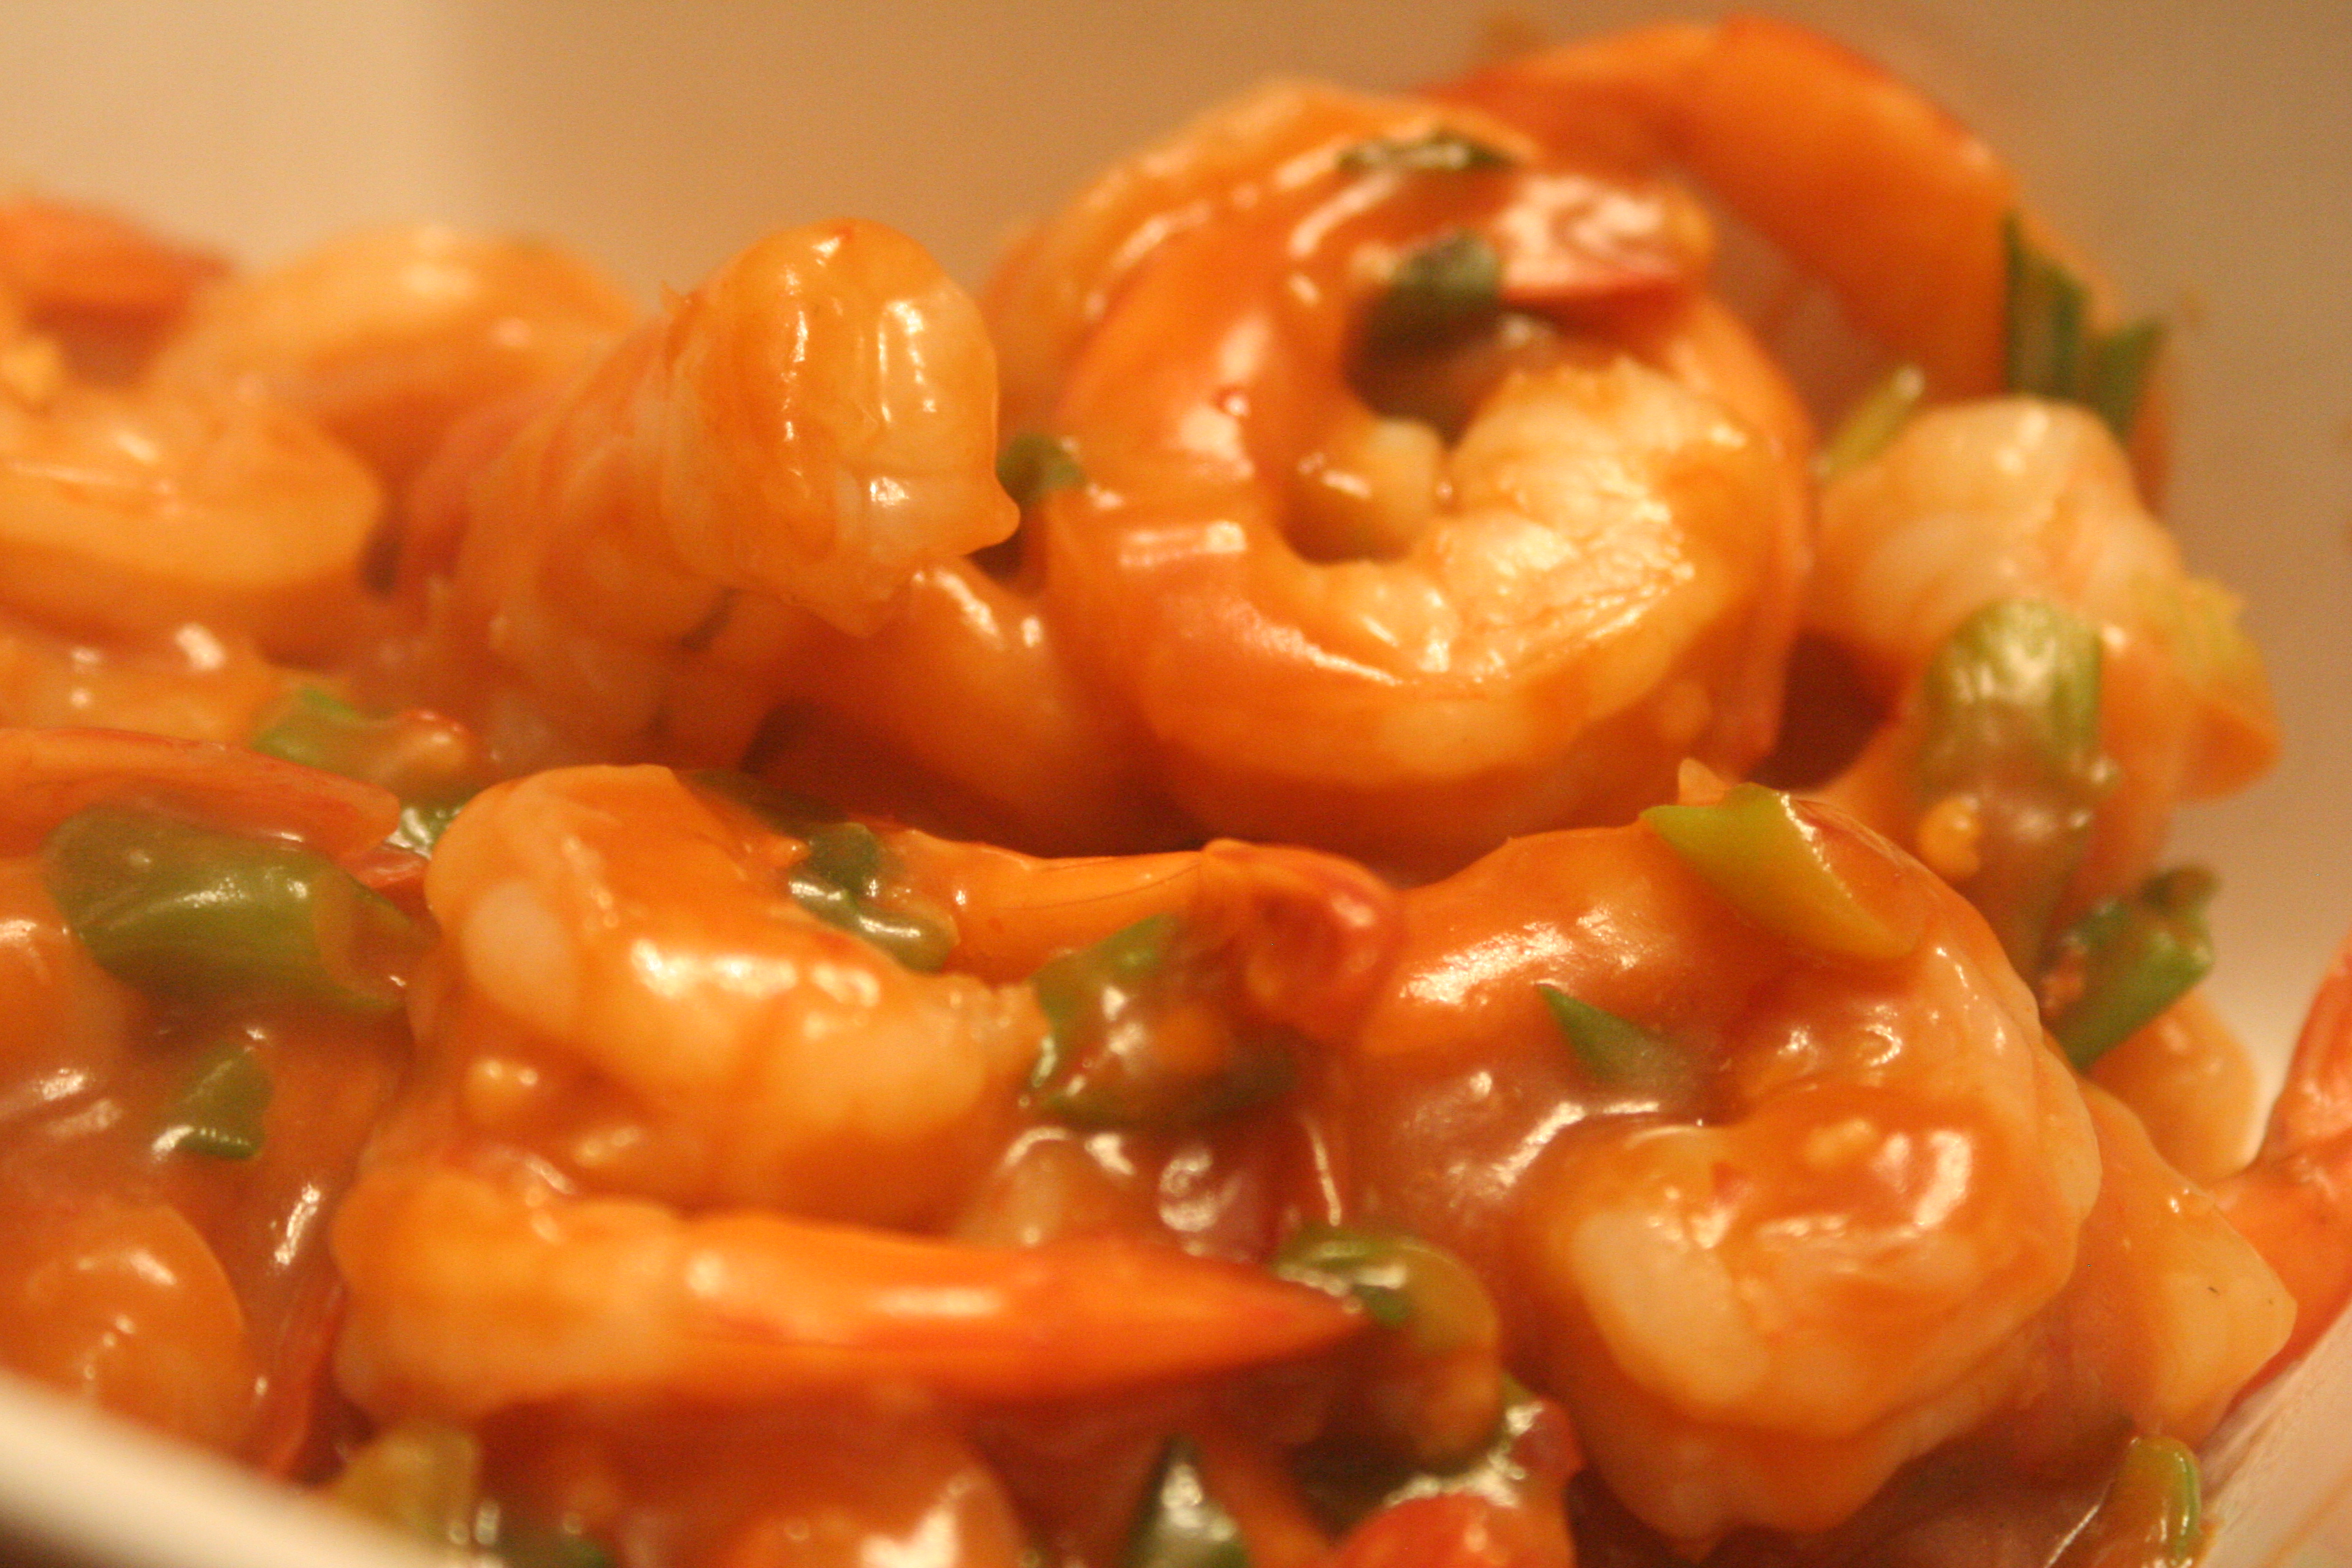
SZECHWAN SHRIMP
(adapted from allrecipes.com)
Print This Recipe

4 Tb. water
2 Tb. ketchup
1 Tb. soy sauce
2 tsp. cornstarch
1 tsp. honey
1/2 tsp. crushed red pepper
1/4 tsp. ground ginger
1 Tb. peanut or vegetable oil
1/4 c. sliced green onions
4 cloves garlic, minced
12 ounces peeled, deviened shrimp with tails

In a bowl, stir together water, ketchup, soy sauce, cornstarch, honey, crushed red pepper, and ground ginger. Set aside.

Heat oil in a large skillet over medium-high heat. Stir in green onions and garlic; cook 30 seconds. Stir in shrimp, and toss to coat with oil. Stir in sauce. Cook and stir until sauce is bubbly and thickened and shrimp is fully cooked - about 5-7 minutes.


ASIAN BEEF with PEA PODS
(adapted from allrecipes.com)
Print This Recipe

3 Tb. soy sauce
2 Tb. rice wine vinegar
1 Tb. brown sugar
1/2 tsp. cornstarch
1 Tb. peanut oil
2 tsp. fresh ginger root, minced
2 cloves garlic, minced
1 lb. beef round steak, cut into thin strips
8 oz. pea pods

In a small bowl, combine the soy sauce, rice wine, brown sugar and cornstarch. Set aside.

Heat oil in a wok or skillet over medium high heat. Stir-fry ginger and garlic for 30 seconds. Add the steak and stir-fry for 2 min. or until evenly browned. Add the snow peas and stir-fry for an additional 3 min. Add the soy sauce mixture, bring to a boil, stirring constantly. Lower heat and simmer until the sauce is thick. Serve immediately.


SWEET & SOUR CHICKEN
(adapted from allrecipes.com)
Print This Recipe

1 (16 oz.) can pineapple chunks, drained (juice reserved)
2 green bell pepper, cut into 1 inch pieces
1/4 c. cornstarch
1 3/4 c. water
3/4 c. white sugar
1/2 c. distilled white vinegar
2 drops orange food color
4 skinless, boneless chicken breast halves - cut into 1 inch cubes
2 1/4 c. self-rising flour
2 Tb. vegetable oil
2 Tb. cornstarch
1/2 tsp. salt
1/4 tsp. ground black pepper
1 egg
2 c. water
1 quart vegetable or canola oil for frying

In a saucepan, combine 1 1/2 cups water, sugar, vinegar, reserved pineapple juice, and orange food coloring. Heat to boiling. Turn off heat. Combine 1/4 cup cornstarch and 1/4 cup water; slowly stir into saucepan. Continue stirring until mixture thickens.

Combine flour, 2 tablespoons oil, 2 tablespoons cornstarch, salt, white pepper, and egg. Add 1 1/2 - 2 1/2 cups water gradually to make a thick batter. Stir to blend thoroughly. Add chicken pieces, and stir until chicken is well coated.

Heat oil in skillet, fryer or wok to 360 degrees F. Fry chicken pieces in hot oil until golden. Remove chicken, and drain on paper towels.

When ready to serve, layer green peppers, pineapple chunks, and cooked chicken pieces on a platter. Pour hot sweet and sour sauce over top. Serve with steamed rice if desired.