Showing posts with label Dessert. Show all posts

Thursday, March 23, 2017

Entertaining + Creme Brulee Recipe

I don't get to entertain as much as I would like these days, but I always love it when I get a chance! I partnered with Oriental Trading Company to set this gorgeous Welcome Spring brunch table! I chose pink, gold, navy, and white as my main colors and I simply adore how this turned out. It's simple yet elegant and feels festive.

Check out the Navy Blue Chevron Hanging Lanterns!
The beautiful Gold Shimmer Burlap Table Runner and Gold Metallic Chargers were my base - both can be used many times over, which I love! I kept the centerpiece simple with a chalkboard I already owned and two gorgeous Milk Jug Vases tied with Hot Pink Baker's Twine - I decided to put some tealights inside, but I think they would also be stunning with flowers and I can't wait to use them again. The final part of the festive decor was the Navy Blue Chevron Hanging Lanterns which hung from the light and looked so pretty.
I love the Gold Shimmer Burlap Table Runner and the Milk Jug Vase!

I love the color combination!
The place settings anchored by the chargers included Navy Blue Chevron Scalloped Paper Dinner Plates, Hot Pink Paper Dessert Plates, Hot Pink Luncheon Napkins, and Premium Gold Metallic Cutlery. The quality on all of these items was really excellent and the combination perfect. I absolutely loved the chevron of the plates and hanging lanterns - so fun! I used the Dictionary Stickers & Tags for place cards tied with the baker's string and set them on the plates to finish the place setting.

The stunning place setting! The Metallic Gold Chargers were truly beautiful and will be so versatile. 

I always love including party favors and these Gold Takeout Boxes were awesome for that! I used Vintage Washi Tape and the baker's string to dress up the boxes a bit.

The simple favor with Gold Takeout Boxes decorated with Vintage Washi Tape were super cute! 
I've used Oriental Trading Company in the past for Oscars Parties, birthday parties, and other events and have not been disappointed. I love that you can mix and match what works for any theme and any price point!

I couldn't let you go without including a recipe for your next event! One of my kids asked for creme brûlée because he had seen it on a baking show and didn't know what it was. I obliged because...why not?! Creme Brûlée is simple, but oh so decadent and delicious. I don't own a torch, so I appreciated that this recipe gave instructions for melting the sugar under the broiler. The original recipe came from the New York Times Cooking.

Creme Brûlée 
Creme Brûlée
serves 4

2 c. heavy Cream
1 vanilla bean, split lengthwise
1 tsp. vanilla extract, optional
1/8 tsp. salt
5 egg yolks
1/2 c. sugar plus more for top

Preheat oven to 325 degrees. In a saucepan, combine cream, vanilla bean (I scraped and added the beans to the liquid before also adding the split bean), and salt. Cook over low heat until just hot. Let sit for a few minutes, then remove vanilla bean. Add vanilla extract if desired. 

In a bowl, beat yolks and sugar together until light. Stir about a quarter of the cream into it, then pour sugar-egg mixture into cream and stir. Pour into four 6-ounce ramekins and place ramekins in a baking dish. Place pan in oven and carefully fill with boiling water halfway up up the sides of the dishes. Bake for 30-40 minutes, or until centers are barely set and slightly jiggly. Cool completely and refrigerate at least a couple of hours and up to a couple of days (perfect to make ahead!).

When ready to serve, completely cover the top of each custard with a thin layer of sugar. Place ramekins 2-3 inches under the broiler. Cook until sugar melts and browns or even blackens a bit, about 5 minutes - watch carefully. Serve within 2 hours. 

Enjoy!

Disclaimer: Oriental Trading Company sent me these products free in exchange for my honest review. This review and opinions of the products are all my own. 


Monday, August 12, 2013

Chocolate Teff Brownies

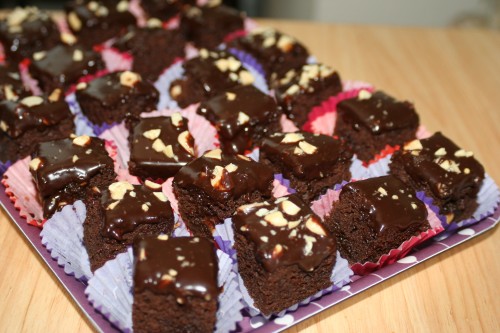
My husband and I were invited to a cook-out recently. He knew the couple hosting the event; I didn't know anyone. I volunteered to bring a dessert so that there would be something gluten-free available for my husband. A look through my pantry and through my favorite cookbook (as you likely know by now!), Nourishing Meals, and I settled on some Chocolate Chip Teff Brownies with an added dairy-free ganache. They were absolutely delicious and received rave reviews from the party goers.

Chocolate Teff Brownies

CHOCOLATE TEFF BROWNIES
(from Nourishing Meals by Alissa Segersten)
Print This Recipe

Dry Ingredients
1 c. teff flour
1/4 c. tapioca flour
1/3 c. cocoa powder
1 tsp baking powder
1/2 tsp baking soda
1/4 tsp sea salt

Wet Ingredients
1/2 c. dates, pitted
1/4 c. ground flaxseeds
1 1/4 c. boiling water
1/2 c. coconut oil
1/2 c. coconut sugar
2 tsp vanilla

Mix-in
1/2 c. chocolate chips

Preheat oven to 350ºF. Grease a 7 x 11 baking dish.

In a mixing bowl, whisk together the dry ingredients. Set aside.

Place the dates and ground flaxseeds into a blender; pour the boiling water over them. Let sit for 10 minutes. Then add the rest of the wet ingredients and blend until smooth and creamy.

Add the wet ingredients to the dry and quickly whisk together. Add the chocolate chips and continue to whisk until thoroughly combined.

Pour better into pan and bake for 20-25 minutes.

Chocolate Ganache Frosting

3 oz chocolate chips
1/4 c. coconut milk
2 Tbsp maple syrup

Place all ingredients into a small pan and heat over low. Stir continuously until melted and thickened, just about 2 minutes. Remove from heat and let cool for about 5 minutes. Do not chill. Drizzle over brownies.

Or, if you would like a thick, creamy, spreadable frosting then let the ganache thicken at room temperature for about 3 hours.

Tuesday, June 11, 2013

Molasses Syrup

Our family LOVES pancakes and it's my husband's specialty! Last week I made some (mostly forgettable) banana nut pancakes and was searching for a quick syrup to make to serve with them. We try to make our own most of the time since I'm not crazy about all the additives in store bought syrup. We do use pure maple syrup (but sometimes at an alarming and therefore expensive rate), however, we usually top pancakes with yogurt, fruit syrups, and/or homemade syrups. So, while I can't take credit for coming up with this yummy syrup recipe, I was very excited to find it! I doubled Simple Bites Recipe because if I'm going to the trouble I want some leftover for other meals.

In short, this was DELICIOUS! We love molasses cookies and the flavor was very reminiscent of the warm, spicy flavors of a fresh cookie. A few notes - 1) a little goes a long way, 2) this was amazing on hot cereal like oatmeal and cream of wheat, and 3) it stores well and would probably be quite good on vanilla ice cream or gingerbread.

Image

MOLASSES SYRUP
Print This Recipe


1 c. brown sugar
1/2 c. molasses
3/4 c. water
1 tsp. cinnamon
2 Tb. salted butter

In a small pot, whisk together sugar, molasses, water, and cinnamon over medium heat. Bring to a slow boil and continue stirring until ingredients are fully incorporated and syrup thickens. Remove from heat and whisk in butter. Cool slightly. Transfer to a pitcher for serving or a glass jar for storing.

Yields: 1 1/2 cups syrup

**Of note, Simple Bites has 4 other great-looking syrups in this post!

Saturday, February 4, 2012

Grandma's Molasses Crinkles

This is perhaps one of my favorite cookies ever. It brings back many memories of family gatherings and shared meals. While I mostly remember my aunt and my mom making them, the recipe originated with my grandma and so I always think of her. I searched through her recipe box and found it written in her hand with a tiny note that this is a good recipe. Love that.

These are the perfect texture, the perfect combination of spices, perfectly sweet but not too sweet, and perfectly formed with "crinkles" on top. They are delicious warm or cooled. Stephanie even had these as favors at her wedding. Yes, I think it's fair to say these are a family tradition.

Molasses Crinkles would be a great addition to your Superbowl Party (along with many of other appetizer and snack recipes!) but they would also be good just about any other day. Perfection.


GRANDMA'S MOLASSES CRINKLESPrint This Recipe

3/4 c. shortening (trust me on this one)
1/4 c. molasses
1 c. sugar
1 egg
2 1/4 c. flour
2 tsp. baking soda
1/2 tsp. salt
1 tsp. ginger
1 tsp. cinnamon
1/2 tsp. cloves

Pre-heat oven to 375 degrees.

Cream shortening, molasses, sugar, and egg together until fully combined and creamy. Add flour, soda, salt, ginger, cinnamon, and cloves. Mix until fully combined.

Scoop dough and roll into 1 inch balls and roll in sugar. Place on an ungreased cookie sheet and bake for 10 minutes or until crinkled on top and lightly golden. Makes about 3 dozen.

Friday, January 13, 2012

Old-Fashioned Pumpkin Doughnuts

For Christmas, I received Top Pot Hand-Forged Doughnuts: Secrets and Recipes for the Home Baker by Mark & Michael Klebeck with Jess Thomson - I think it might have been a not-so-subtle hint from my brother-in-law that doughnuts would be a good next step in the culinary world. I took the hint and excitedly obliged!

This book is awesome! It contains history, tips, recipes, and more for the famous doughnuts made by Seattle bakery Top Pot.  My kids were more than a little excited to see a doughnut book in the mix of my Christmas books and my three-year-old immediately started picking recipes for me to make.

The pictures are beautiful and inspiring and the recipes are detailed and specific. It is thorough and even includes gluten-free doughnut recipes. The book also provides many glazes and icings so you can mix and match your doughnut and topping. Really I just can't get enough of this book and it's not helping my healthier eating January. So...I'm going to also give you a yummy reason to break those resolutions for just one day...or two...at a time (ha!).

If you like to cook and bake and enjoy trying new techniques, this book is definitely for you - go pick up a copy! It's SO fun! I made the Pumpkin Old-Fashioned Doughnuts and the Sour Cream Old-Fashioned Doughnuts - they were both excellent and I can't wait to try another flavor. Today, I will share one recipe from this great book and you go buy the book and get the rest - you won't regret it and you will definitely want to make all of the different kinds! Oh and don't foget to drop off one of your delicious doughnuts for me to try!

Seriously, these are SO GOOD! My family (parents, sister & bil, husband, kids, etc) LOVED them! I'm totally a sucker for pumpkin so these were the first ones I made and honestly, they exceeded my already high expectations. I followed the instructions exactly since I've never made doughnuts and they turned out picture-perfect.


PUMPKIN OLD-FASHIONED DOUGHNUTS

Top Pot Hand-Forged Doughnuts: Secrets and Recipes for the Home Baker
Print This Recipe

3 c. cake/soft-wheat flour, plus more for rolling and cutting
2 tsp. baking powder
1 tsp. iodized salt
3/4 tsp. ground nutmeg
2 tsp. pumpkin pie spice
1/2 c. sugar
2 Tb. shortening/vegetable lard, trans-fat-free preferred
2 large egg yolks
2/3 c. sour cream
1/2 c. canned pumpkin Canola oil, for frying
Pumpkin Glaze:

4 1/2 c./1 lb confectioners'/icing sugar, sifted
2 tsp. light corn/golden syrup
1/2 tsp. iodized salt
1 tsp. pumpkin pie spice
1/4 c. canned pumpkin
1/2 tsp. vanilla extract
1/4 c. hot water

Serves 3 to 4


To make the doughnut dough: Sift the flour, baking powder, salt, nutmeg, and pumpkin pie spice together into a medium bowl, and set aside.

In a stand mixer fitted with the paddle attachment, mix the sugar and shortening/vegetable lard for 1 minute on low speed, until sandy. Add the egg yolks, then mix for 1 more minute on medium speed, scraping the sides of the bowl with a rubber spatula if necessary, until the mixture is light colored and thick.

Add the dry ingredients to the wet ingredients in three separate additions, alternating with the sour cream and pumpkin, mixing until just combined on low speed and scraping the sides of the bowl each time. The dough will be sticky, like wet cookie/biscuit dough.

Transfer the dough to a clean bowl and refrigerate, covered with plastic wrap/cling film, for 45 minutes (or up to 24 hours).

Meanwhile, make the pumpkin glaze: Place the confectioners'/icing sugar, corn/golden syrup, salt, pumpkin pie spice, pumpkin, and vanilla in the work bowl of a stand mixer fitted with the paddle attachment. With the machine on medium speed, add the water in a slow, steady stream, and blend until all of the sugar has been incorporated, scraping the bowl a few times if necessary. Set aside.

Using a candy thermometer to measure the temperature, heat oil (at least 2 in deep) in a deep fryer, large pot, or high-sided frying pan to 325°F. Roll out the chilled dough on a generously floured counter or cutting board to 1/2 in thick, or about 8 inches in diameter, flouring the top of the dough and the rolling pin as necessary to prevent sticking. Cut into as many doughnuts and holes as possible, dipping the cutter into flour before each cut. Fold and gently reroll the dough to make extra holes (working with floured hands makes the dough less sticky), and cut again.

Shake any excess flour off the doughnuts before carefully adding them to the hot oil a few at a time, taking care not to crowd them. Once the doughnuts float, fry for 15 seconds, then gently flip them. Fry for 75 to 90 seconds, until golden brown and cracked, then flip and fry the first side again for 60 to 75 seconds, until golden. Transfer to a rack set over paper towels/absorbent paper.

While the doughnuts are still quite hot, dip the side with the deepest cracks on each into the warm Pumpkin Glaze. Let dry on cooling racks, glazed side up, for about 15 minutes.


My notes:

* This dough was not as sticky as I expected and was easy to work with - I did use regular all-purpose flour (sifted) but that isn't as light as cake flour so that may have contributed to the less stickiness.
* Keeping the oil at a consistent heat (between 325-350) was sometimes challenging and I accidentally added a couple of donuts too early which made them take longer or cook too fast and made the end product not quite as good but nobody complained and there were none left!
* I kept the glaze warm (which makes glazing easier) on my warming burner on the stove (low-medium).
* These were best the first day but still quite excellent the next day.
* I was not compensated in any way for this review except for getting to share and enjoy delicious, homemade doughnuts.

Check out our other pumpkin recipes!

Saturday, December 17, 2011

Peanut Butter Pretzel Truffles

Have you been on pinterest? It's this amazing site that is really like an online scrapbook of ideas. It makes you feel completely inadequate and empowered all at the same time. There are so many categories like cool crafts, awesome looking recipes, fashion ideas, and even fitness plans. Anyway this is actually not a commercial for pinterest but it is where I found this recipe. They were called Chubby Hubby Truffles (after some rather well known ice cream) or Peanut Butter Pretzel Truffles.

These are quick, very easy, and they look really nice. They are a wonderful combination of salt and sweet and the creamy peanut butter is a nice texture with the crunch of the pretzels. In full disclosure - I was not thrilled with how big I accidentally made them. These are really good!


Peanut Butter-Pretzel Truffles
adapted from Brown Eyed Baker

Makes About 18-24 truffles

1½ c. pretzel pieces
½ c. creamy peanut butter (I used Skippy)
1 Tb. unsalted butter, at room temperature
2 Tb. light brown sugar
3 Tb. powdered sugar
1 1/2 c.  milk or semisweet chocolate chips
1 Tb. vegetable shortening

Put the pretzel pieces into a resealable plastic bag and crush into very small bits - I used my food processor.

In a small bowl, combine the peanut butter, butter, brown sugar and salt. Stir until all of the ingredients are completely blended and smooth. Add the pretzel bits to the peanut butter mixture and mix thoroughly. Add the powdered sugar and mix until completely combined.

Line a small baking sheet or plate with wax paper. Using a small cookie scoop, or about 2 teaspoons worth of peanut butter mixture, gently roll  into a ball (I put a little butter on my hand to reduce sticking and had to wash my hands after every 5 or so). Place the ball on the wax paper-lined cookie sheet and repeat with the remaining peanut butter mixture. Place the baking sheet into the refrigerator and chill for at least 30 minutes.

When ready to dip the truffles, microwave the chocolate chips and vegetable shortening together in a small bowl at 50% power in 30-second increments, stirring after each, until completely melted and smooth.

Dip each peanut butter-pretzel ball into the melted chocolate and use a fork or spoon to roll it around, ensuring that it is completely coated with chocolate. Let any extra chocolate drip off and place back on the wax paper-lined sheet. Repeat with all of the peanut butter-pretzel balls.

Return the baking sheet to the refrigerator and again chill for at least 30 minutes. Garnish with a drizzle of melted peanut butter (melt the peanut butter for 30 seconds in the microwave and use a fork to drizzle) and crushed pretzels, if desired. Store in an airtight container in the refrigerator.

Wednesday, December 14, 2011

Mocha Coconut Fudge

When How Sweet It Is posted this recipe, I knew immediately that I would be trying it. I mean really, with her willingness to interrupt our busy plans with this recipe, how could I refuse? :) The flavor combination was an instant win in my book - kind of an extra rich and sweet twist on a yummy frappucino I enjoy occasionally - ahem.

This recipe was super quick, super decadent, and totally yum. I think we may have a new fudge recipe to add to our annual favorites - peanut butter, chocolate, and butter pecan. We may like fudge - the vote is still out - you can send me more recipes to, you know...make sure!

Let me tell you a little secret about this recipe...I made it in the microwave. You can certainly use the double boiler as the recipe recommends but I noticed that she mentioned the microwave as an option and I was sold. You see, I was up to my eyeballs in cookie baking when I threw this recipe in to the mix between shuffling cookies into the oven. So, yes, it was easy. :) You can go here for her original awesome recipe. I'm going to post my microwave version in case you are lazy like me.

Seriously, how pretty is this?! This would make aa really great gift! Oh and I forgot to mention - my mom thought this was wonderful.


Mocha Coconut Fudge
Adapted from How Sweet It Is
Print This Recipe

12 oz. semisweet chocolate, chopped (I used 2 c. semi-sweet chocolate chips)
12 oz. white baking chocolate, chopped (I used 2 c. white chocolate chips)
1 can (15oz) sweetened condensed milk (mine was 14 oz which was no problem), divided
1 1/2 Tb. espresso powder or instant coffee (I used the latter - two packets of an instant because that's what I had)
1 tsp. vanilla extract
1 1/2 tsp. coconut extract
1 Tb. coconut oil, divided
1/2 c. flaked coconut, toasted (350 degrees for about 10 minutes but watch it carefully so it doesn't burn!)

Line an 8×8 pan with buttered foil.

Add semisweet chocolate to microwave safe bowl and microwave for 30 seconds. Stir and microwave for 30 more seconds. Add in half of the sweetened condensed milk (I eyeballed it), the coffee powder and 1/2 tablespoon (1 1/2 tsp.) of coconut oil. Return to microwave for 30 seconds. Remove and stir. Continue 30 second increments until fully melted and smooth. Stir in the vanilla. Spread evenly in the bottom of the pan. Mixture will be quitethick. Place in the freezer for 30 minutes (or less if your me and you want to hurry).

Add white chocolate to a micorwave safe bowl and heat for 30 seconds. Add in remaining condensed milk and coconut oil and return to microwave for 30 seconds. Stir. Microwave 30 more seconds if needed until mixture is completely melted. Add coconut extract and thoroughly combine. Remove fudge from freezer and add white chocolate on top, spreading evenly to coat. Top with toasted coconut, then chill in the refrigerator for 60-90 minutes.

When ready to cut, fill a large cup with hot water or run knife under the tap. Dip a sharp knife into the water, then blot on a towel. Use knife to cut fudge into your desired size of squares.

This is SO rich and SO good - I think you could easily cut this into 1 inch squares which would make for 64 pieces of fudge. :) Enjoy and go thank How Sweet It Is for this deliciousness and check out her site! If you like chocolate, coffee, and coconut, you will LOVE this.

Monday, November 28, 2011

Balsamic Figs w/Yogurt Cream Cheese & Walnuts

Seriously, I have been missing out. I have always associated figs with those packaged fig cookies which were a treat as a child. My goodness people, if you have not eaten a fresh fig, get yourself to the store immediately and buy some. They are splendid. Maybe I've had them before but it seems I would remember...

These were a splurge at the farmer's market. We wanted to try something new and the seller had samples. One taste and we were totally hooked. We debated how to prepare them and finally settled on this recipe. It was inspired by a recipe on Food Network, I believe. They were difficult to successfully photograph but they were not difficult to eat. This dessert is not super sweet but it is comforting and delicious. It would be a lovely treat during the hustle and bustle of the holidays!


BALSAMIC FIGS with YOGURT CREAM CHEESE & TOASTED WALNUTS
Print This Recipe

8 figs, sliced in 1/2

Balsamic Reduction:
1/4 c. orange juice
1/8 c. balsamic vinegar
2 Tb. honey

Combine and boil for 5 minutes to reduce to a more syrupy consistency.

Heat broiler. Toss the figs in the balsamic reduction and then place cut side up on a pan and broil for 5-6 minutes until caramelized.

3 Tb. chopped Walnuts, toasted in butter

Yogurt Cream Cheese:
1/4 c. cream cheese
1/4 c. plain yogurts
1 Tb. honey

Beat until smooth.

To serve: place figs on plate and drizzle the remaining reduction from the pan, spoon the yogurt cream cheese over them and top with the walnuts.

Tuesday, November 22, 2011

Sweet Potato Maple Bacon Pie

Deliciouness abounds in this pie. I absolutely love the combination of sweet and salty. The candied bacon and maple cream kind of stole the show - as in, I could eat a whole bowl of just those two combined. :) Seriously though, this pie was good! I served it to my parents and husband and they all proclaimed it delicious and they were all surprised at how much they LOVED the bacon.

Personally, I still like pumpkin pie better than sweet potato (it's a texture thing) but I would totally make this again and serve it to guests and especially find more uses for that bacon. This is really an awesome twist on the traditional pumpkin pie. I'm already dreaming of the leftovers for breakfast. [Just a small note - the bacon looks dark in the picture but it was not burned I assure you!]

There are a few steps to this pie but it is not difficult and the steps do not need to be completed all at once.


SWEET POTATO MAPLE BACON PIE
Print This Recipe

1 pie crust in a pie pan (you can make your own or buy a prepared one)
2 c. pureed sweet potato
2 eggs slightly beaten
1 c. evaporated milk
2 Tb. maple syrup
2/3 c. sugar
1/2 tsp salt
1 1/4 tsp cinnamon
1/2 tsp ginger
1/2 tsp nutmeg
1/2 tsp cloves

Preheat oven to 425 degrees. Combine the sweet potato, milk, egg, and maple syrup in the blender. Add the spices. Pour into the crust. Bake at 425° for 15 minutes.  Then decrease oven to 350° and bake for 35-45 minutes until set.

CANDIED BACON
3 strips bacon, roughly chopped (mine was fairly thick)
1 tsp. maple syrup
1 tsp. brown sugar

Toss the bacon with brown sugar and maple syrup. Cook until crisp stirring and moving continually. It cooks fairly quickly and you need to keep an eye on it. Drain and cool completely.

MAPLE CREAM
1 c. whipped cream
2 Tb. maple syrup
1 tsp. vanilla extract

Just before serving, whip the cream for 1 minute. Add maple syrup and vanilla. Whip until stiff peaks form. Spread on top of pie. Top with candied bacon pieces.

Saturday, November 19, 2011

Nantucket Cranberry Pie

Cranberries are in abundance this time of year and this dessert is a perfect way to capture the beauty and flavor of the cranberry. This is really more like an upside down cake, but for whatever reason, it's called a pie. It's super simple, so if you aren't a lover of all things pie, you might just enjoy adding this sweet treat to your Thanksgiving Day dessert spread. I ate the entire pan myself, (granted, it was just a half a recipe, I didn't eat it all in one day, and my husband apparently doesn't like cranberries, but still...) and enjoyed every bite!

I found this recipe on The Pioneer Woman blog. But I did decrease the sugar from her recipe. I like my cranberries to retain a little bit of their tartness. If I make this again, I think I'll add a bit of orange zest to the cranberries and maybe a squeeze or two of fresh orange juice. Or, you could do as I did here and add the orange zest to your whipped cream! Also, if you don't care for the flavor of almond extract, you might try substituting vanilla extract.

I made this gluten-free by subbing in my gluten-free all-purpose blend and it worked out great.


NANTUCKET CRANBERRY PIE
(slightly adapted from The Pioneer Woman)
Print This Recipe


2 heaping cups cranberries, fresh or frozen
1/2 c. chopped pecans or walnuts
1/2 c. sugar
orange zest (opt.)
1 c. flour (or gluten-free flour blend)
3/4-1 c. sugar (depending on how tart/sweet you want it)
1 stick of butter, melted
2 eggs, lightly beaten
1 tsp almond extract
1/4 tsp salt
1 Tbsp coarse sugar for sprinkling (opt.)

Preheat oven to 350°F.

Liberally butter a cake or pie pan. Pour in the cranberries. Sprinkle with the chopped pecans, orange zest, and 1/2 c. sugar.

In a bowl, combine flour, 3/4-1 c. sugar, melted butter, eggs, almond extract, and salt. Stir gently to combine the ingredients.

Slowly pour the batter over the cranberries, making sure to cover the surface. Spread gently, if needed.

Bake for 45 to 50 minutes. If using coarse sugar, 5 minutes before removing from the oven, sprinkle the surface with 1 Tbsp of coarse sugar.

Serve with freshly whipped cream or ice cream.

Friday, July 8, 2011

Baker's Delight: Cherry Chocolate Almond Oatmeal Cookies

Do they have a long enough name? :) These are from the wonderful Bon Appetit Dessert Cookbook. I adapted them based on the ingredients I had but they were delicious! I'm going to go ahead an include the recipe as written in the book because I would totally make them exactly as written.

Cookies are one of my favorite desserts - they are perfect for picnics and pitch-ins, most of them freeze very well, and they are usually fairly easy to put together. They are also one of my favorite things to bake!


CHERRY-CHOCOLATE CHIP OATMEAL COOKIES
Bon Appetit Dessert Cookbook
Print This Recipe

1 c. all purpose flour
1/2 tsp. baking soda
1/4 tsp. salt
1/2 c. plus 2 Tb. unsalted butter, room temperature
1/2 c. sugar
1/2 c. (packed) dark brown sugar
1 large egg
1 tsp. vanilla extract
1/2 tsp. almond extract
1 c. old-fashioned oats
1 1/2 c. semisweet chocolate chips
1 c. dried tart cherries
1/2 c. slivered almonds, toasted


Position racks in center and top third of oven and preheat to 325°F. Line 2 large baking sheets with parchment paper. Sift flour, baking soda and salt into medium bowl. Using electric mixer, beat butter, sugar and brown sugar in large bowl until well blended. Mix in egg and both extracts. Beat in flour mixture. Mix in oats, then chocolate chips, cherries and almonds.

Drop dough by rounded tablespoonfuls onto baking sheets, spacing 2 inches apart. Bake cookies 12 minutes. Switch and rotate baking sheets. Bake cookies until golden, about 6 minutes longer. Cool cookies on baking sheets (cookies will firm as they cool). (Can be prepared 1 week ahead. Store airtight at room temperature.)

Friday, June 24, 2011

Weekend Fare: Lemon Coconut Bars

Okay, seriously, these are delicious! Citrus and coconut - how can you go wrong? The creamy, sweet, and tart were just the perfect balance. These would make a wonderful contribution for a pitch-in or for a light dessert.


LEMON COCONUT BARS
(Bon Appetit Dessert Cookbook)
Print This Recipe

Crust:
1 cup all purpose flour
1/4 cup sugar
1/4 teaspoon salt
3/4 cup sweetened flaked coconut, toasted, cooled
6 tablespoons (3/4 stick) chilled unsalted butter, cut into 1/2-inch cubes

Filling:
3/4 cup sugar
2 large eggs
1/4 cup fresh lemon juice
1 tablespoon (packed) finely grated lemon peel
1 teaspoon all purpose flour
1/2 teaspoon baking powder
Pinch of salt

1/4 cup powdered sugar


For crust:
Preheat oven to 350°F. Line 8x8x2-inch metal baking pan with foil, leaving overhang. Butter foil. Combine flour, sugar, and salt in processor; blend 5 seconds. Add coconut and butter; process until mixture resembles fine meal and begins to clump together. Gather dough into ball. Press dough evenly over bottom of prepared pan. Bake crust until golden at edges, about 25 minutes.

Meanwhile, prepare filling:
Combine 3/4 cup sugar, eggs, lemon juice, lemon peel, flour, baking powder, and salt in processor. Blend filling until smooth.

Remove crust from oven. Pour filling evenly over hot crust. Return to oven and bake until filling begins to brown at edges and is just set and springy to touch in center, about 30 minutes. Transfer pan to rack; cool lemon bars completely.

Using foil as aid, transfer lemon bars to work surface. Flatten foil edges. Cut into 16 bars. Sift powdered sugar over. (Can be made 5 days ahead. Store airtight in single layer in refrigerator.)

Friday, June 17, 2011

Off the Shelf: June Magazine Reviews

Food Network Magazine (Stephanie): This issue is filled with an abundance of summery recipe goodness. Beverages, hotdogs toppings, condiments, desserts, grilling ideas. Some recipes that look particularly appealing to me are Chinese Beef and Broccoli, Cold Peanut Soba Noodles with Chicken, Warm Pasta-Bean Salad, Buttermilk-Pecan Ice Cream, Salted Caramel Milkshakes, and Fresh Peach Cake.

I made the Almost Famous Corn Salsa recipe. This is a copy-cat recipe for the Chipotle Restaurant's Roasted Corn Salsa. We're big fans of Chipotle around here, so the other night when I was making soft tacos, I mixed up this salsa to top them. It was tasty and a great addition to our tacos.
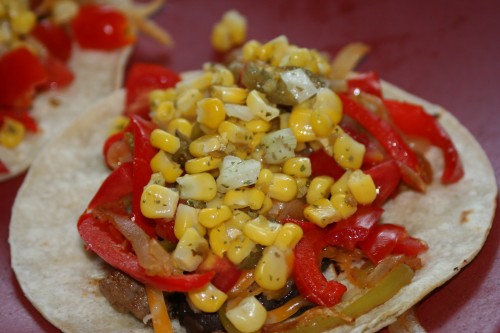


ALMOST FAMOUS CORN SALSA
(from Food Network Magazine, June 2011)
Print This Recipe

1/2 small poblano chile pepper, seeded
3 teaspoons olive oil
Kosher salt
1 cup fresh corn kernals or frozen corn, thawed
1 jalapeno pepper, seeded and chopped
2 Tablespoons fresh cilantro, chopped
2 Tablespoons red onion, chopped
2 Tablespoons fresh lime juice
1/2 teaspoon sugar

Preheat grill to medium high. Brush the poblano pepper with 1 teaspoon olive oil and grill, skin-side down, until charred, but still firm. About 5 minutes. Cool slightly; peel and finely chop.

If using fresh corn, bring a small pot of salted water to a boil. Add the corn and cook until tender, 2-3 minutes; drain.

Mix the corn (if using frozen, add it here), poblano, jalapeno, cilantro, and red onion in a bowl. Stir in the remaining 2 teaspoons olive oil, lime juice, sugar, and 1/2 teaspoon salt.
COOKING LIGHT (Stephanie): I was pleased with all the seasonal, delicious sounding recipes featured in this issue, as well--Curry Chicken Wraps with Nectarine Chutney, White Bean and Sage Pita Burgers, Grilled Apricot Halves, Curried Potato Salad, Pina Colada Sorbet, Cherry-Almond Crisp, and Rich Chocolate Pudding Pie.

I chose the Mango-Coconut Sherbet recipe. I love using my ice cream maker and I like coconut milk ice cream. My one drawback is that I'm not terribly fond of mangoes. However, they were on sale for a $1 last week, so I figured it was frugal enough experiment. The sherbet turned out great, but the mango flavor was just too strong for me. So, if you like mangoes, you are sure to like this recipe. It's super easy and the toasted coconut on top makes this dessert look fancy. I plan to experiment with other fruits to replace the mango, because I really liked this recipe.


MANGO-COCONUT SHERBET
(from Cooking Light, June 2011)
Print This Recipe

2 cups cubed peeled ripe mango
3/4 cup granulated sugar
1 tablespoon fresh lime juice
1 (13.5-ounce) can light coconut milk
1/4 cup unsweetened flaked coconut, toasted

Combine cubed mango, sugar, 1 tablespoon lime juice, and coconut milk in a blender; process until mixture is smooth, scraping sides as necessary. Pour mixture into the freezer can of an ice-cream freezer, and freeze according to manufacturer's instructions to soft-serve consistency. Spoon sherbet into a freezer-safe container; cover and freeze 2 hours or until firm. Before serving, sprinkle each dish with coconut.

BON APPETIT (Alaina) - This issue has some wonderful, seasonal recipes and an interesting article about Gwyneth Paltrow - by the way, is there anything she doesn't do? There are some great looking recipes for crostinis and salads and strawberries. As always, the pictures are tempting and I have yet to have a recipe not turn out from Bon Appetit. You can't go wrong with any of their tantalizing recipes.

I especially loved the section on lettuce, cherry, and chicken. It was from there that I found the recipe I wanted to try - Cherry Clafouti. Cherries are practically my favorite fruit and since I happened to have some, I couldn't resist. This was delicious. Not too sweet and so pretty!


CHERRY CLAFOUTI
(from Bon Appétit, June 2011)
Print This Recipe

1 pound fresh cherries, stemmed and pitted, or frozen pitted cherries, thawed, drained
1 cup whole milk
1/4 cup heavy whipping cream
4 large eggs
1/2 cup all-purpose flour
1/2 cup sugar
3/4 teaspoon finely grated lemon zest
3/4 teaspoon vanilla extract
1/2 teaspoon kosher salt
Powdered sugar
10" springform cake pan or eight 2/3- or 3/4-cup ramekins or custard cups

Preheat oven to 375°. Butter cake pan or ramekins. Arrange cherries in a single layer in pan.

Combine milk and cream in a small saucepan; bring just to a simmer over medium heat. Set aside. Combine eggs, flour, sugar, lemon zest, vanilla, and salt in a medium bowl; whisk to blend. Gradually whisk in hot milk mixture; whisk until custard is smooth. Pour custard evenly over cherries in pan. If necessary, gently shake pan to allow custard to settle.

Bake clafouti until custard is set and top is golden brown, about 30 minutes for ramekins and 45-55 minutes for cake pan. Let cool 3 minutes, then run a knife around pan sides to loosen clafouti (if using a cake pan). Dust top with powdered sugar; cut into wedges and serve.
EVERYDAY WITH RACHAEL RAY (Alaina) - It's been awhile since I have really liked an issue of this magazine but the June issue was great. There were so many interesting recipes and photos - just look at the cover!


There are many different burgers and sandwiches, popsicles, and many salads and sides. The Crispy Cheese w/Strawberry Salad, Antipasti Bowl, Thai Style Chicken w/Basil & Pineapple, Lemon-Scented Carbonara, and the Chocolate-Dipped Strawberry Ice Pops are just a few of the delicious recipes! I decided to try one of the more unusual looking recipes - Spicy Cucumber & Blueberry Salad. It was suprisingly refreshing and delicious. The flavors really worked together!


SPICY CUCUMBER & BLUEBERRY SALAD
(from Everyday with Rachael Ray, June/July 2011)
Print This Recipe 

2 lbs. english cucumbers, halved lengthwise
Salt
1 large jalapeño chile, seeds and ribs discarded, finely chopped
4 tsp. fresh lime juice
1 clove garlic, finely chopped
1/4 tsp. ground cumin
1/4 cup EVOO
1 1/2 pt. blueberries
1 cup cilantro leaves

Using a hand held slicer, slice the cucumbers into half-moons about 1/8 inch thick; season with salt.

In a large bowl, combine the jalapeño, lime juice, garlic and cumin; whisk in the EVOO. Add the cucumbers, blueberries and cilantro and toss to coat.

Monday, June 6, 2011

Baker's Delight: Lime Shortbread

First, don't forget to enter our great giveaway! It ends tomorrow!


This weekend I needed to make a quick dessert and so I turned to one of my newest cookbooks, Bon Appetit Dessert. Heather actually gave me this amazing cookbook for my birthday and I just couldn't wait to start trying the delicious recipes! This recipe was for Lemon Shortbread Squares but I switched it up to to make them lime. We LOVED them! I doubled the recipe and put them in a 12x18 bar pan which made them thinner than the original recipe but it was perfect for us. These are just so good and so incredibly easy!


LIME SHORTBREAD
(Adapted from Bon Appetit Desserts)
Print This Recipe

1/2 c. sugar
1 Tb. finely grated lime peel
3/4 c. unsalted butter, room temperature
1 Tb. fresh lime juice
2 Tb. cornstarch
1/2 tsp. salt
1 1/2 c. flour

Preheat oven to 300 degrees. Spray pan with nonstick spray.

Using fingertips, rub sugar and lime peel together in large bowl to release essential oils in peel. Add butter. Using electric mixer, beat until mixture in light and fluffy. Beat in lime juice, then cornstarch, and salt, Add flour and beat just until blended. Using fingers, press dough firmly and evenly over bottom of prepared pan. Pierce dough all over with fork.

Bake shortbread until cooked through and just golden brown, about 50 minutes. Cool in pan on rack 10 minutes. Cut and enjoy. Store in an airtight container at room temperature.

Friday, May 27, 2011

Baker’s Delight: Double Chocolate Chip Cookies

We are pleased to welcome back Sarah Pulliam Bailey with this guest post! These would be great for you weekend and summer picnicking!

Chocolate chip cookies provide the ultimate comfort food. If you’re serving chocoholics, consider baking double chocolate chip cookies, which offers a rich, moist, chewy dessert.

The cookies did not turn out terribly even because I was in a hurry and grabbed rounded spoonfuls of dough, which made them puffier. If you prefer more uniform, flattened cookies, you could roll the dough up on parchment paper in a log, refrigerate for two hours, and cut individual cookies. You could also substitute white chocolate chips for peanut butter chips and chopped peanuts. Some of the reviews suggested using 1 tsp. of baking soda and 1 tsp. of baking powder, so consider experimenting. The recipe takes about 30 minutes and makes about 3 dozen cookies.


DOUBLE CHOCOLATE CHIP COOKIES
(Adapted from allrecipes.com)
Print This Recipe

1 cup unsalted butter (2 sticks), softened
1 cup white sugar
3/4 cup brown sugar
2 eggs
1 1/4 cups unsweetened cocoa powder
1 3/4 cups flour
2 teaspoons baking soda
1/4 tsp. of salt
1 tsp. of vanilla
2 cups white chocolate chips or chunks (12 oz. bag)
3/4 cup chopped walnuts (optional)

Preheat oven to 350 degrees F. Grease cookie sheets. In a large bowl (I used my KitchenAid), cream together the butter, brown sugar and white sugar. Add the eggs one at a time, beating each one well. In a separate bowl, whisk together the cocoa, flour, baking soda, and salt. Gradually stir the mixture into the other bowl. Fold in white chocolate chips. Drop rounded spoonfuls onto the cookie sheets. Bake for 8 to 10 minutes (9 minutes was perfect in my oven). Allow cookies to cool on baking sheets for 5 minutes before removing to a wire rack to finish cooling. If you have a smaller kitchen, consider investing in a tiered cooling rack.

Friday, May 20, 2011

Baker's Delight: Banana Cupcakes

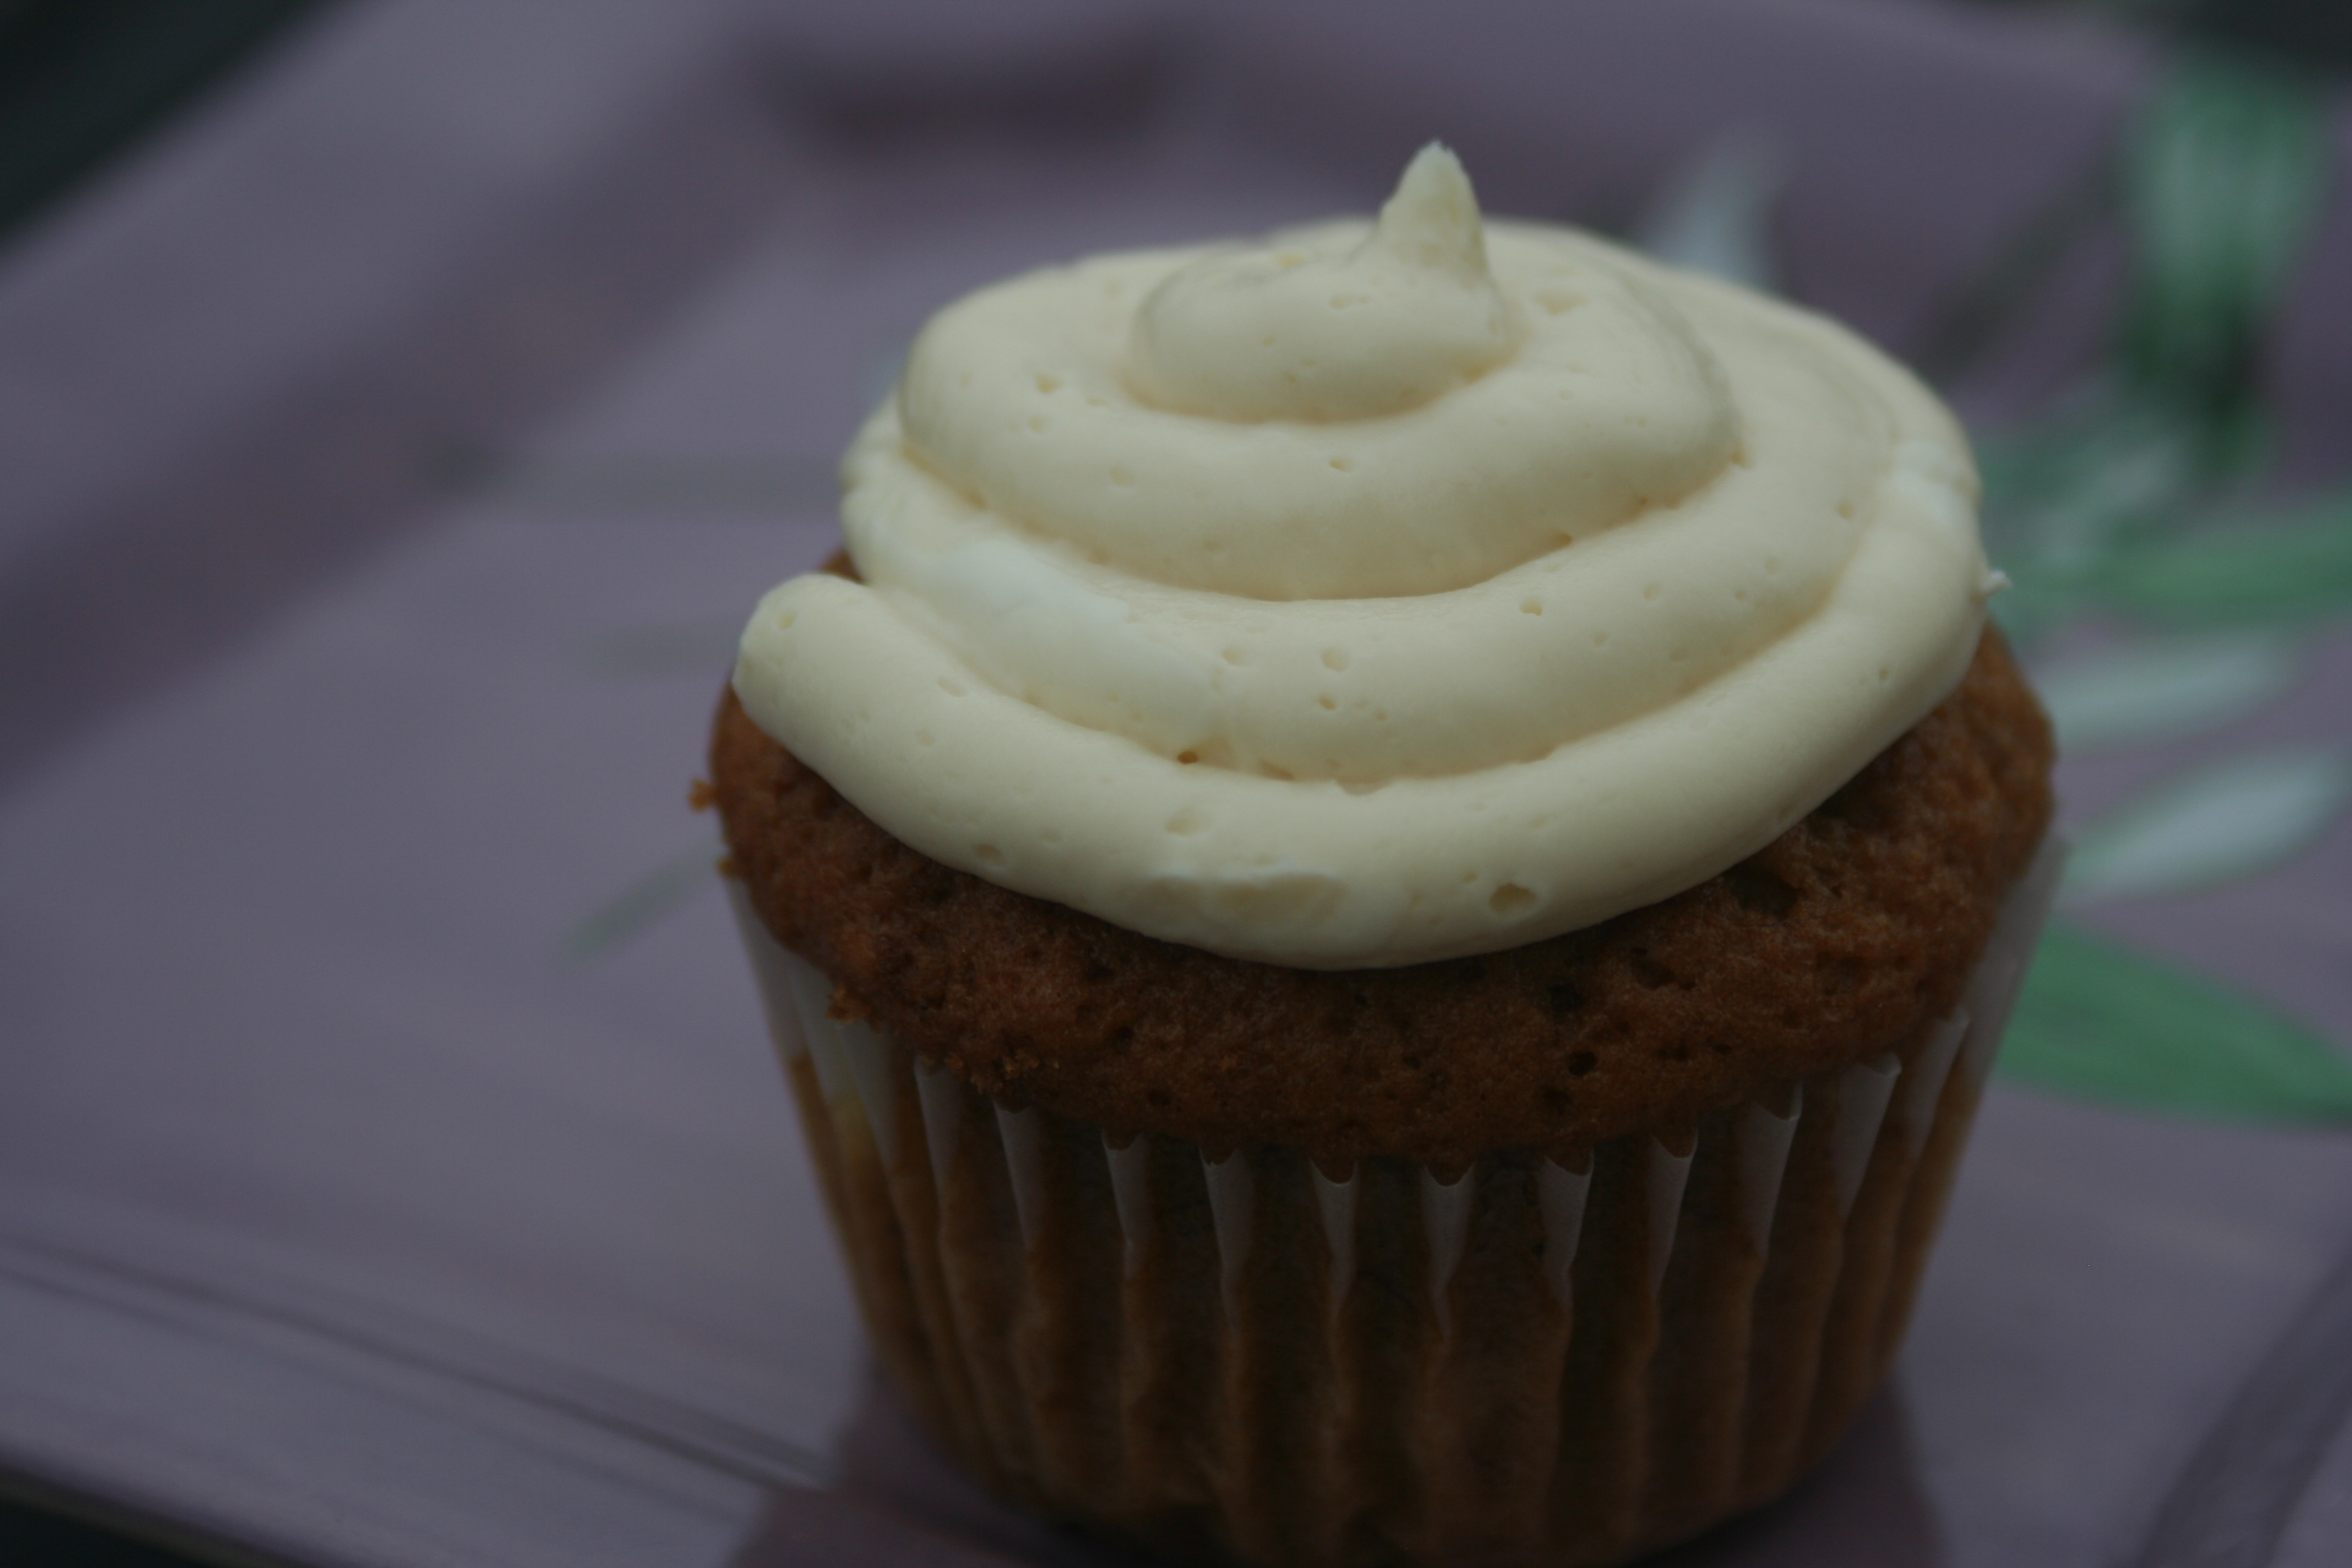
I first made this recipe a few years ago and really enjoyed it! Recently, I was asked to provide banana cupcakes for an open house and I remembered these. And so, I returned to the recipe and adapted it - these were the result. The honey cream cheese frosting is fabulous - not too sweet but oh so wonderful. These also make wonderful mini cupcakes - a batch makes 24 regular cupcakes and a lot of minis.  


BANANA CUPCAKES
(Adapted from Giada De Laurentiis, Food Network)
Print This Recipe

3 cups all-purpose flour
1 teaspoon baking soda
1 teaspoon salt
1/2 teaspoon baking powder
1 teaspoon ground cinnamon
1/2 teaspoon ground nutmeg
2 cups sugar
1 cup canola oil
3 large eggs
1 tablespoon vanilla extract
4 ripe bananas, peeled and coarsely mashed

Frosting:


8 ounces cream cheese
1 stick unsalted butter, softened
1/4 cup honey
1/2 cup chopped walnuts, toasted (optional)


Line 24 muffin cups with paper liners. Preheat the oven to 325 degrees F.

Whisk the flour, baking soda, salt, baking powder, cinnamon, and nutmeg in a medium bowl to blend. Beat the sugar, oil, eggs, and vanilla in a large bowl to blend. Stir in the banana. Add the dry ingredients and stir just until blended.

Divide the batter among the prepared muffin cups. Bake on the middle rack until the tops are golden brown and a tester inserted into the center comes out with no crumbs attached, about 25 minutes. Transfer cakes to a rack and cool slightly. Cool completely before frosting.

To frost the cupcakes: Using an electric mixer, beat the cream cheese and butter in a large bowl until light and fluffy. Beat in   the honey. Spread the frosting over the muffins. Sprinkle with the walnuts if desired.

Friday, April 29, 2011

Baker's Delight: Lemon Raspberry Cupcakes


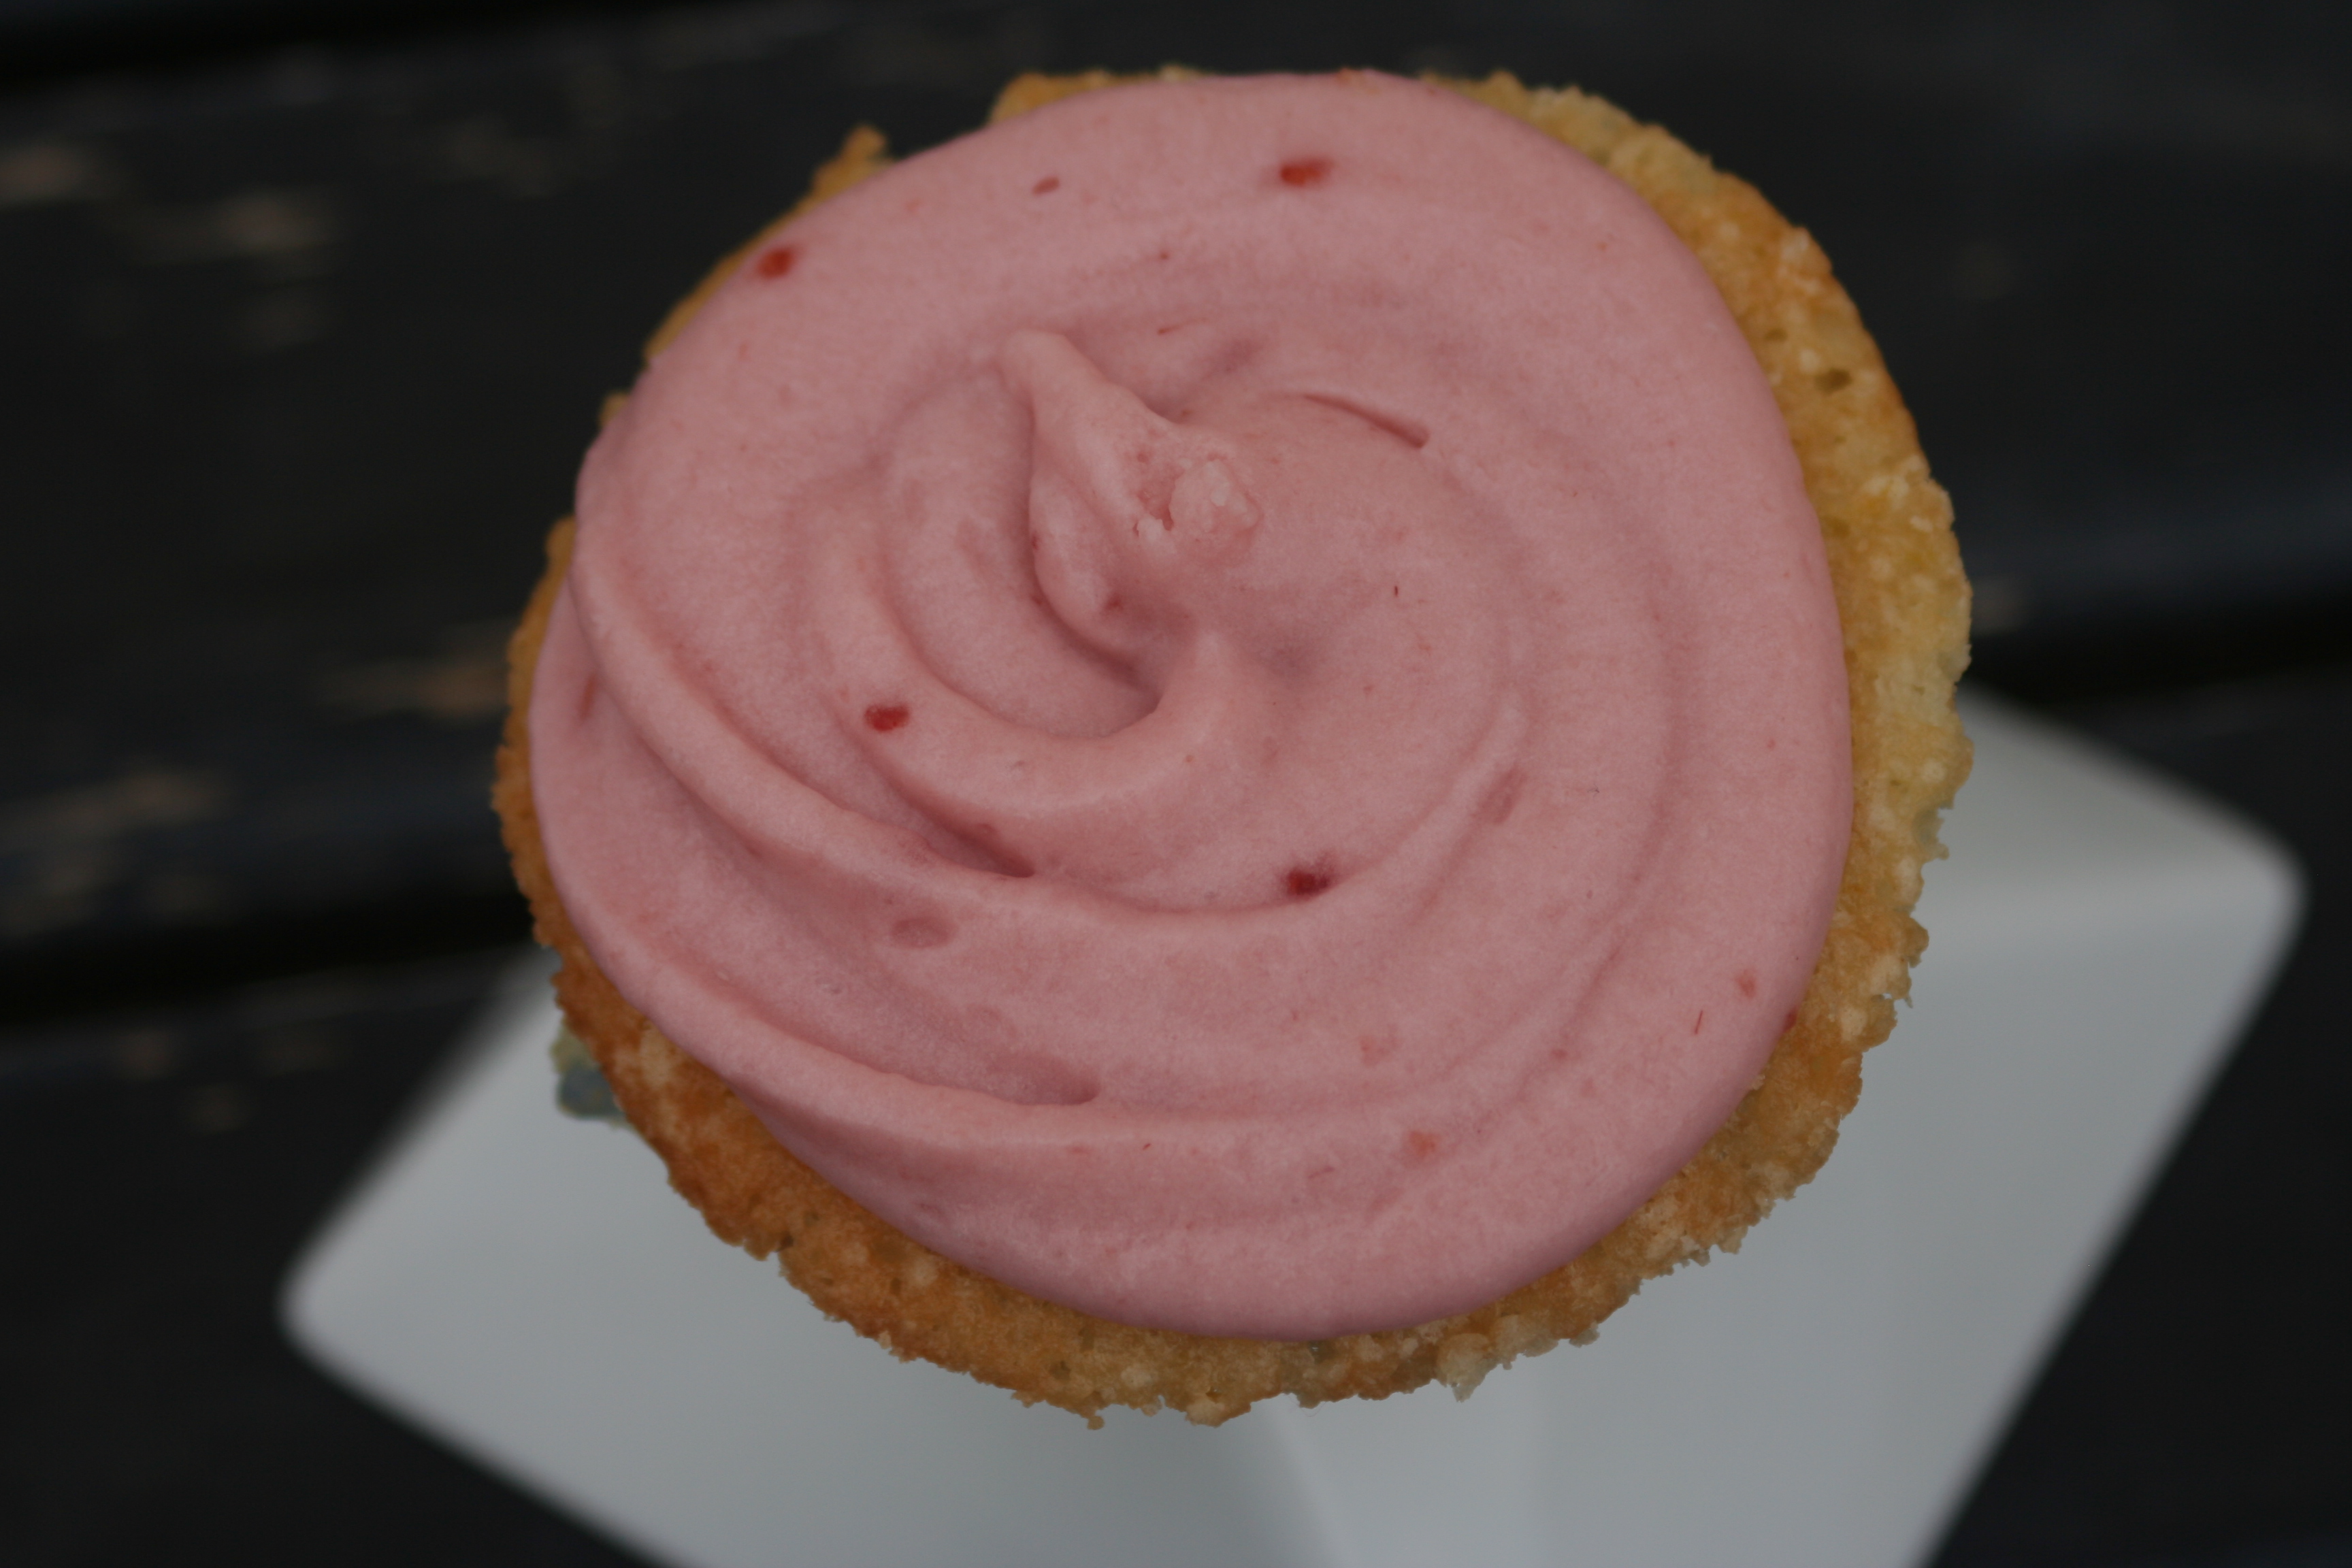
As promised, here is the lemon cupcake recipe! We really enjoyed these. I still want to tweak the frosting a little bit but it's really good. Don't skip the lemon curd, it's excellent and it will make more than you need which is a happy bonus.  You can print all of these recipes here.


LEMON CURD
(Adapted from Ina Garten)


Zest of 3 lemons
1 1/2 c. sugar
1 stick unsalted butter, room temperature
4 eggs
1/2 c. fresh lemon juice
1/8 tsp. salt

Combine lemon zest, sugar, butter, eggs, lemon juice, and salt in a saucepan.


Cook over low heat until thickened (about 10 minutes), stirring constantly. The lemon curd will thicken just below simmer. Remove from the heat and cool or refrigerate – place plastic wrap on surface of curd while it cools.


LEMON CUPCAKES


2 1/2 c. cake flour
1 tsp. baking powder
1/2 tsp. baking soda
1 tsp. salt
2 1/2 sticks unsalted butter, softened
2 c. sugar
5  eggs
1 1/2 tsp. vanilla extract
1 tsp. lemon extract
2/3 c. buttermilk
Zest of 2 lemons

Preheat oven to 350 degrees F. Line 2 muffin tins with paper liners.


Into a medium bowl whisk together flour, baking powder, baking soda, and salt; set aside.

In a stand mixer, cream butter and sugar together until light and fluffy, about 4 minutes. Add eggs 1 at a time until just combined. Add vanilla and lemon extract and zest. Add buttermilk and dry ingredients, being careful not to over mix.

Fill cupcake liners 2/3 full with batter. Bake for 15 to 18 minutes or until golden brown and toothpick inserted in the center comes out clean. Remove from oven and let cool on wire racks before filling and frosting.


RASPBERRY CREAM CHEESE FROSTING:


4 oz. cream cheese, softened
1 stick unsalted butter, softened
2 teaspoons vanilla extract
6-8 cups confectioners' sugar
1/2 cup raspberry preserves


Using a hand-held mixer beat cream cheese and butter together until light and smooth. Add vanilla extract and slowly add the confectioners' sugar 1 cup at a time until thoroughly incorporated and desired thickness is reached.


TO ASSEMBLE:
Remove a small amount of cake from the center of the cooled cupcake and spoon in the chilled lemon curd. Use a pastry bag or Ziploc bag to frost the cupcakes. Store finished cupcakes in the refrigerator.

Friday, April 22, 2011

Baker's Delight: Vanilla Cupcakes

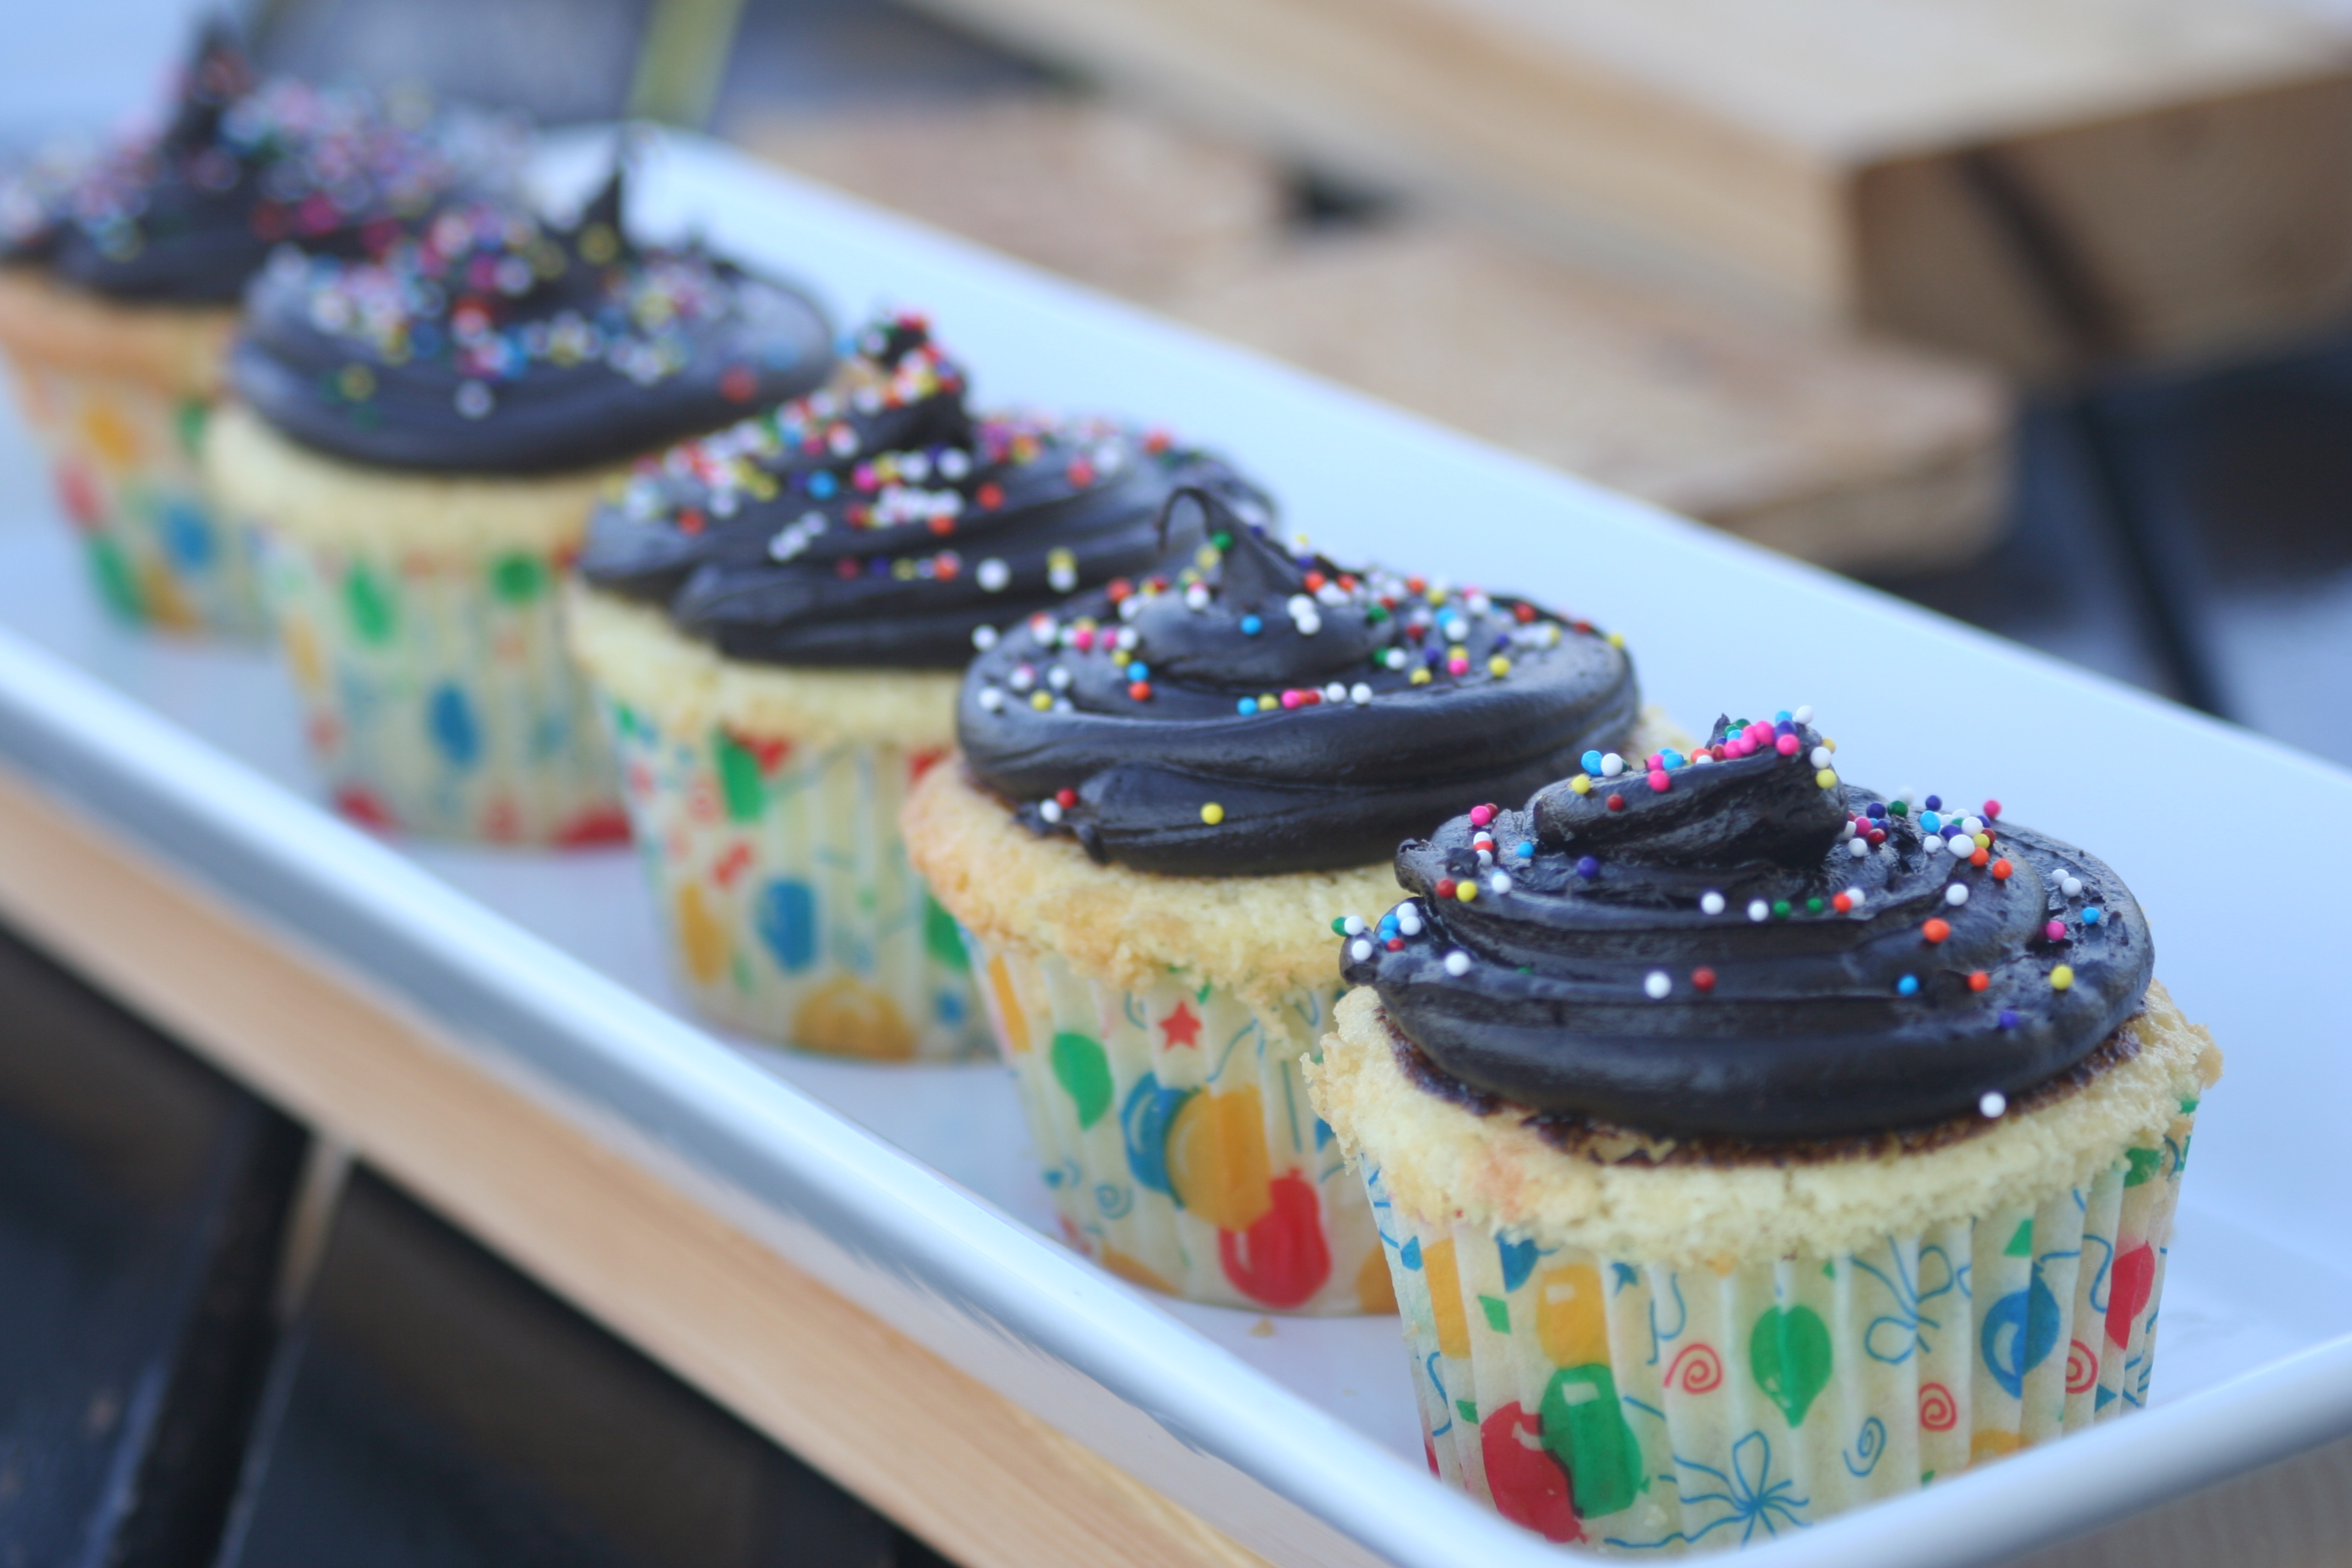
This week, I set out on a mission to find  a vanilla cupcake recipe for my oldest son's birthday. It wasn't as easy as it sounds. Reviews on nearly every vanilla (or white) cake recipe are mixed - some love it, some hate it, some think it's light, some think it's dense...you get the idea. And let's be honest, not everyone is a competent baker, so it's hard to know which reviews to trust!

Finally, I deicided to just jump in and try a recipe. Bobby Flay had one which I adapted to work for me. The texture was lovely and the flavor was quite good. The chocolate frosting he included was delicious as well - a frosting recipe unlike any I have ever made. These definitely got the seal of approval from my family and the birthday boy loved them! They would also make a beautiful Easter or spring dessert.


VANILLA CUPCAKES
(adapted from Bobby Flay's Mini Vanilla Bean Cupcakes)
Print These Recipes

2 1/2 cups cake flour
1 1/4 teaspoons baking powder
1/4 teaspoon baking soda
1/2 teaspoon fine sea salt
1 3/4 cup sugar, divided
10 tablespoons unsalted butter, melted and cooled slightly
1 cup buttermilk, room temperature
3 Tablespoons vegetable oil
1Tablespoon vanilla extract
6 large egg yolks, room temperature
3 large egg whites, room temperature
Creamy Chocolate Frosting, recipe follows
Sprinkles for decorating, if desired


Adjust the oven rack to the middle position and preheat the oven to 350 degrees F. Fill muffin tins with liners .

Whisk the flour, baking powder, baking soda, salt, and 1 1/2 cups sugar together in a large bowl. Whisk together the melted butter, buttermilk, oil, vanilla, and yolks in a medium bowl.

In a clean bowl of a stand mixer fitted with whisk attachment, beat the egg whites at medium-high speed until foamy, about 30 seconds. With the machine running, gradually add remaining 1/4 cup sugar; continue to beat until stiff peaks just form, 30 to 60 seconds Transfer to a separate bowl and set aside. Wash the bowl and dry.

Add the flour mixture to the now-empty mixing bowl fitted with the whisk attachment. With the mixer running at low speed, gradually pour in the butter mixture and mix until almost incorporated (a few streaks of dry flour will remain), about 15 seconds. Stop the mixer and scrape the whisk and sides of the bowl. Return the mixer to medium-low speed and beat until smooth and fully incorporated, 10 to 15 seconds.

Using a rubber spatula, stir 1/3 of the whites into the batter to lighten, and then add the remaining whites and gently fold into the batter until no white streaks remain.

Fill the cupcake molds 3/4 full and bake until just firm, about 18-22 minutes. Let cool and frost with Creamy Chocolate Frosting. Decorate with sprinkles, if desired.


CREAMY CHOCOLATE FROSTING
(Adapted from Bobby Flay at FoodNetwork.com - adaptations noted)

2 1/2 sticks unsalted butter, softened
1 cup confectioners' sugar
3/4 cup Dutch-processed cocoa (I used dark chocolate cocoa powder)
 Pinchof fine sea salt
3/4 cup light corn syrup
1 teaspoon vanilla extract
8 ounces semisweet chocolate, melted and cooled slightly
1 teaspoon espresso powder (I omitted this since I was making them for kids but it would have been a fantastic addition!)


In a food processor (or using a mixer), process the butter, sugar, cocoa, and salt until smooth, about 30 seconds, scraping the sides of the bowl as needed. Add the corn syrup and vanilla and process until just combined, 5 to 10 seconds. Scrape the sides of the bowl, and then add the melted chocolate and espresso and pulse until smooth and creamy, 10 to 15 seconds.

Thursday, March 10, 2011

Baker's Delight: Salted Toffee-Chocolate Squares

Honestly, I just didn't know what to make for today. It's been a long couple of weeks filled with illness at our house and my desire to cook and bake has been almost non-existant. And so, I looked at magazines and websites looking for something that would inspire me. I wrote to one of my friends that I was at a loss...and then, I happened to pick up my May 2010 issue of Everyday Food. I turned to the back for the index and instead, I came across this recipe. I had everything on hand and decided to give it a shot.

Oh. My. Goodness. These are amazing. They combine so much yumminess into one cookie that I can hardly stand it! They certainly aren't on the "healthy list" but they are worth the splurge. The coarse salt is just the perfect flavor addition - makes all of the flavors come alive. I had to walk away from the pan of cookies; in fact, I had to go upstairs so I would not eat more. So, without further ado, here is the amazing and easy recipe!


SALTED TOFFEE-CHOCOLATE SQUARES
(Everyday Food, May 2010)
Print This Recipe

13 graham crackers
1 bag (8 ounces) toffee bits
1 1/2 cups coarsely chopped toasted natural almonds
1/2 cup sugar
1 cup (2 sticks) unsalted butter
3/4 cup (4 ounces) bittersweet chocolate, chopped, or chocolate chips (I used mini chocolate chips)
3/4 teaspoon coarse salt

Preheat oven to 350 degrees. Line a rimmed baking sheet with foil. Place graham crackers in a single layer on sheet, edges touching. Sprinkle toffee bits and almonds over graham crackers.

In a small saucepan, bring sugar and butter to a boil over medium-high. Reduce heat and cook at a rapid simmer, swirling pan occasionally, until mixture is syrupy, 2 minutes. Immediately pour over graham crackers. Bake until sugar topping is bubbling, 12 minutes. Remove from oven and immediately sprinkle chocolate and salt over graham crackers. With a sharp knife or pizza cutter, cut into 2-inch squares. Let cool completely on sheet on a wire rack. (Store in an airtight container, up to 1 week.)

Read more at Marthastewart.com: Salted Toffee-Chocolate Squares Recipe - Martha Stewart Recipes

Wednesday, February 23, 2011

Crock-pot Cooking: Baked Maple Apples

I've been in a bit of a cooking rut lately. To try and unstuck myself, I've been checking out cookbooks from the library, reading favorite cooking blogs, perusing cooking magazines. This weeks cooking inspiration attempt is my crock-pot, helped out by the newly released cookbook, More Make if Fast, Cook it Slow, written by the crock-pot queen herself, Stephanie O'Dea.

Monday nights I get home from yoga around 7 p.m. I need something easy for supper. This week I knew I was serving leftovers, but I wanted a little something extra. So, I quickly put together these baked apples. And in two hours we had a nice little treat. Super easy and perfect alongside a meal, or as a lightly sweetened dessert.

We love cinnamon in our house, so I sprinkled these with cinnamon before baking. The orange juice added a bit of a tangy quality to the sauce. If you don't prefer that, you might try substituting apple juice.


BAKED MAPLE APPLE HALVES
(from More Make it Fast, Cook it Slow)
Print This Recipe

2 large apples, cored and cut in half
2 Tbsp butter
1/2 c. orange juice
2 Tbsp maple syrup
Whipped cream, if desired

Use a 6-quart slow cooker. Put the apple halves into the bottom of the slow cooker, flesh-side up. In a small bowl, melt the butter in the microwave. Stir in the orange juice and maple syrup. Spoon the butter and syrup mixture evenly into the apple halves. Cover and cook on low for 2 to 3 hours, or on high for 1 to 2 hours. Serve with a dollop of whipped cream, if desired.