Showing posts sorted by relevance for query healthy. Sort by date Show all posts

Monday, February 28, 2011

Healthy Living: Black Bean Dip

Looking for a healthy dip alternative? I was - I wanted a guilt free dip that I could enjoy with vegetables or for a treat with tortilla chips. This recipe is the result and I was so pleased with the delicious, easy, healthy dip created with such simple ingredients!


BLACK BEAN DIP
Print This Recipe

2 cans black beans (1 drained, 1 not)
1/2 c. cilantro
1/2 tsp. lime zest
juice of 1 lime
1 jalapeno, cut into large chunks
1/2-1 tsp. salt

Combine all ingredients in a food processor or blender. Process until smooth and creamy. Chill before serving or serve at room temperature. Serve with prepared vegetables or tortilla chips. Enjoy!

Thursday, April 12, 2012

Carrot Cake Bites

It's time for another no-bake healthy treat recipe...

For my 5th birthday I requested carrot cake for my dessert. It's been a standby ever since. (Though I'm sorely disappointed if I ever encounter carrot cake that has raisins lurking inside!) I have to admit to loving the cream cheese frosting that is the usual accompaniment and adds to my all-around love of the cake.  It's been months, maybe even a couple of years since I've eaten a slice of my beloved carrot cake, so I was intrigued by this recipe for raw carrot cake balls I stumbled across on Pinterest. These are cream cheese frosting free, but I still thought worth sampling.

These don't taste exactly like carrot cake, but they certainly are reminiscent and they are both tasty and healthy little morsels that make you feel like you're getting a treat. So, they come with my recommendations. I did tweak the original recipe by adding nuts and spices. I'm sure coconut and perhaps a little nutmeg would be good as well. And maybe if you want to go really fancy, you can make a sweet cream cheese dip. :)


CARROT CAKE BITES
(adapted from gracefulfitnessblog.com)
Print This Recipe

10 dates
small handful raw walnuts
1 c. gluten-free rolled oats
1 medium carrot, finely grated
zest from one lemon
1/4 tsp vanilla
1/8 tsp cinnamon
dash of ground ginger
1/8 tsp salt
finely chopped walnuts for rolling, opt.

Rough chop the dates and walnuts and then put them in a food processor fitted with the chopping blade. Process until date pieces are about the size of raisins.

Add the oats and process until the oats are ground.

Add grated carrot, lemon zest, vanilla, cinnamon, ginger, and salt and process until the ‘dough’ comes together in a ball. If it seems a little dry, add a few drops of water and process again.

Use clean hands to form into balls. Roll in chopped walnuts, if desired and store in the fridge. Makes 12-15 balls.

Monday, April 28, 2014

Curried Red Lentils

Curried Red Lentils are a healthy and easy dish for weeknight dinners!


What?! A post?! You probably thought we had forgotten what those were... :) In truth, we have been working on re-launch and are a couple of months behind where we hoped to be. Our lives have taken unexpected turns and have not allowed as much time as we would like for blogging. We do plan to be back on a semi-regular basis. We are excited to have a new look (still in progress). We have changed blog platforms, so please make sure to clear your past history (media cache) to make our site function for you (i.e. searching). Please know that we are still a work in progress and bear with us. We hope it will be worth it. On to the post for today...

These days, I need quick, healthy, and easy meals. Life with four kids - all with varying needs - leaves less time for meal planning and execution. These curried red lentils are always a hit, can be ready in 45 minutes or less, can be easily adapted, and are nutritionally great. This can also be made gluten-free, vegan, vegetarian, and dairy-free. While I have changed this recipe a fair bit and generally double it for my family, the original inspiration came from one of my favorite cookbooks, More With Less. I serve this over brown rice - just put it in your rice cooker with plenty of time to fully cook.

Curried Red Lentils
Red Curried Lentils

CURRIED RED LENTILS

1 c. red lentils (you can use brown or french, but texture will be different & cooking time maybe longer)
2 1/2 c. chicken, beef, or vegetable broth
1 bay leaf
1 tsp. salt

Bring to a boil and simmer for 20 minutes.

In a separate pan sauté together for 5-10 minutes:

1/4 c. butter, olive oil, or coconut oil
1 onion, diced
2 stalks celery, diced
2 carrots, peeled & diced
2 cloves garlic, minced

Add:

1 1/2 - 2 Tb. curry powder

Combine the veggie mixture and the lentils.

Add:
2 Tb. fresh lemon juice
2-3 Tb. fresh cilantro (plus more for serving)

Cook on low for just a few minutes stirring frequently to allow flavors to combine. Remove bay leaf before serving. Top with fresh cilantro and serve over rice, quinoa, or couscous.

Wednesday, February 24, 2010

Off The Shelf: Slow Cooker Cookbooks

I found it difficult to review slow cooker cookbooks. Perhaps it's because I have the idea in my head that slow cooker recipes should be quick and simple, almost as if by magic a healthy and delicious meal should appear on my plate with no effort at all. The fact of the matter is, all good, healthy meals do take some kind of time. If it's not the time spent just before dinner is served, it may be the time spent getting a slow cooker meal ready early in the morning or the evening before. If I can reconcile myself to investing a little bit of time in a slow cooker meal, then there are some lovely cookbooks to make use of.

The Art of the Slow Cooker by Andrew Schloss was the book I chose today's recipe from. It is a relatively new book, well laid out and filled with good pictures. The book contains 80 recipes divided between soups, stews, braises, classics, vegetables and sweets. You will find some outside-the-box recipes such as Chocolate Chicken Chili Soup and Espresso Braised Beef as well as classics such as Chicken Cacciatore and Herby Minestrone.

The cookbook is definitely aimed at people who like gourmet-type recipes, made with whole foods and no shortcuts. Many of the recipes are the type I would use on the weekend, rather than for a simple weeknight meal. I chose to try the Sausage and Tomato Ragu with Pasta. We all thoroughly enjoyed this meal and will look forward to having it again sometime soon.


SAUSAGE AND TOMATO RAGU WITH PASTA
(Art of the Slow Cooker)
Print this recipe


2 Tbsp. olive oil
2 pounds mild Italian sausage, cut into 2-inch lengths
2 medium onions, cut into 1/2-inch dice
2 celery ribs, cut into 1/2-inch-thick slices
2 large carrots, peeled and cut into 1/2-inch dice
4 cloves garlic, finely chopped
1 Tbsp. fresh rosemary leaves (or 1 tsp. dried)
pinch of ground allspice (I omitted this)
1 tsp. kosher salt
1/2 tsp. coarsely ground black pepper
1/4 c. flour (to make gluten-free, substitute a gluten-free flour blend)
1 cup dry red wine
2 cups chicken broth or beef broth
1 can (28 oz.) crushed tomatoes
1 can (15 oz.) tomato sauce

1 pound short pasta, such as penne, ziti, or rigatoni

Heat the oil in a large deep skillet over medium-high heat. Brown the sausage on all sides, about 2 minutes per side, then transfer to a 5-to-6 quart slow cooker.

Add the onions, celery and carrots to the oil remaining in the skillet and saute until lightly browned, about 4 minutes. Add the garlic, rosemary, allspice, salt, and pepper and cook for another 30 seconds. Add the flour and stir until incorporated. Add the wine and bring to a boil. Add the broth, crushed tomatoes, and tomato sauce and stir to incorporate, scraping up any browned bits from the bottom of the pan to blend them with the sauce. Heat to simmering and pour over the sausages. (At this point I put the ragu in the fridge for the night and place it in the slow cooker in the morning.) Cover the cooker and cook for 4 to 5 hours on high or 8 to 10 hours on low.

Cook the pasta in rapidly boiling, lightly salted water until tender, about 10 minutes; drain and serve with the ragu.

Serves 4-6 generously.

I also enjoyed perusing the Williams-Sonoma Essentials of Slow Cooking: Delicious New Recipes for Slow Cookers and Braisers. As with any Williams-Sonoma cookbook, this is a high-quality, beautifully designed cookbook. The introduction covers slow-cooking basics and prepares the way for the recipes contained in the book, including giving sample meal menus. The book covers vegetables, seafood, poultry, pork, beef & lamb and basic recipes.

I would say this cookbook tends even more toward the gourmet cook with such recipes as Savoy Cabbage with Pancetta, Celery Root with Chestnuts, Braised Artichokes, Braised Dug Legs with Port and Figs, and Thai Red Curry Beef. However, there are plenty of more down-to-earth recipes like Texas-Style Beef Chili, Italian Pot Roast, Beef Stroganoff with Mushrooms, and Spanish Chicken Stew. Once again it is a book I would use for weekend cooking more than everyday.

Wednesday, October 7, 2009

Off The Shelf: Food Magazines

We thought we'd start our Off The Shelf posts with a review of some of the cooking magazines that we benefit from. Cooking magazines can be a great way to find new inspiration each month. Most are filled with beautiful pictures and usually contain somewhere from 50-120 recipes! It's worth buying one issue of a new magazine, or browsing through it at the library, before deciding for sure to buy a subscription. We've also found that after a year or two, it may be time to switch to a different magazine so inspiration continues afresh.

IMG_7293Food Network Magazine (October 2009)
(Heather)

Food Network Magazine is a new magazine that I've just recently come across. I like it so much that I'm considering making it a subscription next year. I find it's size and layout very appealing. There are lots of beautiful photographs and the recipes are laid out in an easy-to-follow manner. For a number of years I've been looking for a US magazine to compare with the amazing British BBC Good Food. I think this is it!

The October issue of Food Network Magazine has 120 new recipes, including a helpful little tear-out booklet with 50 Easy Soups -- just in time for soup season! I decided to try Soup #26 -- Curried Red Lentil. Red lentils are my favorite member of the lentil family because they melt away into a thick broth and don't give me that "bean texture" that I dislike. I'll be making this soup again for it's lovely, Thai-inspired tastes.

CURRIED RED LENTIL SOUP
(October Food Network Magazine)

3 chopped garlic cloves
1 chopped onion
1 chopped carrot
1/2 Tbsp. grated ginger (I keep a large piece of ginger root in a plastic bag in the freezer and just grate from frozen, peel and all)

6 cups water
1 can coconut milk
1 cup red lentils (washed)
1/2 cup rice (I used brown)

Garnish: lime, cilantro, green onions

Cook the garlic, onion, carrot, and ginger in a bit of oil until softened. Add the water, coconut milk, lentils and rice. Simmer 20 minutes. Garnish with lime, cilantro, and green onions.

Serves 4-6.

IMG_7097

IMG_7700Everday with Rachael Ray (October 2009)
(Alaina)

This magazine has some great tips and what appear to be some yummy recipes. I can definitely vouch for the one I tried! And I have a few more bookmarked that I hope to make. These brownies are decadent and not very difficult. They were inspired by the Samoa Girl Scout cookies - honestly, I'd rather have these any day along with a cup of coffee!

CARAMEL-COCONUT FUDGE BROWNIES
(Everyday with Rachael Ray)
6 oz. semisweet chocolate, chopped (I used Ghiradelli bar)
6 Tb. unsalted butter
1 c. sugar
2 lg. eggs
1/2 c. flour
1/4 c. unsweetened cocoa powder
1/4 tsp. salt
1 c. chewy caramel candies (about 20 candies), unwrapped (my kids did this!)
1 tsp. milk
1/2 c. sweetened shredded coconut, toasted*

Preheat the oven to 350 degrees. Grease an 8-inch square baking pan and line with a 14-inch-long sheet of parchment paper,** allowing the ends to hang over 2 sides of the pan. In a medium glass bowl, combine the chocolate, butter and 3 Tb. water. Microwave*** on medium power for 2 1/2 minutes. Whisk in the sugar, then the eggs one at a time. Whisk in the flour, cocoa and salt until smooth. 

Scrape the batter into prepared pan and spread to the edges with a spatula. Bake until cracked on top, 25-30 minutes. Let cool completely.

In a small glass bowl, combine caramels and milk. Microwave at medium power for 2 minutes, then stir until smooth. Spread the caramel evenly on top of the brownie layer, Top with the coconut, patting lightly.

Cut in 16 pieces and enjoy (you do not want these any bigger - they are rich!).

*I put the un-toasted coconut in the oven while it was preheating and stirred it every couple of minutes until lightly browned.
**Parchment paper makes them easier to remove and easier to cut but you could omit it and just grease the pan very well.
***If you don't want to use the microwave, you could melt the chocolate and the caramels over a double boiler.

IMG_7670

IMG_7295

Everyday Food (October 2009)
(Heather)

Everyday Food is a paper-backed-book-sized magazine which I always welcome in the mailbox each month. Don't let Martha Stewart's picture on the front scare you away! Although this magazine is published by her company, the recipes are fast and simple. The photos and recipes in this magazine have always measured up to my wishes.

Feeling in the mood for something oriental, I decided to make the "Cashew Chicken" from the October issue. Despite the fact that I didn't have any cashews, this recipe turned out very well and will be made again. I accompanied it with the Simple Sesame Noodles from Pioneer Woman (made with whole grain pasta), and roasted broccoli.

CASHEW CHICKEN
(October Everyday Food)

1 1/2 pounds boneless, skinless chicken breasts, cut into 1-inch pieces
2 Tbsp. dry sherry (or cooking wine, or leave out)
2 tsp. minced, peeled, fresh ginger
3 1/2 tsp. cornstarch
coarse salt

1/2 cup chicken broth
2 Tbsp. soy sauce
1 Tbsp. rice vinegar
2 tsp. sugar

1 Tbsp. plus 2 tsp. vegetable oil

2 garlic cloves, chopped
2/3 cup unsalted cashews, toasted
2 green onions, white and green parts separated and thinly sliced

In a medium bowl, toss chicken with sherry, ginger, and 1 1/2 tsp. cornstarch; season with salt. (Note: watch the salt on this recipe. It adds up fast, so season lightly.) Refrigerate 30 minutes.

In another bowl, combine broth, soy sauce, vinegar, sugar, and 2 tsp. cornstarch. Set sauce aside.

In a large nonstick skillet, heat 1 Tbsp. oil over medium-high heat. Add half the chicken and cook until golden and cooked through, about 5 minutes. Transfer chicken to a covered plate. Add 1 tsp. oil to skillet and cook remaining chicken (reduce heat if chicken is over-browning). Transfer to plate.

To same skillet, add 1 tsp. oil, garlic, cashews, and green onion whites. Cook, stirring constantly, until garlic begins to soften, about 30 seconds. Whisk sauce and add to skillet along with chicken. Cook until sauce thickens, about 30 seconds. Top with green onion greens and serve with rice or noodles.

Serves 4+.

IMG_7258

IMG_7929Cooking Light (October 2009)
(Alaina)

Cooking Light is one of my favorite cooking magazines. The colorful pictures and healthy recipes are inspiring. I love the fact that they don't use a lot of sugar-free, light and fat-free ingredients but rather make it healthy by choosing better ingredients. Fresh food is often featured and each recipe includes serving information with calories and other important health facts.  

I had company when I made this dish and it was a hit! Koshari is an Egyptian street food and is vegetarian. It is spicy which my kids didn't appreciate but everyone else thought it was good!

KOSHARI
(Cooking Light October 2009)

Sauce:
1 Tb. extra-virgin olive oil
1 c. onion, finely chopped
1 1/2 Tb. garlic, minced
1/2 tsp. sea salt
1/2 tsp. freshly ground pepper
1/2 tsp. crushed red pepper
2 (14.5 oz) cans diced tomatoes, undrained

Heat oil in a large saucepan over medium heat. Add chopped onion to pan, and cook for 15 minutes or until golden, stirring occasionally. Add garlic; cook for 2 minutes. Stir in salt, peppers, and tomatoes; cook 10 minutes or until slightly thick. Transfer tomato mixture to a food processor; process 1 minute or until smooth (I used an immersion blender). Keep warm.

Koshari:
3 Tb. extra-virgin olive oil
3 c. onion, thinly sliced
1/2 c. vermicilli, uncooked, broken into 1-inch pieces*
5 c. water**
1 1/4 c. dried lentils or yellow split peas (I used brown lentils)
2 1/2 c. hot cooked long-grain rice
1 tsp. sea salt

Heat oil in pan over medium heat. Add sliced onion; cook 15 minutes or until deep golden brown, stirring frequently. Remove onion with a slotted spoon to several layers of paper towels; set aside. Return pan to medium heat. Add vermicelli; saute 2 minutes or until golden brown, stirring frequently. Set aside.

Combine water and lentils in a medium saucepan; bring to a boil. Cover, reduce heat, and simmer 30 minutes or until lentils are tender. Remove from heat; add vermicelli, stirring well to combine. Wrap a clean kitchen towel around lid, and cover lentil mixture; let stand for 10 minutes or until vermicelli is tender.

Add rice and salt to lentil mixture; fluff with a fork. Serve immediately with sauce and onions.

Makes 6-8 servings.


IMG_7737

Tuesday, November 10, 2009

Bread Basket

November is the perfect time of year to get into the kitchen and bake some bread -- either quick or yeast. With the shorter days and cooler temperatures, the warmth of the oven and the tempting aroma of freshly baked bread will lift everyone's spirits.

Pumpkin muffins are an ideal treat for breakfast, afternoon snack, or as an accompaniment to soup and salad. This recipe is so versatile -- you can make it sweet for dessert (and even bake it in cake pans and top with icing), or you can make it healthy by substituting whole wheat flour and honey. I'm also thinking of trying a gluten-free version by substituting rice flour and masa meal for the flour.

Image180

PUMPKIN MUFFINS

3 eggs
1/2 tsp. vanilla
1 c. pumpkin
1/2 c. brown sugar (use 1 c. if you want a sweet cake or 1/2 c. honey if you want it without sugar)
1/2 c. oil

1 c. flour (here's where you can substitute whole wheat flour)
1 tsp. cinnamon
3/4 tsp. baking powder
1/2 tsp. baking soda
1/2 tsp. ginger
1/2 tsp. nutmeg

3/4 c. raisins (optional)
1 c. walnuts, chopped (optional)

Beat eggs. Add vanilla, pumpkin, sugar, and oil. In a separate bowl, sift together flour, cinnamon, baking powder, baking soda, ginger, and nutmeg. Add flour mixture to egg mixture, mixing just until incorporated. Add raisins and walnuts. Pour into lined muffin tins. I like to sprinkle the muffin tops with rolled oats at this point -- just to make them look more inviting. Bake at 350F for 20-25 minutes or until done.  Makes 12. (You can also bake this as a loaf -- it will take 50-55 minutes to bake.)

Dinner rolls are another type of bread in high demand during the months of cold weather. I have made this recipe countless times, relying on my bread machine to do the hard work for me.

Image024

BREAD MACHINE DINNER ROLLS

1 1/3 c. water
8 Tbsp. butter
1/4 c. sugar
1 egg
1 tsp. salt
3 1/2  c. all-purpose flour (can use some whole wheat)
4 Tbsp. dry milk powder (if you have it)
2 tsp. dry yeast

Measure ingredients into bread machine in order given. Use the "dough" setting (mine takes about 2 hours). Once ready, divide dough into two halves. Roll each half into a circle about 14 inches or so in diameter.

Image016

Cut the circle into twelve "pie" pieces. Roll each piece from the large end to the point to form crescent rolls.

Image021

Place rolls on greased cookies sheets and brush with egg glaze (1 egg mixed with 2 Tbsp. water). Let stand 10-15 minutes and then bake at 375F for 25-35 minutes. Makes 2 dozen.

Image085

A favorite yeast bread of mine is Pumpkin Raisin Bread. It combines my love of pumpkin with my love of yeast bread, along with hints of another kind of bread I love so much -- Cinnamon Bread. If you enjoy making yeast breads, you need to give this one a try!

PUMPKIN RAISIN BREAD
(original recipe from Laura T.)

2 pkg. yeast (or 4 1/2 tsp.)
1/3 c. honey
2/3 c. warm water
1 (15 oz.) can pumpkin
1/4 c. oil
2 tsp. salt
2 tsp. cinnamon
1 1/2 tsp. ginger
1/2 tsp. nutmeg
6 1/4-7 1/4 c. flour (can be all white, all whole-wheat, or a combination of both)
2 eggs
1 1/2 c. raisins

In a large bowl, sprinkle yeast and sugar over warm water; stir until dissolved. Add pumpkin, oil, salt, spices, and 1 1/2 c. flour. Beat with wire whisk at low speed until well blended. Increase speed to medium; beat 2 minutes. Add eggs and 1 c. flour; beat 2 minutes more.

With a wooden spoon, stir in raisins and enough additional flour to make a soft dough. Knead for 5-8 minutes. Place in a greased bowl and let rise until doubled, about 1 hour.

Image078

Punch dough down. Divide in half or thirds (for round loaves). Shape dough into loaves and place in greased loaf pans or on greased cookie sheets. Let rise for 45 minutes.

Image081

Bake at 375F for 35-40 minutes. Makes 2 loaves (or 3 small loaves).

Thursday, June 10, 2010

Off The Shelf: June Magazines

Cooking Light (Heather) -- the June issue begins with six superfast ways to cook beef and then launches into a sorbet taste-test. Features this month include: healthy grilling, making the perfect cake, and eating in Sante Fe. A large section devoted to variations on potato salad caught my eye. The summer cookbook section is full of interesting recipes using summer fruits and vegetables. As always there are also interesting articles and plenty of other recipes. All in all, this issue has its season right (summer)!

I chose to try the Herbed Ricotta Tart since I had many of the ingredients from my CSA. This recipe was simple to follow and turned out fantastic! I can't wait to make it again, and even improvise a bit on the ingredients. It is an excellent idea for a brunch -- something other than the usual quiche!


HERBED RICOTTA TART
(Cooking Light, June 2010)
Print this recipe


 1 (11-ounce) can refrigerated pizza crust dough (or homemade!)
cooking spray
2 cups thinly sliced green onions
1 1/3 cups part-skim ricotta cheese
1/2 cup thinly sliced fresh chives
2 Tbsp. minced fresh dill
1/2 tsp. salt
1/2 tsp. freshly ground black pepper
2 large eggs, lightly beaten
1 large egg white, lightly beaten (I just used a whole egg)
2 Tbsp. finely grated fresh Parmigiano-Reggiano cheese

Preheat oven to 375F.

Unroll dough, and press into bottom and up sides of a 9-inch round removeable-bottom tart pan coated with cooking spray.

Heat a medium nonstick skillet over medium heat. Coat pan with cooking spray. Add thinly sliced green onions to pan; cook 5 minutes, stirring occasionally. Combine cooked green onions, ricotta cheese, sliced fresh chives, minced fresh dill, salt, pepper, eggs and egg white. Pour onion mixture into prepared crust; sprinkle mixture with Parmigianno-Reggiano. Bake at 375F for 35 minutes or until center is set. Let stand 5 minutes. Cut into wedges.

Serves 6.

Bon Appetit (Heather) -- this issue is, of course, focused on summer. Instead of sorbets, Bon Appetit is reviewing ice-cream and giving recipes for smoothies. If you want to learn about tamarind and how to cook with it, this is the issue for you! As with Cooking Light, there are many grilled recipes and some lovely side dishes. I do feel as if the recipes in this magazine tend to be a bit more gourmet and involved -- definitely what I call weekend cooking.

That said, the recipe I tried (Frittata Bites with Chard, Sausage and Feta) exceeded my expectations. The texture and taste were delicious, and even one of my kids who "hates greens" decided they liked swiss chard after eating this. I plan to use it as a breakfast casserole when entertaining and hope to make it again for dinner some evening. The frittata bites in the magazine were much taller, but that's because they used a smaller baking pan and I used a larger one -- mostly because I accidentally doubled the sausage, but also to help shorten the cooking time.


FRITTATA BITES WITH CHARD, SAUSAGE, AND FETA
(Bon Appetit, June 2010)
Print this recipe


nonstick vegetable oil spray
1 12-ounce bunch Swiss chard, stems and center ribs removed
1 Tbsp. olive oil
1 cup chopped onion
8 ounces mild Italian sausages, casings removed, sausage broken into 1-inch pieces
8 large eggs
1/4 cup heavy whipping cream
1/2 tsp. salt
1/2 tsp. freshly ground black pepper
1 cup crumbled feta cheese (about 4 1/2 ounces)
fresh Italian parsley leaves


Preheat oven to 325F. Spray an 8x8x2-inch glass baking dish with nonstick spray. Bring large pot of salted water to boil. Add Swiss chard and cook until just wilted, about 2 minutes. Drain. Finely chop chard, then place in kitchen towel and squeeze dry. Set chard aside.

Heat oil in large nonstick skillet over medium-high heat. Add onion to skillet and saute until soft, 4 to 5 minutes. Add sausage and saute until brown and cooked through, breaking up with a fork, 5 to 7 minutes. Remove from heat and cool.

Whisk eggs, cream, salt and pepper in large bowl to blend. Add chard and cooled sausage mixture, then feta; stir to blend. Transfer mixture to prepared baking dish.

Bake frittata until set in center, 45 to 55 minutes. Transfer baking dish to rack and cool frittata 15 to 20 minutes. Place platter atop dish with frittata. Using oven mitts, hold baking dish and platter firmly together and invert frittata onto platter; place another platter atop fritata and invert again so that frittata is right side up. Cut frittata into 20 pieces.

Can be made one day ahead. Place frittata pieces on rimmed baking sheet. Cover and chill. Rewarm in 325F oven until heated through, about 10 minutes.

Transfer frittata pieces to platter. Garnish each piece with parsley; serve warm or at room temperature.

Makes 20 bite-sized portions.

Organic Gardening (Heather) -- Organic Gardening is not a cooking magazine, but I wanted to mention it here because it encourages so much of what we like here at The Cooks Next Door: local, fresh, seasonal, organic.

This magazine has been around since World War II, and year after year brings helpful articles on how to grow your own food. The June/July issue includes articles on cooking with tomatoes, keeping hens in the backyard, varieties of peppers, a rural garden in England, and caring for your grass in a greener way. Scattered throughout the magazine are many more short, helpful articles for your garden or yard.

Having seen watermelon and tomato salads mentioned everywhere this summer, I decided to try the recipe in Organic Gardening. The result was beautiful, as well as delicious. Seasoned with salt, lime juice and basil shreds, the combination of watermelon and tomatoes worked well together. It's the perfect salad to bring to your next summer gathering.


CHERRY TOMATO, MELON, AND MINT SALAD
(Organic Gardening, June/July 2010)
Print this recipe


 4 cups melon balls, scooped from a ripe, sweet watermelon at room temperature
3 cups ripe 'Sungold' cherry tomato halves, at room temperature (I used a gourmet selection from the supermarket)
4 tsp. freshly squeezed lime juice
1/2 cup coarsely chopped fresh spearmint
3/4 tsp. kosher salt

Toss all ingredients together in a mixing bowl. Serve immediately or refrigerate for up to 24 hours.

Serves 8.

(Alaina) I haven't written about Better Homes & Gardens but I really like this magazine. It's especially great for summer with the combination of gardening, home decorating, and recipes. They offer interesting articles and many do-it yourself project ideas. The recipes include several grilling recipes. The Corn & Blueberry Salad, the Chocolate Marchmallow Ice Cream Sandwiches, and the twists on BBQ sauce are all recipes I would like to try!

I decided to make the Junebug "Mocktail" (a non-alcoholic mixed drink). It was quite sweet but my family really liked it! You could serve this as a dessert with a scoop of sherbet on top. It's quite refreshing for a hot day!


JUNEBUG
(Better Homes & Gardens, June 2010)
Print This Recipe

3 c. ginger ale
4 Tb. grenadine
4 Tb. orange juice
3 scoops orange sherbet

Blend together ginger ale, grenadine, orange juice, and sherbet. Pour into ice-filled cocktail glasses.

Serves 4.

(Alaina) Food Network Magazine has a great issue including many summer recipes and many grilling recipes. This magazine draws from a variety of different chefs which makes for a really good publication. They continue to provide a 50 recipe pull-out section - this month features burger recipes which is perfect for summer. The different sauces and pestos looked delicious as well as the Foil-Packet Fish w/Corn Relish, Watermelon-Cucumber Salad, Strawberries and Cream Tart, and Blackberry Lemonade!

I was in need of a quick dessert, so I made Guy Fieri's Blondies w/Dark Roots. These were better the next day and definitely better served completely cooled. While I liked these, I probably won't make them again because they were a little cakier and a little drier then I prefer. The combination of the coconut, pecans, and dark chocolate was really nice, though!


BLONDIES W/DARK ROOTS
 (Food Network Magazine, June 2010)
Print This Recipe

1 c.  flour
1/2 tsp. baking powder
1/2 tsp. baking soda
1/4 tsp. salt
5 1/3 TB. ( 1/3 c.) butter, at room temperature
3 oz. cream cheese, at room temperature
1 c. packed light brown sugar
1 egg
1 Tb. vanilla extract
1/2 c. chopped hazelnuts (I subbed pecans b/c I didn't have any hazelnuts)
1/4 c. sweetened shredded coconut
1/2 c. dark chocolate chips or chunks


Preheat the oven to 350 degrees F. Spray  an 8-inch-square glass baking dish with cooking spray. Whisk the flour, baking powder, baking soda and salt in a small bowl.

Beat the butter and cream cheese in a large bowl with a mixer at medium speed until fluffy. Add the brown sugar and beat 3 to 4 more minutes. Beat in the egg and vanilla. Add the flour mixture and mix on low speed until just combined. Fold in the hazelnuts, coconut and chocolate chips with a wooden spoon.

Spread the batter in the prepared pan and bake until a toothpick inserted into the center comes out clean, 35 to 40 minutes. Let cool 20 minutes in the pan before slicing.

Serves 9.

Monday, October 4, 2010

Happy 1st Birthday, Blog! (& Giveaway!)

It's hard to believe a whole year has passed since we launched this blog! We continue to be passionate about making and creating good, healthy, seasonal food. And we hope to see the blog continue to grow! We are so thankful for you readers - we appreciate you reading our blog, making our recipes, entering our contests, and commenting on our posts! It makes blogging fun!

This week, we will have some new recipes (we are doing our magazine review, weekend fare, and foodie Fridays) but we will also be taking a look back at some of our favorite recipes. Today, we will also feature an awesome giveaway!


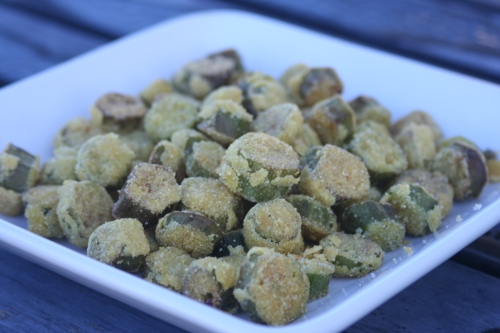
Market Fresh: Okra - I discovered that I like okra more than I thought and I made this recipe several times!


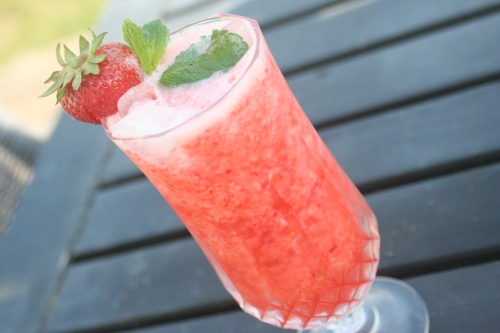
Weekend Fare: Summer Drinks - This quickly became a favorite drink and they looked so beautiful and yummy, too! 


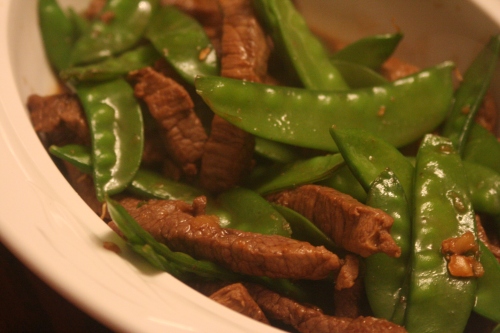
Internationa Cuisine: Chinese Main Dishes - This was one of my favorite collections of recipes. We had my parents and siblings over for a feast and every recipes surpassed my expectation!


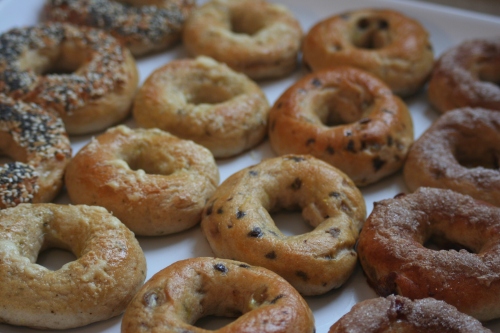
Bread Basket: Bagels - Making these was one of my cooking highlights. It was totally new techniques and it was incredibly creative for me. And they were delicious!

IMG_7267

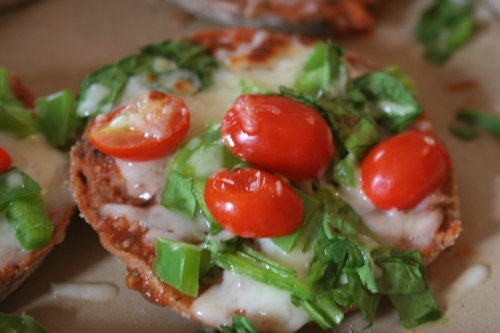
Kids in the Kitchen: Easy Lunch - Not only do we love these pizzas but I also love what this post (and the other Cooking with Your Kids posts) represents - spending time with my kids. Building memories and spending time with them in the kitchen is fun and my boys love it!

____________________________________________


GIVEAWAY!


We wanted to come up with a great giveaway to celebrate our one year anniversary!
So today, you are entering to win:


an apron and two cookbooks


A Beautiful Green & White 1/2 Apron
Kitchen Sense
Williams Sonoma Kid's Cookies


TO ENTER:
- Leave a comment on this post telling us 1 or 2 of your favorite recipes from our site.
- Make sure we have a way to contact you!

For additional entries (just leave us a comment telling us which ones you have done!):
- Subscribe via the link to the right or with google reader.
- Add us to your blog roll.
- Join our facebook group – The Cooks Next Door.
- Facebook about this giveaway.
- Tweet about this giveaway.
- Blog about this giveaway.

There you go! You could earn as many as 7 entries. And if you already are in our group, subscribe etc, let us know and we will add in the extra entries!

This giveaway will be closed on Thursday night, October 7 and the winner announced on Friday, October 8!

Wednesday, July 14, 2010

Off The Shelf: Bean Appetit

Bean Appetit by Shannon Payette Seip, Kelly Parthen, and Carisa Dixon is a captivating cookbook for children. Its goal is to get kids excited about healthy eating. It certainly did just that for my daughter who couldn't wait to try out several of these recipes.

The chapters cover topics such as: breakfast, snacks, going to the market, outdoor eating, food art, cooking-themed birthday party, winter food, summer food, international food, tea party, and book-themed food. There are activities and games interspersed with the recipes, making for a very fun book.

We tried the Stick Stacks and the Stack 'N' Sip -- both were much enjoyed by my children (not to mention me!).


STACK 'N' SIP
(Bean Appetit)
Print this recipe


Make 3 different colored smoothies. Pour one color in the bottom of a glass. Layer the second smoothie on top. Add a top layer using the final smoothie. It's a triple-decker drink!

Note: We used blueberry, banana, and strawberry smoothies.


STICK STACKS
(Bean Appetit)
Print this recipe


1 3/4 cups unbleached all-purpose flour
3 Tbsp. packed light brown sugar
1 Tbsp. baking powder
2 Tbsp. flax meal
pinch of ground cinnamon
3 eggs
1 tsp. vanilla extract
1 Tbsp. butter, softened
1 cup milk
4 strawberries, cut widthwise into slices
2 kiwis, peeled and sliced widthwise into circles
1/4 cup blueberries (we used blackberries)

maple syrup, for serving

Chant "Pancakes! Pancakes!" as you combine the flour, brown sugar, baking powder, flax meal, and cinnamon.

Combine the eggs and vanilla in a mixing bowl. Add the butter and milk. Slowly add the egg mixture to the flour mixture. Stir until smooth. Chill in the freezer for 5 minutes.

Preheat a griddle to low. Lightly spray the griddle with nonstick spray. Ladle the pancake mixture onto the griddle to make 2-inch mini pancakes.

When the pancakes start to bubble lightly and the edges turn golden brown, flip them over. all the bitty bakers should flip around the kitchen, as if they were just flipped with a spatula. Cook on the other side for 1 to 2 more minutes, until the pancakes come off the griddle easily with a spatula.

Layer the pancakes and fruit on the skewers. Dip in maple syrup and eat one layer at a time.

Makes 12 to 14 mini pancakes.

Note: This post contains affiliate links.

Thursday, April 26, 2012

Healthy Chocolate Peanut Butter Cups

We love Reese's Peanut Butter Cups! We don't eat them often because I'm anti-all the garbage additives. So, I thought I'd give this refined sugar-free recipe a try (unlike usual, I followed the original without any alterations). While they aren't Reese's, per se, they are sweet, peanutty and chocolatey, all good things! :) With coconut oil in the ingredient list, these definitely have coconut undertones, if that's not your thing, you could try butter and see how that works. If you want a thicker layer of chocolate (I think I might), just double the ingredients for the chocolate layer. I hope you enjoy!


CHOCOLATE PEANUT BUTTER CUP
(from lifemadewhole.com)
Print This Recipe


For peanut butter layer:
3/4 c. natural peanut butter
1/4 c. coconut oil
2 Tbsp raw honey

For chocolate layer:
2 Tbsp coconut oil
2 Tbsp butter
2 Tbsp unsweetened cocoa powder
2 Tbsp raw honey

For the peanut butter layer: Line mini-muffin pan with papers. Melt the coconut oil, then mix together with the peanut butter and honey. Carefully pour into prepared pan. Place in the freezer while preparing the chocolate.

For the chocolate layer: Melt the coconut oil and butter together. Add the cocoa powder and the honey. Stir until smooth. Remove the pan from the freezer and evenly pour the chocolate into each cup. Freeze for at least 15 minutes before serving.

Store in the fridge or freezer. Makes about 24.

Monday, January 11, 2010

Market Fresh: Grapefruit

Walk into the supermarket just now and you will see piles of large, round, yellow "softballs" stacked in pallets or on display at the end of the citrus aisle. Grapefruit -- one of the quintessential winter fruits.

I distinctly remember my mother getting up morning after morning to cut grapefruit, carefully winding her knife around each little section, so we could sit down to breakfast with half a grapefruit each. I also remember the day we watched a guest take a whole grapefruit and carefully peel the skin away to reveal a beautiful, pink ball that could be plucked apart and eaten like a peeled orange. It opened a whole new realm of grapefruit eating for us.

Nowadays I am too lazy to do as my mother did and I just cut our grapefruit in handy little wedges for easy eating:


Don't just get stuck in a rut though. Think outside the morning breakfast bowl. Think salads, desserts, juice, and cake. I've sectioned grapefruit and added it to spinach salad instead of an apple or mandarin oranges. Squeeze the leftover juice to replace lemon juice in the salad dressing. Recipes for grapefruit cake can be found, and of course one can always squeeze the fruits to make juice.

For a delicious and healthy dessert, why not try this salad?


ORANGE AND PINEAPPLE PLATED SALAD
(from www.bbcgoodfood.co.uk)

1 medium pineapple
2 pink grapefruit
1/4 c. sugar
small bunch mint, leaves only

Use a sharp knife to top and tail the pineapple, then stand it upright on a chopping board. With the sharp knife, carve the skin away and discard. Rest the pineapple on its side, then cut into wafer-thin slices. Repeat with the grapefruit, cutting away the peel and pith, then cut into slices. Arrange the fruit on a serving platter, catching any juices, and set aside.

Using a pestle and mortar, pound the sugar and mint together until completely blended. Scatter the mint sugar over the fruit and serve on its own or with yogurt (preferable Greek yogurt).

NOTE: I loved this salad. I'm also eager to try substituting lime zest for the mint and also trying it sometime with shards of crystalized ginger over top, or even a little fresh ginger grated into the sugar.

Friday, July 19, 2013

Chocolate Coconut Milk Ice Cream

Here's a delicious treat for your weekend! This is a recipe that I posted a long while back, but it is buried in a post with another recipe. And since it is quick and fairly healthy, I decided to re-post. Plus, it's summer, so who doesn't love some ice cream?!

I should note that the original recipe is  not mine; however, I do not remember where I found it. This time around I did add a 1/2 teaspoon of almond extract, which was a nice twist.

IMG_1763

CHOCOLATE COCONUT MILK ICE CREAM
Print This Recipe


2-14 oz cans full-fat coconut milk
2/3 c. sugar or agave nectar (I used coconut sugar)
1/4 c.  unsweetened cocoa powder
1 1/2  tsp vanilla extract (feel free to replace 1/2 tsp of vanilla with 1/2 tsp almond extract)

Place all ingredients in a blender and blend thoroughly. Refrigerate for 30 minutes.

Pour into the bowl of an ice cream freezer and freeze according to the manufacturer’s directions. Serves 4.

Wednesday, May 25, 2011

Gluten-Free Goodness: Double Chocolate Walnut Brownies

These tasty little morsels are full of chocolatey goodness and they are made with coconut flour. I don't have lots of knowledge of or experience baking with coconut flour, but I know that it soaks of moisture, so a little goes a long way! These also contain walnuts, so they are more healthful and protein packed than your average brownie (we could all use a few more "healthy" brownies in our life, right?!).

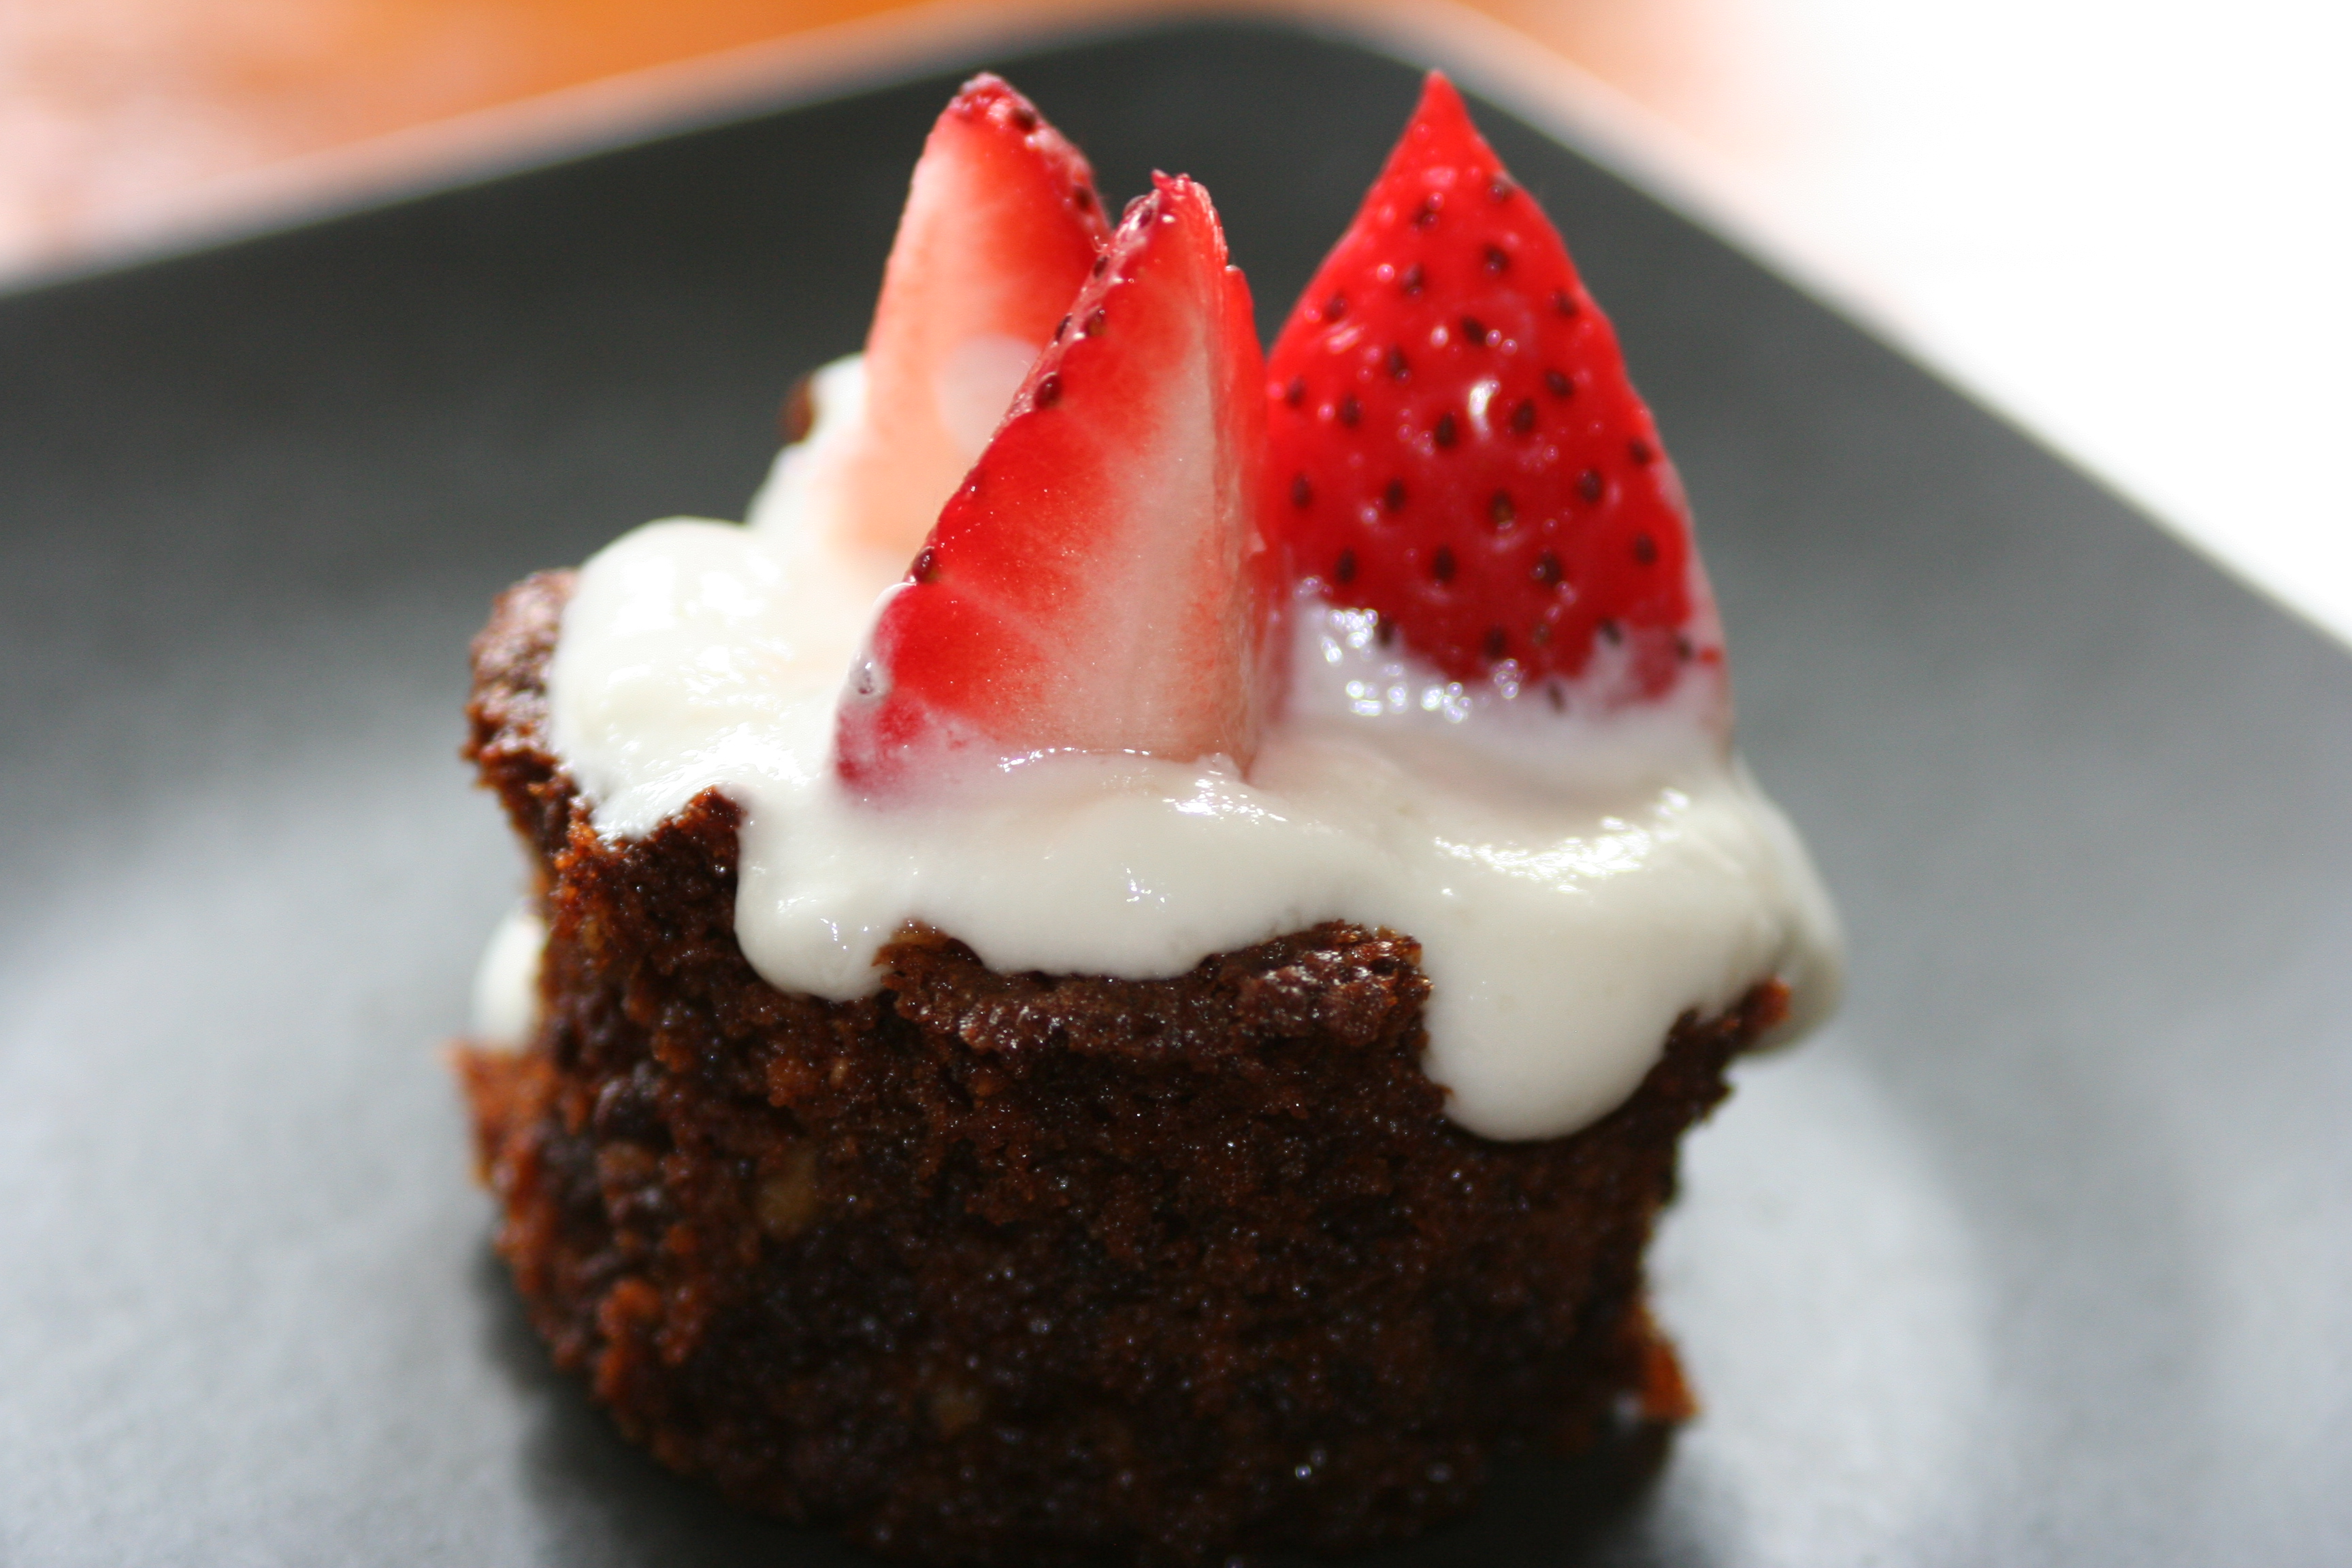
I made these for a holiday brunch and topped them with a bit of vanilla custard and strawberries. Though they would be delicious with some whipped cream, icing, powdered sugar, or even just plain.


DOUBLE CHOCOLATE WALNUT BROWNIES
(from elanaspantry.com)
Print This Recipe

1/2 cup dark chocolate chips (73% cacao)
1/4 cup coconut flour
1/2 teaspoon sea salt
1/2 teaspoon baking soda
2 eggs
1/2 cup agave nectar (maple syrup or honey, if preferred)
1/4 cup grapeseed or canola oil
1 Tablespoon vanilla extract
1/2 cup chopped walnuts
1/3 cup dark chocolate chips (73% cacao)

Preheat oven to 350°F.

Place 1/2 cup chocolate chips in food processor and pulse until the consistency of coarse sand. Pulse in coconut flour, salt, and baking soda until combined. Pulse in eggs, agave, grapeseed oil, and vanilla.

Pour batter into a greased 8x8 pyrex dish. Sprinkle walnuts and remaining chocolate chips over batter. Bake  for 25-30 minutes. Cool and serve.

Optional: Top with fresh strawberries, vanilla custard, whipped cream, homemade icing.

Monday, May 20, 2013

Collard Green Wrap

Today's post is not really a recipe, but rather a concept. :) Overall, being gluten-free isn't altogether difficult, but there are times when I miss the ease of everyday breads, tortillas, and other baked goods. It takes more effort to make or more financial investment to purchase adequate alternatives.

My pantry typically includes corn tortillas for soft tacos or enchiladas, rice cakes for snacks, and Rudi's Multigrain GF Bread for toast, garlic bread, and pb&j sandwiches.  Occasionally I splurge on gluten-free tortillas (other than the corn variety) so I can make hummus veggie wraps or bean and grain wraps.

Recently I tried using blanched collard greens for wraps and it worked out quite well. Once blanched the greens do not have a strong flavor, so you're able to enjoy the filling. Not only does it save some money to use collard greens, but it also facilitates eating more leafy green veggies, which is excellent for all of us. I've seen this idea on a few healthy eating oriented blogs, but I followed the directions in the Nourishing Meals cookbook (are you getting the idea that I used this cookbook all of the time?!).

Collard Green Wraps

BLANCHED COLLARD GREEN WRAPS

To prepare the collard greens for wrapping: Wash the greens and cut the stem off the bottom of each leaf. Bring a large pot of water to a boil. Blanch the collard greens by submerging them in the boiling water for about a minutes. Gently remove them with tongs and place them on a plate to cool.

To assemble your collard green wrap: Place a collard green on a cutting board. Spoon your desired filling near the stem end of the the green. Fold in the long ends of the collard green about 1 inch on each side and then tightly roll.

Thursday, January 21, 2010

Gluten-Free Goodness: Blueberry Muffins

Blueberry muffins are a comfort food you do not need to go without if you are gluten-free. With this recipe you can enjoy the warm, soft goodness of fresh-baked muffins, popping with sweet-tart blueberries. If you don't have blueberries, substitute another berry such as raspberries, black raspberries, or mulberries. I chose to use raspberries for the muffins pictured below.


GLUTEN-FREE BLUEBERRY MUFFINS
(Healthy Gluten-Free Cooking)

1 1/2 c. rice flour
1/2 c. tapioca flour (or 1/2 c. rice flour + 1 Tbsp. cornstarch)
1 tsp. baking soda
2 tsp. baking powder
1 tsp. xanthum gum (optional -- I did not use this)
1/4 tsp. salt
3/4 c. sugar (less if you want)
5 Tbsp. butter, melted and cooled
1 egg, beaten
3/4 c. buttermilk (add 1 Tbsp. vinegar to 3/4 c. regular milk)
2/3 c. fresh berries (if using frozen, baking time will need to be lengthened)

Preheat oven to 350F. Mix together flours, baking soda, baking powder, xanthum gum, salt and sugar with a wire whisk. In a separate bowl, combine butter, egg, and buttermilk. Carefully mix dry ingredients into wet, being sure not to overmix. Fold in berries. Line a muffin tin with muffin cups and fill 2/3 full. Bake at 350F for 25 minutes or until done.

Makes 12.

Monday, October 11, 2010

Market Fresh: Butternut Squash

Butternut Squash is my favorite winter squash. I love its mild, sweet taste and its bright orange color. I've been noticing the suggestion this fall of using butternut squash puree in place of pumpkin puree in your favorite pumpkin recipes. Sounds like a good idea to me!

Here are some other ideas for butternut squash:


Butternut Tarts with Spinach and Feta make a delicious fall take on quiche.


This Spicy Butternut Curry is a recipe I made several times last fall. Company loved it and, served with brown rice, it is a very healthy meal.


Roasted Sweet and Savory Squash is a quick and easy side dish that mixes fresh herbs, butter, and brown sugar for a winning combination.