Showing posts with label Gluten-Free Goodness. Show all posts

Monday, August 12, 2013

Chocolate Teff Brownies

My husband and I were invited to a cook-out recently. He knew the couple hosting the event; I didn't know anyone. I volunteered to bring a dessert so that there would be something gluten-free available for my husband. A look through my pantry and through my favorite cookbook (as you likely know by now!), Nourishing Meals, and I settled on some Chocolate Chip Teff Brownies with an added dairy-free ganache. They were absolutely delicious and received rave reviews from the party goers.

Chocolate Teff Brownies

CHOCOLATE TEFF BROWNIES
(from Nourishing Meals by Alissa Segersten)
Print This Recipe

Dry Ingredients
1 c. teff flour
1/4 c. tapioca flour
1/3 c. cocoa powder
1 tsp baking powder
1/2 tsp baking soda
1/4 tsp sea salt

Wet Ingredients
1/2 c. dates, pitted
1/4 c. ground flaxseeds
1 1/4 c. boiling water
1/2 c. coconut oil
1/2 c. coconut sugar
2 tsp vanilla

Mix-in
1/2 c. chocolate chips

Preheat oven to 350ºF. Grease a 7 x 11 baking dish.

In a mixing bowl, whisk together the dry ingredients. Set aside.

Place the dates and ground flaxseeds into a blender; pour the boiling water over them. Let sit for 10 minutes. Then add the rest of the wet ingredients and blend until smooth and creamy.

Add the wet ingredients to the dry and quickly whisk together. Add the chocolate chips and continue to whisk until thoroughly combined.

Pour better into pan and bake for 20-25 minutes.

Chocolate Ganache Frosting

3 oz chocolate chips
1/4 c. coconut milk
2 Tbsp maple syrup

Place all ingredients into a small pan and heat over low. Stir continuously until melted and thickened, just about 2 minutes. Remove from heat and let cool for about 5 minutes. Do not chill. Drizzle over brownies.

Or, if you would like a thick, creamy, spreadable frosting then let the ganache thicken at room temperature for about 3 hours.

Monday, August 5, 2013

Spinach Pesto Pasta

I love a good pesto during the summer. In the past I have not had particularly great success with making my own pesto. I just never felt like I got the flavor and texture correct. And now, since going dairy-free, I have to consider pesto without the Parmesan cheese. I decided to mesh a couple of recipes together to create this dairy-free pesto to go over a roasted tomato and white bean pasta dish. It was delicious! And the leftover pesto is great for topping homemade pizza or using for a pita bread dip.

IMG_1765

SPINACH PESTO
Print This Recipe


2 1/2 c. baby spinach
1/2 c. fresh basil leaves
1/2 c. walnut pieces
2 cloves garlic, minced
juice of one lemon
2 Tbsp nutritional yeast
1/4 c. olive oil
salt and pepper to taste
1/8 tsp cayenne pepper

Add the spinach, basil, walnuts, garlic, and lemon juice into the bowl of a food processor. Pulse until everything is broken down into small pieces. Add the nutritional yeast, olive oil, salt, pepper, and cayenne. Whirl until the pesto is smooth.

Monday, July 29, 2013

Whole-Grain Freezer Waffles

I recently started a full-time job. With an hour of commute time each day, I knew my meal prep time was going to be disappearing. So, the week before work began I spent time making some muffins, granola bars, pita breads, and waffles for the freezer. I intended to get a lot more frozen than that, but it was a start.

The waffles are delicious and work from freezer to toaster. And this week when I didn't know what I was going to fix for supper, we enjoyed breakfast for dinner. These are gluten-free, whole-grain, and egg-free!

For the waffles, I used a recipe from my go-to cookbook, Nourishing Meals. First make a batch of dry mix (which keeps in the pantry for up to 4 months, so make as many batches you want!). Then make the waffles. I made a triple batch, which made 26 waffles in my rather small waffle maker.

Gluten-free Waffles

WHOLE-GRAIN FREEZER WAFFLES
(from Nourishing Meals by Alissa Segersten)
Print This Recipe

DRY MIX
1 1/2 c. brown rice flour
1 c. teff flour
1 c. millet flour
1 c. tapioca flour
1/2 c. quinoa flour
4 tsp baking powder
2 tsp baking soda
2 tsp cinnamon (opt.)
1 tsp sea salt

Place all ingredients into a large bowl. Using a wire whisk, mix well. Place into an airtight container. Makes 5 cups or 5 batches of waffles.

WAFFLES
2 Tbsp waffles
2 Tbsp very hot water
2 Tbsp unsweetened applesauce
2 Tbsp melted coconut oil
1 Tbsp maple syrup
1 c. milk (I used almond milk)
1 c. Waffle mix

Place the ground flax seeds and hot water into a medium-sized mixing bowl; quickly whisk together until the flax forms a thick gel. Sometimes this doesn't happen right away so keep whisking until the gel forms. Add the applesauce, coconut oil, maple syrup, and milk and whisk together well. Then add the waffle mix. Whisk together until the batter is smooth.

Heat waffle maker and cook according to waffle make directions.

If you plan to freeze them, cool completely and then layer between pieces of waxed paper and place in freezer bags.

Monday, June 24, 2013

Vegan Chocolate Chip Cookies

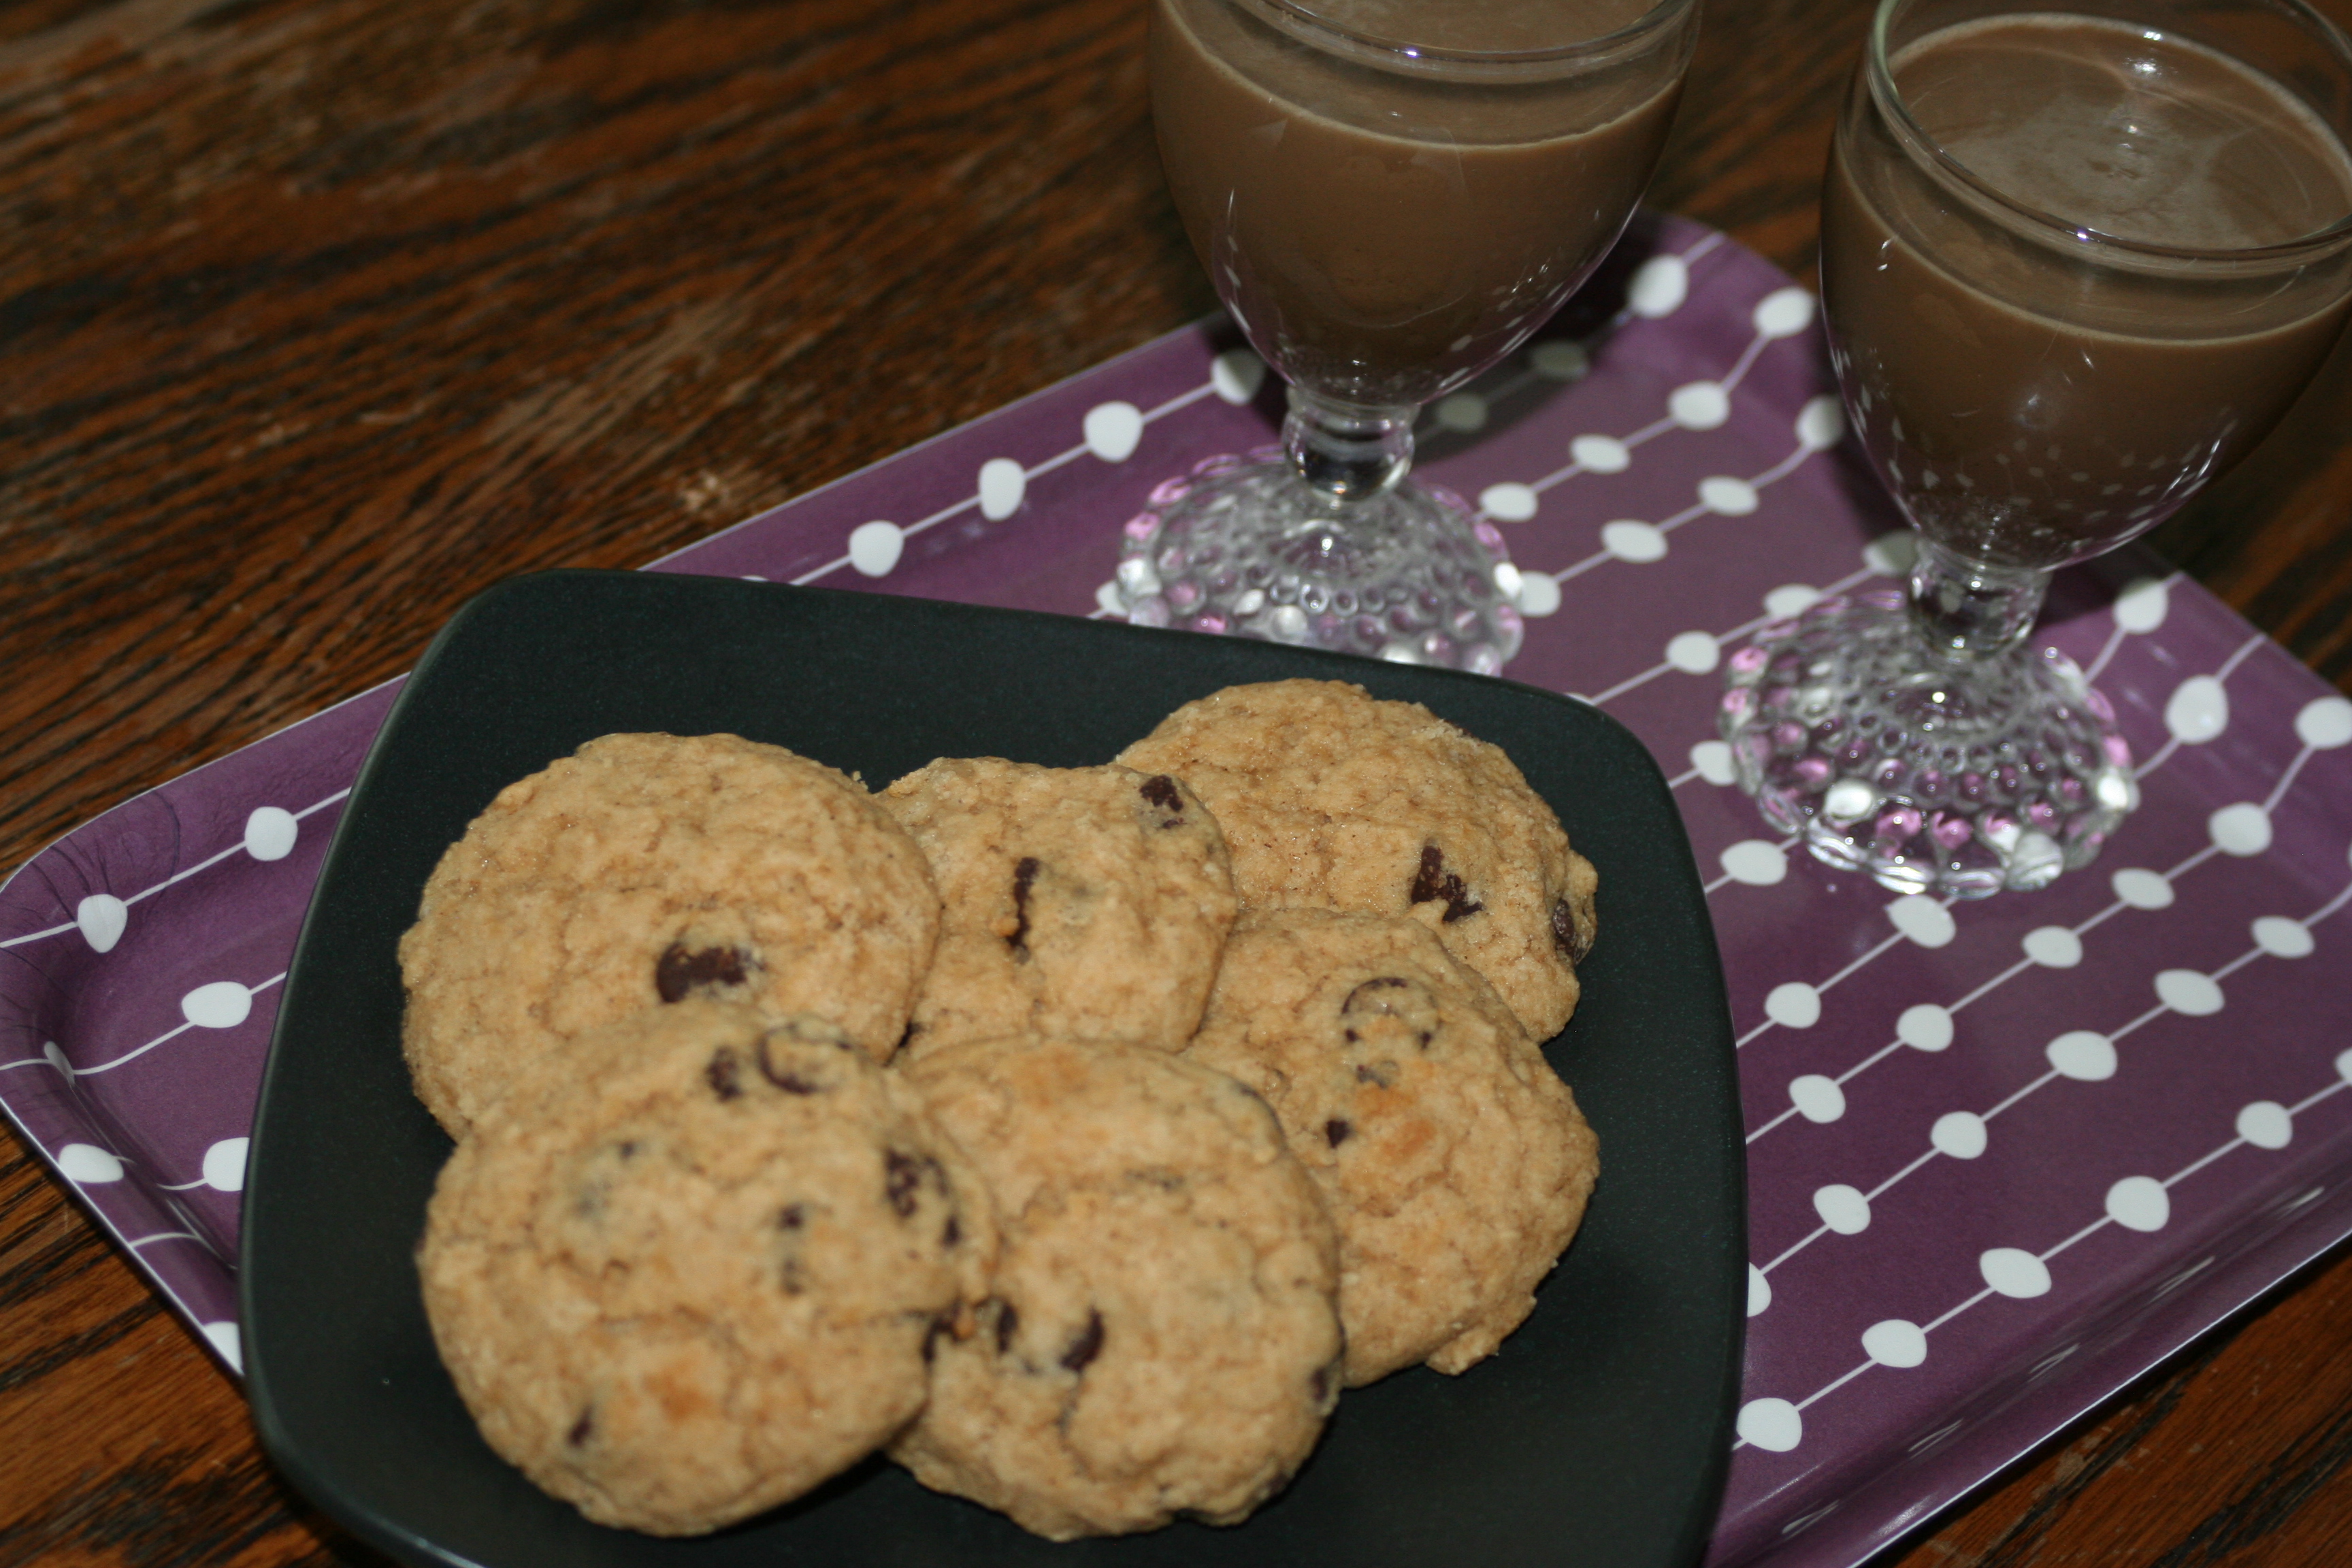
I think I found this recipe in The Happy Herbivore cookbook. But as I didn't notate that information, I'm not for sure. :) I certainly cannot take credit for these. While these aren't your typical melt-in-your-mouth chocolate chip cookies, they are good and a great healthy treat, with no added fat and not too much sugar. Plus, the are gluten-free! They have become our go-to dessert when we need a little sweet fix. Within 30 minutes you can enjoy warm cookies from the oven!

Vegan Chocolate Chip Cookies

VEGAN CHOCOLATE CHIP COOKIES
Print This Recipe


1/3 c. unsweetened applesauce
1/2 c. coconut sugar or brown sugar
1 tsp vanilla
1/4 c. non-dairy milk
1 c. gluten-free all purpose flour mix
1 tsp baking powder
1/4 tsp salt
1 Tbsp cornstarch or arrowroot powder
1/4 tsp cinnamon
1/2 c. chocolate chips

Preheat oven to 350°F. Grease cookie sheet or line with parchment paper.

In a bowl combine applesauce, sugar, vanilla, and milk. In a small bowl, whisk together flour, baking powder, salt, cornstarch, and cinnamon. Pour dry ingredients into wet in three batches, stirring to combine. Fold in chocolate chips.

Drop by spoonfuls on cookie sheet. Bake for 11-13 minutes.

Makes 15 cookies.

Monday, May 13, 2013

Gluten-Free Pita Bread

These pita pockets can be made in about 25 minutes. They are dairy-free, egg-free, yeast-free, and gluten-free. And despite all that "free-ness" they are delicious. We enjoy them dipped in hummus, as mini pizza crusts, or as pockets to stuff with veggies for a sandwich.

I have found that these don't create their own "pockets" very well, which just means I have to cut them open myself, not a big deal to me. I also love that these freeze well, so I often make a double batch and freeze half. I like to freeze some in pocket form and some just whole.

The original recipe calls for using just sorghum flour and sweet rice flour. I have successfully replaced up to a 1/4 cup of the sorghum flour with teff flour or brown rice flour. I also sometimes add some herbs or spices depending on what I plan to use the pitas for (ie adding Italian seasonings when I use them for pizza crusts).

Gluten-Free Pita Bread

GLUTEN-FREE PITA BREAD
(from Nourishing Meals)
Print This Recipe

1 1/4 c. warm water
6 Tbsp ground flax seed
2 Tbsp extra virgin olive oil
1 Tbsp apple cider vinegar

1 1/2 c. sorghum flour
1/2 -- 3/4 c. sweet rice flour (in the mountains here I always have to add the larger amount of flour, but start with the lesser amount first)
1/2 tsp sea salt
1/2 tsp baking soda
Herbs or spices, opt.

Preheat the oven to broil/550°F. Line one or two baking sheets with parchment paper. Position the oven rack in the center of the oven, not right underneath the broiler.

In a medium bowl, whisk together the warm water and ground flax seed. Let rest for about 5 minutes to thicken. Then whisk in the olive oil and apple cider vinegar.

Add the dry ingredients to the wet and use a fork to mix together. You should be able to form a ball of dough that is not too sticky or too dry. If the dough is sticky add in extra sweet rice flour (up to the additional 1/4 cup). If the dough is dry, add a little water.

Divide the dough into 5 equal pieces (I've done 6 smaller pitas or 4 larger pitas too, depending on what I'm using them for). Using wet hands, roll each piece of dough into a ball and then flatten with your hands until they are 5-6 inch circles. Place onto the parchment lined baking sheet. If you're using a large baking sheet, you should be able to fit all the pitas on there (they don't spread much). Otherwise use two baking sheets.

Bake for 10-12 minutes, flipping each pita after 6 minutes. The pitas bubble slightly and get golden around the edges when done. After they are cooled, slice them in half and cut the bread to form a pocket.

If not using right away, layer these between waxed paper and store in a sealed container. Or freeze.

Monday, April 29, 2013

Savory Spiced Nuts

Nuts are a staple snack in our house. In the interest of health, I've been avoiding buying the pre-roasted, salted varieties. So, I buy raw nuts and toast and spice them myself. This is our favorite savory spiced nut recipe thus far. It's also quite easy as it's all made on the stovetop. Once completely cooled, store the nuts in a glass jar.

Savory Spiced Nuts

SAVORY SPICED NUTS
Print This Recipe


1 Tbsp olive oil
1 tsp smoked paprika
1/2 tsp salt
1/4 tsp garlic powder
1/4 tsp onion powder
1/8 tsp chili powder
1/8 tsp black pepper
1/8-1/4 tsp cayenne
1 c. raw almonds
1 c. raw walnuts
1/2 c. raw sunflower seeds

In a large skillet, heat olive oil over medium heat. Add all the spices and stir to make a paste. Add almonds, walnuts, and sunflower seeds and stir to coat evenly. Continue stirring the nuts, toasting until fragrant, about 5 minutes. Cool in the pan.

Monday, April 15, 2013

Vegetarian Enchiladas

In our quest for new vegetarian main dishes, my creativity is being pushed into high gear. Very frequently I turn to Alissa Segersten's two cookbooks, The Whole Life Nutrition Cookbook and Nourishing Meals. Every recipe I've tried has been delicious. A plus for me is that the recipes are gluten-free, dairy-free, and some are also egg-free. (If you have a chance to peruse her cookbooks through the library, I'd strongly suggest you do. There are plenty of non-vegetarian recipes in there as well.)

Last night I tried my hand at making vegetarian enchiladas from Nourishing Meals. I did make several changes to the recipe, but the essence of it doesn't belong to me. I love enchiladas and these were delicious! The made-from-scratch enchilada sauce is incredibly tasty and not too labor intensive. While topping them with cheese would be amazing, we just went the route of guacamole (my husband is sensitive to dairy, so we in general avoid it).

Vegetarian Enchiladas

VEGETARIAN ENCHILADAS
(adapted from Nourishing Meals by Alissa Segersten)
Print This Recipe

Sauce:
2 Tbsp olive oil
1 small onion, chopped
3 cloves garlic, peeled and chopped
1 jalapeno, chopped
1 small bell pepper, seeded and chopped
1 Tbsp cumin
1/2 tsp chili powder
1/4 tsp crushed red pepper flakes
1 1/2 tsp salt
1 1/2 c. water
2 c. tomato sauce or diced tomatoes
1/4 c. arrowroot powder or cornstarch

Enchiladas:
12 to 16 corn tortillas (I used only 12)
2 c. cooked mashed sweet potatoes (feel free to spice these with your favorite Mexican spices)
3 c. cooked black beans
2 c. baby spinach leaves

Guacamole for topping

Preheat oven to 400° F. Grease 9 x 13 glass baking dish.

To make the enchilada sauce, heat a 3-quart saucepan over medium heat. Add the oil, onion, jalapeno, and bell pepper; saute for 7 minutes, or until softened. Add the garlic, spices, and salt; saute a few minutes more. Then add the water and tomato sauce or diced tomatoes. Cover and simmer for about 20 minutes. Pour sauce into a blender, add arrowroot power or cornstarch; blend until smooth.

To make the enchiladas, first be sure to heat up each tortilla so they are pliable for filling and rolling. Lightly grease a hot skillet; heat each tortilla for about 10 seconds on each side. You can fill one enchilada while the next tortilla is heating. Add a few small spoonfuls of mashed sweet potato, then beans, and finally a small handful of spinach leaves. Roll tightly and place the filled tortilla seam-side down in the greased baking dish. Repeat with remaining tortillas, pushing the filled enchiladas closely together. Once the pan is filled, top with the sauce. Cover and bake for 30-35 minutes. Garnish with guacamole.

Saturday, June 2, 2012

Compote, Cake, and Custard

A trip to the farmer's market this morning yielded strawberries, asparagus, and rhubarb all sure signs of spring and the coming summer! I've been an anti-rhubarb girl for as long as I can remember, but I decided this year to give it a try. Spring is a wonderful time to try something new as fresh fruits and veggies are once again making their seasonal appearances so they are at their peak flavor.

And so, after a long work week, I decided to spend my Saturday afternoon in the kitchen. Inspired by the fresh produce, as well as several blogs I follow, I got busy.


First up was a gluten-free lemon sponge cake recipe courtesy of Cannelle et Vanille. The ingredient list was simple and I thought it would be perfect with some lightly sweetened, sliced strawberries. The end result wasn't as lemony as I'd expected, but it is still delicious.

Next, I tackled my rhubarb, making a simple compote that I figured I could spoon over the sponge cake, eat with yogurt or vanilla pudding. I used the basic recipe from Simple Bites. While I'm not yet in love with rhubarb, I did enjoy this easy dish and I hope to try out a few other rhubarb recipes.

Finally, I decided since I didn't have any whipping cream on hand, that a nice vanilla pudding would the perfect conclusion to my afternoon kitchen dabbling. I followed the recipe from Smitten Kitchen, though sadly I didn't have any vanilla beans, so vanilla extract it was for me. How can you go wrong with pudding? It will be delicious with any of my other creations.

I hope you too are being inspired by fresh, spring produce.

Thursday, April 26, 2012

Healthy Chocolate Peanut Butter Cups

We love Reese's Peanut Butter Cups! We don't eat them often because I'm anti-all the garbage additives. So, I thought I'd give this refined sugar-free recipe a try (unlike usual, I followed the original without any alterations). While they aren't Reese's, per se, they are sweet, peanutty and chocolatey, all good things! :) With coconut oil in the ingredient list, these definitely have coconut undertones, if that's not your thing, you could try butter and see how that works. If you want a thicker layer of chocolate (I think I might), just double the ingredients for the chocolate layer. I hope you enjoy!


CHOCOLATE PEANUT BUTTER CUP
(from lifemadewhole.com)
Print This Recipe


For peanut butter layer:
3/4 c. natural peanut butter
1/4 c. coconut oil
2 Tbsp raw honey

For chocolate layer:
2 Tbsp coconut oil
2 Tbsp butter
2 Tbsp unsweetened cocoa powder
2 Tbsp raw honey

For the peanut butter layer: Line mini-muffin pan with papers. Melt the coconut oil, then mix together with the peanut butter and honey. Carefully pour into prepared pan. Place in the freezer while preparing the chocolate.

For the chocolate layer: Melt the coconut oil and butter together. Add the cocoa powder and the honey. Stir until smooth. Remove the pan from the freezer and evenly pour the chocolate into each cup. Freeze for at least 15 minutes before serving.

Store in the fridge or freezer. Makes about 24.

Thursday, April 12, 2012

Carrot Cake Bites

It's time for another no-bake healthy treat recipe...

For my 5th birthday I requested carrot cake for my dessert. It's been a standby ever since. (Though I'm sorely disappointed if I ever encounter carrot cake that has raisins lurking inside!) I have to admit to loving the cream cheese frosting that is the usual accompaniment and adds to my all-around love of the cake.  It's been months, maybe even a couple of years since I've eaten a slice of my beloved carrot cake, so I was intrigued by this recipe for raw carrot cake balls I stumbled across on Pinterest. These are cream cheese frosting free, but I still thought worth sampling.

These don't taste exactly like carrot cake, but they certainly are reminiscent and they are both tasty and healthy little morsels that make you feel like you're getting a treat. So, they come with my recommendations. I did tweak the original recipe by adding nuts and spices. I'm sure coconut and perhaps a little nutmeg would be good as well. And maybe if you want to go really fancy, you can make a sweet cream cheese dip. :)


CARROT CAKE BITES
(adapted from gracefulfitnessblog.com)
Print This Recipe

10 dates
small handful raw walnuts
1 c. gluten-free rolled oats
1 medium carrot, finely grated
zest from one lemon
1/4 tsp vanilla
1/8 tsp cinnamon
dash of ground ginger
1/8 tsp salt
finely chopped walnuts for rolling, opt.

Rough chop the dates and walnuts and then put them in a food processor fitted with the chopping blade. Process until date pieces are about the size of raisins.

Add the oats and process until the oats are ground.

Add grated carrot, lemon zest, vanilla, cinnamon, ginger, and salt and process until the ‘dough’ comes together in a ball. If it seems a little dry, add a few drops of water and process again.

Use clean hands to form into balls. Roll in chopped walnuts, if desired and store in the fridge. Makes 12-15 balls.

Friday, April 6, 2012

Peanut Butter Fudgy Bites

Jeremy and I have a rather bad habit of wanting something sweet after dinner. I didn't grow up having dessert every night, but I find that my mind wanders to a bite of sweet almost every evening. Most often we'll enjoy a little dark chocolate, but I've been experimenting lately with finding some "healthy" treats for us to enjoy. The next few recipes I plan to share with you are some these sweets. So, perhaps you too can healthfully satisfy your post-supper sweet tooth.

First up, is a recipe that I now can't remember where I found; however, in typical fashion, I've adapted the recipe anyway to suit our tastes. We love the classic combination of peanut butter and chocolate, so are fond of these. As they are raw treats, be sure to store in the fridge. (Sadly, these little bites are really unattractive to photograph...I hope that won't deter you from trying them. :))


PEANUT BUTTER FUDGY BITES
Print This Recipe


15 pitted dates, rough chopped
1/2 c. peanut butter
1/3 c. shredded unsweetened coconut (my coconut is larger flakes, so I've been using a packed 1/2 cup instead)
2 Tbsp unsweetened cocoa powder
1 tsp vanilla extract
3 Tbsp chocolate chips

Place the dates in a food processor fitted with the chopping blade and process into smaller pieces. Add the remaining ingredients and process until thoroughly combined and ingredients form a "dough." Roll into balls.

Monday, February 13, 2012

Flourless Chocolate Cake

For all you chocolate lovers, I have the perfect dark chocolate cake for your Valentine's Day celebration! I dusted mine with some powdered sugar, but this would be lovely with a chocolate glaze, a thin layer of icing, whipped cream, or a puree of berries. It's delicious, simple to make, and naturally gluten-free! Plus, Jeremy gave it two thumbs up. So, whether you're dining out or in, make sure you end your night with something sweet.

As a conversational aside, for my wedding 3 1/2 years ago someone gave me a His and Hers heart shaped baking pan. I decided this was the perfect opportunity to try it out. The batter was a little too much for these, but I still thought the heart shape was fun for the occasion. (I definitely would not buy a pan with such infrequent uses, but I guess it's fun to use every once in awhile, since I already own it! :) )


FLOURLESS CHOCOLATE CAKE
(ever so slightly adapted from epicurious.com)
Print This Recipe

4 oz quality, bittersweet chocolate (I used a 72% cacao)
1 stick unsalted butter
3/4 c. sugar
3 large eggs
1/2 c. unsweetened cocoa powder
1/2 tsp vanilla extract

Preheat oven to 375°F. Butter an 8-inch round baking pan. Line bottom with wax paper and butter paper.

Chop chocolate into small pieces. Cut butter into 8 pieces. In the top of a double boiler or a bowl set over a saucepan of barely simmering water melt chocolate with butter, stirring, until smooth. Remove the bowl from heat and whisk sugar into chocolate mixture. Add eggs and vanilla and whisk well. Sift 1/2 cup cocoa powder over chocolate mixture and whisk until just combined.

Pour batter into pan and bake for 25 minutes, or until top has formed a thin crust. Cool cake in pan on a rack for 5 minutes and invert onto a serving plate. Garnish as desired.

(When completely cooled, cake will keep in an airtight container up to 1 week.)

Friday, January 6, 2012

Flour-less Peanut Butter Chocolate Chip Cookies

I know the flurry of holiday baking is behind us and we're looking to tighten our belts and say "no" to sweets. But sometimes you just need a sweet fix. Or perhaps you need a  little something to share with company or to bring to a gathering. How about five-ingredient flour-less cookies?! Not only are these quick to mix up, but they are awfully tasty as well. We are fans of peanut butter and chocolate around here, so one night when we "needed" an after dinner sweet treat, I made these. This recipe is definitely a keeper.

I found this recipe in the October issue of Every Day With Rachael Ray magazine. In keeping with how I approach dessert recipes, I cut back on the sugar by 1/3 of a cup. I thought the cookies were perfectly sweet that way, allowing the peanut butter and chocolate flavors to shine through. But, feel free to up the sugar if you like your sweets super sweet. Additionally, I've made these egg-free by making a flax gel to replace the egg (1 Tbsp ground flax seed + 3 Tbsp hot water whisked together and set aside for a few minutes to gel). The texture was slightly different with the flax gel in place of the egg, but the flavor was just as good.


FLOUR-LESS PEANUT BUTTER CHOCOLATE CHIP COOKIES
(from Every Day With Rachael Ray, Oct. 2011)
Print This Recipe


1 cup peanut butter
2/3 cup brown sugar
1 egg
1 teaspoon baking soda
1/2 cup chocolate chips

Beat first 4 ingredients with a mixer. Stir in chocolate chips. Drop rounded Tablesoons of dough 2 inches apart on a parchment-lined cookie sheet. Bake at 350°F for 10 minutes. Let cool on pan.

Makes 16 cookies.

Thursday, January 5, 2012

Broccoli Cheddar Soup

It's officially winter now. Snow is clinging to the trees. The short walk to my car is a bit treacherous with icy patches. Wind whistles around the house and pushes its way through the cracks in my old, leaky windows. And when I approach the kitchen each evening, soup is often my first thought. Alas, my husband is not as much a lover of soups as I am. However, over the three and a half years we've been married, I've been slowly bringing him around by concocting soups that cause the memories of canned soups to fade away. While I won't serve soup every single night, I make sure it gets a good rotation in our dinners.

If you're at all like me and love a good soup or stew on these blustery, winter evenings, then stay tuned throughout the month of January as we hope to bring you several new recipes. (One minor aside, I don't think soup generally photographs well at all.)

Health and added veggies and fruits are often top priority at the start of the new year. We all want to make changes and somehow the turning of the calendar year creates a perfect clean slate opportunity. Broccoli Cheddar Soup might not come to mind as a thoroughly healthful soup, but when Food Network's Ellie Krieger is the brains behind the recipe, it's bound to be a lightened up version. This soup takes just a bit longer as you make a simple cheese sauce to add to the soup, but it's definitely worth the effort. For a quicker prep, I used frozen broccoli florets.


BROCCOLI CHEDDAR SOUP
(from Comfort Food Fix by Ellie Krieger)
Print This Recipe


2 tsp olive oil
1 onion, chopped
1 clove garlic, minced
1/4-1/2 tsp ground nutmeg (opt.)
1 large head broccoli, florets and tender part of stem chopped (about 6 cups)
3 c. chicken broth
2 c. milk
2 Tbsp flour or cornstarch
1 1/4 c. lightly packed shredded sharp cheddar cheese (5 ounces)
1/2 tsp salt, plus more to taste
1/4 tsp freshly ground black pepper, plus more to taste

Heat the oil in a soup pot over medium heat. Add the onion and cook, stirring, until softened and translucent, about 4 minutes. Add the garlic and nutmeg and cook for 30 seconds. Add the broccoli and chicken broth and bring to a boil. Reduce the heat to medium low and cook until the broccoli is tender, about 5 minutes. Remove from the heat and cool slightly, about 15 minutes.

Meanwhile, in a small saucepan, whisk together the milk and flour/cornstarch, until dissolved. Heat the mixture over medium-high heat, stirring constantly, and bring to a gentle boil. Reduce the heat to medium low and cook, stirring occasionally, until the mixture has thickened, about 3 minutes. Add one cup of the cheese and cook, stirring, until melted, 2 minutes more. Removed from the heat and cover to keep warm.

Use an immersion blender and puree the broccoli mixture, until it is mostly smooth with a few chunks. (Alternatively, if you don't have an immersion blender, puree one cup at a time in a blender.) Stir in the cheese mixture, season with salt and pepper, and cook over low heat until warmed through. Serve topped with the remaining cheese. Serves 4.

Friday, December 23, 2011

Cranberry-Apple Pancakes

We are big fans of pancakes around here (in fact my gluten-free husband only really starting loving pancakes once he switched to eating gluten-free, so that is a testament to a healing body and a really good recipe). Lazy mornings often find me whipping up a batch for breakfast. I've made the recipe so frequently, that I have it memorized. And while we love the simple taste of lightly cinnamon-spiced pancakes with a dollop of plain yogurt and a drizzle of real maple syrup, lately I've been experimenting with add-ins to fancy up our pancake fare. One day it was mashed banana and a handful of chocolate chips. Another day frozen blueberries. And most recently, chopped fresh cranberries and apples.

You can of course make this recipe with regular wheat flour, but for those of you that are gluten-free this is a great recipe. Perhaps your Christmas breakfast might include pancakes this year?


CRANBERRY-APPLE PANCAKES
(adapted from The Artisanal Gluten-Free Cooking)
Print This Recipe

1 c. gluten-free all-purpose flour (if your favorite does not include xanthan gum, add 1/4 tsp to the dry ingredients)
2 to 4 Tbsp ground flax-seed (opt.)
1 Tbsp sugar
2 tsp baking powder
1/2 tsp cinnamon
1/4 tsp salt
1 egg
1 c. milk
1 tsp vanilla extract
2 Tbsp salted butter, melted
1 small apple, peeled, cored, and diced
1/3 c. rough chopped fresh or frozen cranberries

Whisk together all the dry ingredients. Add the egg, milk, and vanilla. Stir to combine. Add in the melted butter and mix. Add in the chopped fruit and stir once more to combine.

Heat a skillet over medium-high. Grease with cooking spray. Spoon batter into rounds in the skillet. Cook until bubbles have formed on the surface of each pancake. Flip and cook until the other sides are golden.

Makes about 12 pancakes.

Monday, December 19, 2011

Cocoa Chocolate Chip Meringues

I'm going to squeeze in one more chocolate treat recipe for you. Made with whipped egg whites and sugar, meringues are much lower in fat than the average Christmas cookie or candy. This particular recipe is flavored with cocoa powder and chocolate chips and the chocolate flavor certainly shines through. These aren't overly sweet, making them a nice change. And, as an added bonus, they are naturally gluten-free.

My husband and I both enjoyed these crispy little cookies. I know they'll become a regular holiday treat in our house.


COCOA CHOCOLATE CHIP MERINGUES
(from Gluten-Free Christmas Cookies by Ellen Brown)
Print This Recipe

3 large egg whites, at room temperature
1/4 tsp cream of tartar
pinch of salt
3/4 c. granulated sugar
1/3 c. unsweetened cocoa powder
1/2 tsp vanilla extract
1 c. miniature chocolate chips

Preheat the oven to 275°F. Line two baking sheets with parchment paper.

Place egg whites in a grease-free mixing bowl and beat at medium speed with an electric mixer until frothy. Add the cream of tartar and salt, raise the speed to high, and beat until soft peaks form. Add sugar, 1 Tablespoon at a time, and continue to beat until stiff peaks form and meringue is glossy. Beat in cocoa and vanilla. Gently fold in chocolate chips.

Scoop meringue into either a pastry bag fitted with a large star tip, or into a ziploc bag with the corner cut off. Pipe the meringue through bag of choice by heaping 1-Tablespoon portions onto prepared baking sheets. Bake for 30 minutes. Turn off the oven, and allow meringues to stay in the oven for an additional 30 minutes. Transfer to a cooling rack to cool completely.

Makes 3 to 4 dozen depending on size.

Friday, December 16, 2011

White Chocolate Almond Truffles

Continuing in our week of chocolate, I thought I'd share a white chocolate recipe. These are rich, quite sweet little treats, that don't taste strongly of almonds or white chocolate. The flavor seemed almost caramelly to me. But not even exactly that either. :) Still, these would make a unique addition to your holiday treat repertoire.

I did find the rolling of these to be incredibly tedious. Truffle rolling is always messy, but somehow these just didn't want to be rolled. See my note below the recipe with a possible alternative finish to these candies.


WHITE CHOCOLATE ALMOND TRUFFLES

1 pound white chocolate
1 cup heavy cream
1 cup natural almond butter
1/2 cup sugar
pinch of salt
1 cup blanched almonds

Break chocolate into pieces no larger than a lima bean. Either pulse chocolate in a food processor fitted with a steel blade or chop by hand.

Heat cream, almond butter, sugar, and salt in a saucepan over medium heat, stirring frequently, until mixture comes to a simmer. Stir in chocolate. Remove the pan from the heat, cover the pan, and allow chocolate to melt for 5 minutes. Whisk mixture until smooth, and transfer to a 9 x 9-inch baking pan. Chill mixture for at least 4 hours, or overnight.

While mixture chills, preheat the oven to 350°F. Place almonds on a baking sheet, and toast for 5 to 7 minutes, or until lightly browned. Remove the pan from the oven, and in a food processor fitted with a steel blade, pulse to finely chop the almonds. Or chop finely by hand. Set aside.

Place chopped almonds in a bowl. Using a spoon, scoop out 2 teaspoons mixture, and gently form it into a ball. Roll balls in chopped almonds, and then refrigerate for 30 minutes or until firm.

Cook's Note: If I make them again, I think I might grease my square pan, sprinkle in a layer of finely chopped, toasted almonds, pour in and spread the hot truffle mixture, and then sprinkle the top with the remaining chopped toasted almonds. Then, instead of little truffle balls, you could cut truffle squares.

Variation: Substitute natural peanut butter and dark chocolate to make chocolate peanut butter truffles.

Tuesday, December 13, 2011

Cinnamon-Honey Truffles

Any chocolate loving person is bound to enjoy truffles. They are so deeply rich and chocolatey. I was intrigued by this particular recipe (which I found in some cookbook or other and promptly forgot the name) because the cream is steeped in spices and honey. I loved the idea; however, the spices were very subtle in the end result. If you want more of the cinnamon to shine through, I'd try doubling the amount of cinnamon stick. Or, you can do like I did and sprinkle a little cinnamon into the cocoa powder that you roll the truffles in. Either way, these are delicious drops of chocolate, perfect for a holiday goody tray.


CINNAMON-HONEY TRUFFLES
Print This Recipe


8 ounces dark bittersweet chocolate (at least 60% cacao), very finely chopped
1/2 c. heavy cream
1 Tbsp honey
1/2 tsp vanilla extract
1/2-1 cinnamon stick, 1 1/2-3 inches long (depending on the depth of spice you want)
2 whole cloves
pinch of sea salt
2 1/2 Tbsp unsalted butter, at room temperature
1/4 c. unsweetened dutch-process cocoa powder, sifted

Place the chocolate in a medium heatproof bowl. (It is very important to chop the chocolate very finely to allow it to melt properly.)

In a small saucepan over medium heat, combine the cream, honey, vanilla, cinnamon stick, cloves, and salt. Bring to a boil, reduce the heat to low, and simmer for 5 minutes. Remove from the heat. Pour the cream through a fine-mesh sieve held over the chocolate, discarding the contents of the sieve, and let stand for 2 minutes. Using a rubber spatula, gently stir the chocolate mixture in a circular motion until it has completely melted. Add the butter and stir until incorporated. Cover the bowl with plastic wrap and set aside at room temperature for 30 minutes to set the chocolate. Then refrigerate the chocolate for 30 minutes, or until the chocolate is able to be scooped and rolled into balls.

Line a rimmed baking sheet with waxed paper. Using a small spoon or scoop, scoop out 1-inch balls of chocolate and gently roll them into irregularly shaped truffles. Place them on the prepared baking sheet. Return the truffles to the refrigerator and chill until firm, about 1 hour.

Place the sifted cocoa powder in a shallow bowl. One at a time, roll the truffles in the cocoa, coating evenly. Makes about 30 truffles.

Cook's Note: The truffles will keep up to 2 weeks in the refrigerator.

Monday, December 12, 2011

Cocoa Thumbprints

Welcome to our week-long Christmas treats extravaganza! Our focus will be on chocolate, but we might sneak something else in as well. We hope you find plenty of inspiration for your holiday baking!

I enjoy a good jam-filled thumbprint cookie. Last year I made lovely little butter thumbprint cookies. This year I was imagining a chocolate cookie base with a berry jam center. And what do I find in the December issue of Food Network Magazine? That's right, Cocoa Thumbprints!

I tinkered with the recipe a bit to make them gluten-free. I cut-back on the sugar by a couple of Tablespoonfuls. And I used a slightly sweet, four-fruit jam as the center. Oh my, these are tasty!

As usual, if you are not gluten-free, feel free to substitute all-purpose flour and omit the xanthan gum.


COCOA THUMBPRINTS
(slightly adapted from Food Network Magazine, Dec. 2011)
Print This Recipe

1 1/2 c. gluten-free all-purpose flour
scant 3/4 c. sugar
1/2 c. unsweetened Dutch-process cocoa powder
1 tsp baking powder
1/2 tsp salt
1/2 tsp xanthan gum
6 Tbsp unsalted butter, melted
2 eggs, lightly beaten
1/4 c. confectioner's sugar (for rolling)
1/4 c. granulated sugar (for rolling)
favorite jam (for filling)

In a medium bowl, whisk together the flour, scant 3/4 cup sugar, cocoa powder, baking powder, salt, and xanthan gum. Add the melted butter and eggs and stir until combined. Cover and refrigerate the dough until firm, about 30 minutes.

Preheat the oven to 325°F. Line 2 baking sheets with parchment paper.

Place the confectioner's sugar and the granulated sugar in two separate bowls. Roll scant Tablespoonfuls of dough into balls. Roll each in granulated sugar and then in confectioner's sugar. Place 1-inch apart on baking sheets.

Make a deep indentation with thumb in each cookie. Place 1/2 teaspoon of jam in the indentation. Bake 10 to 12 minutes, or until the cookies are puffed and slightly cracked. Let cool 3 minutes on the baking sheet. Then transfer to a wire rack until completely cooled.

Wednesday, December 7, 2011

Mocha Mousse Pie

'Tis the season for lots of sweet treats!  My husband requested a chocolate dessert for Thanksgiving. This naturally gluten-free pie fit the bill. Perhaps you'll find a place for this on your holiday table.

I took this recipe from The Pioneer Woman. The only adjustment I made was to decrease the amount of sugar and still I think it's plenty sweet. This pie is fluffy, yet rich, and incredibly delicious with notes of chocolate and coffee shining through. I love the nut crust on this, but you could just as easily use a crushed cookie crust, regular pre-baked pie crust, or even just serve the filling in cups without any sort of crust. As a disclaimer, this pie does contain raw eggs.


MOCHA MOUSSE PIE
(very slightly adapted from The Pioneer Woman)
Print This Recipe


Crust
1 cup Pecans, Finely Chopped
1/4 cup Brown Sugar
2 ounces, weight Semi Sweet Chocolate Grated
2 Tablespoons Kahlua
Dash Of Salt

Filling
2 sticks Butter, room temperature
1-1 1/4 cup Sugar
2 teaspoons Instant Coffee Granules
1 teaspoon Kahlua
3 ounces, weight Semi-sweet (or Bittersweet) Chocolate
1 teaspoon Vanilla Extract
4 whole Large Eggs

To make the crust, combine chopped pecans (which you can chop in the food processor, if desired), brown sugar, grated chocolate, and salt. Stir with a fork to combine, and then drizzle in Kahlua, stirring until combined. Press mixture into a pie pan, bringing it up the sides a bit. Set aside (do not bake) or refrigerate until needed.

In small microwave safe bowl, melt 3 ounces of unsweetened baking chocolate until smooth and completely melted (about 45 seconds on high). Set aside to cool.

In a large bowl of an electric mixer fitted with the whisk attachment, beat butter, sugar, 2 teaspoons instant coffee, and 1 teaspoon Kahlua until fluffy, about 1 1/2 minutes. When melted chocolate is cooled, drizzle it into the butter/sugar mixture as it beats on medium speed; use a rubber spatula to get it all out. Add 1 teaspoon of vanilla extract. Beat the mixture thoroughly until combined, scraping the sides if necessary.

On medium speed, add the four eggs, one at a time, over a period of 20 minutes; leave about 5 minutes between each egg addition (allowing the mixer to run for 5 minutes with each egg addition). Scrape sides of bowl halfway through this process. The filling will gradually lighten in color and become fluffier. Pour filling into the pie crust.

Smooth out the pie filling and place pie in the refrigerator to chill for at least two hours.

Serve with whipped cream and more grated chocolate, optional.