Tuesday, August 31, 2010

Counter Culture

Have I mentioned that my daughter and I are on a gluten-free trial diet? It's been two weeks so far. We've managed to collect a few good recipes for things like muffins, waffles, and cookies.

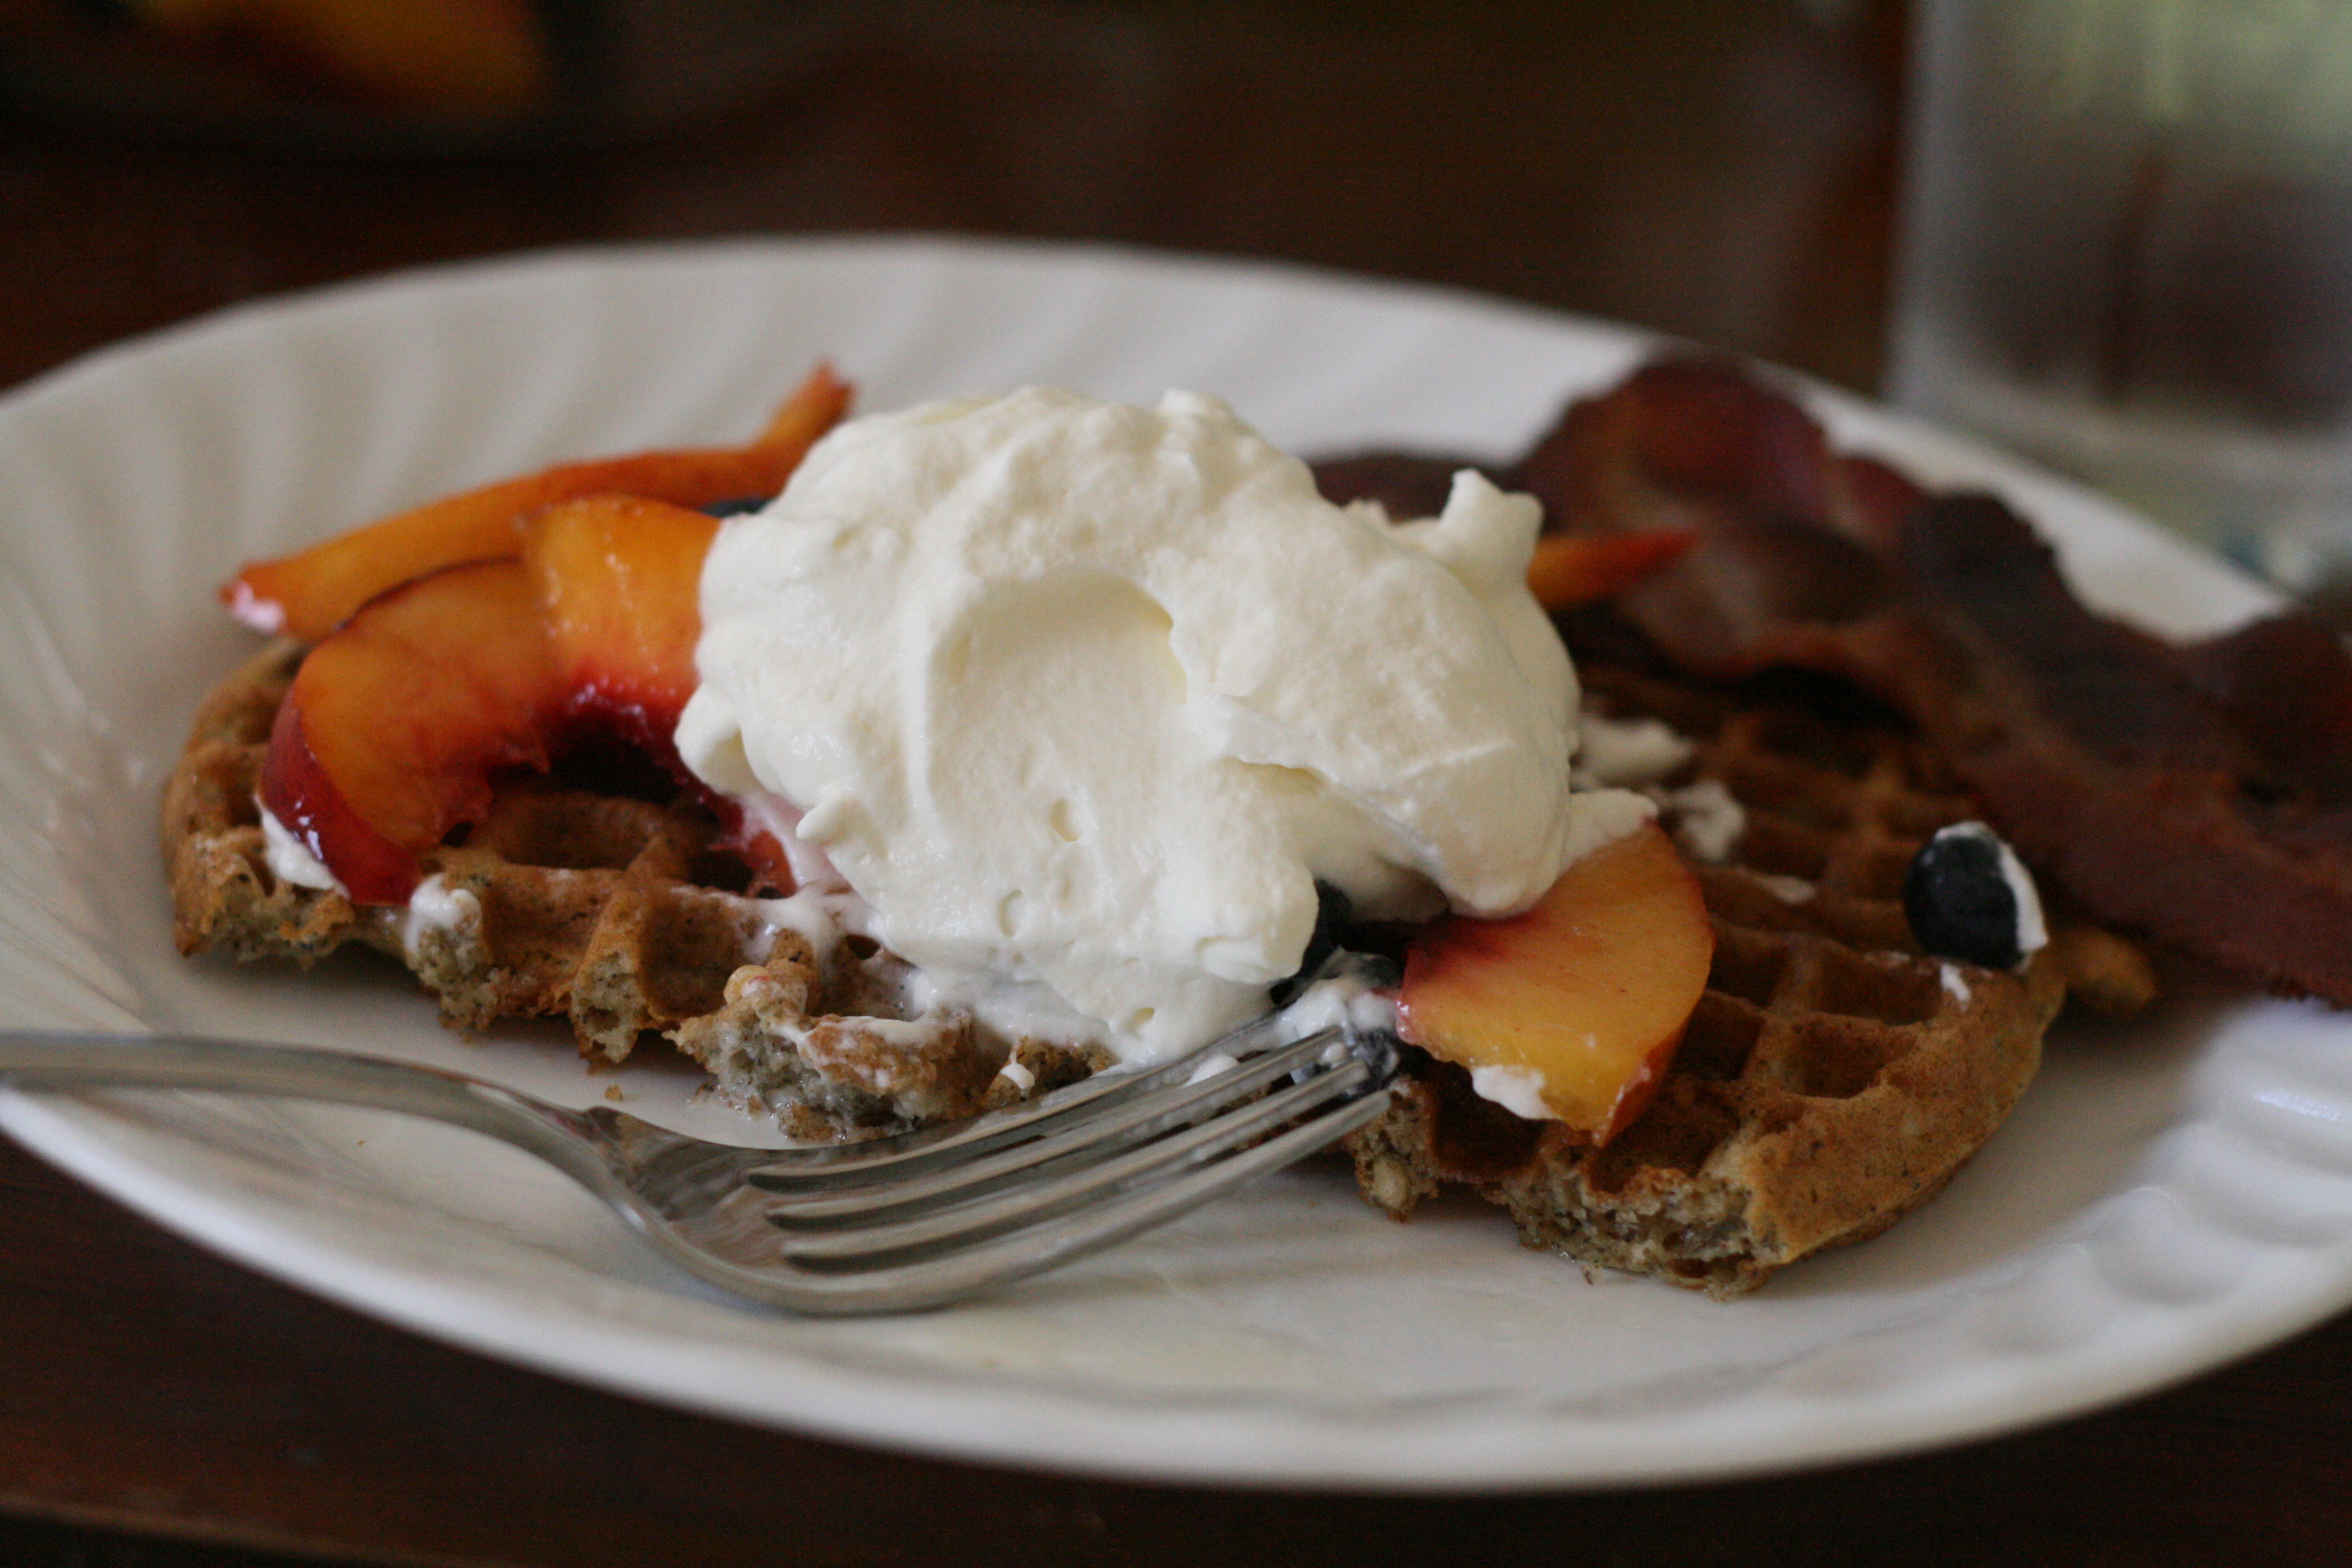
When my youngest sister arrived back in town this week after a two month absence, we decided a celebration breakfast was in order: gluten-free buckwheat waffles with peaches, blueberries and whipped cream, and bacon on the side. The waffles were every bit as good as they look! (And if you don't have to go gluten-free, you might still enjoy these waffles by making them with all-purpose flour instead of the gluten-free baking mix.)


GLUTEN-FREE BUCKWHEAT WAFFLES
(glutenfreegourmand.blogspot.com)
Print this recipe


1 cup gluten-free pastry flour (I used Bob's Red Mill flour mix)
1/2 cup buckwheat flour
1/2 cup brown rice flour
2 tsp. baking powder
3/4 tsp. salt
1/2 tsp. baking soda
1/4 tsp. xanthum gum (if your flour mix doesn't already have it included)
1/4 cup sugar

2 eggs, separated
pinch of cream of tartar
2 cups milk
5 Tbsp. butter, melted

Mix flours, baking powder, salt, baking soda, xanthum gum and sugar in a large bowl.

Beat the egg whites and cream of tartar until stiff in a separate bowl. You will know when they are ready when the eggs stick to the bottom of the bowl when tilted. At this point, stop beating the eggs immediately -- you don't want the egg whites to be dry.

In a medium bowl, whisk the egg yolks, milk, and melted butter. Add the wet ingredients to the dry ingredients and mix until combined. Pour 1/4 of the fluffy egg whites into the batter and gently fold them in with a rubber spatula, then fold the rest of the egg whites into the batter as well. You can stop folding when only a tiny amount of the egg whites is still distinguishable.

Pour 1/2 to 1 cup of the batter into a heated, greased waffle iron and cook until amount of steam coming out of the iron is decreased significantly. Repeat until batter is used. Serve waffles right off the iron or put them in a 250F oven to keep them warm.

Serves 6.

Monday, August 30, 2010

Market Fresh: Melons

I will admit that I'm not very creative when it comes to melon - usually, I cut them and serve them. For this post, however, I decided to step outside the box since you probably don't need tips on how to cut your melon into 1-inch pieces.

A couple notes on picking a melons: For honeydew and cantaloupe, I smell them - if it smells faintly like the fruit, it's probably good, if it smells really strong, it's probably past. For watermelon, I really do smack the melon and I can tell by the way it feels if it's likely a good one.  I want to feel the juice "ripple" inside.

Now on to the recipes for today. I really liked this first one, it seemed like an unusual combination (I adapted the recipe from one I found) but the juicy melon with the classic tomato and basil combination was fabulous. It was a sophisticated and unexpected salad.


WATERMELON, TOMATO, & BASIL SALAD
Print This Recipe

1/4 c. balsamic vinegar
1/4 c. sugar (next time I would try honey)
1/2 watermelon cut into chunks,
1 c. cherry tomatoes, halved
2 Tb. fresh basil, chopped
2 Tb. Olive oil

Combine the balsamic vinegar and sugar in a small saucepan over medium heat. Bring to a simmer, stirring occasionally, until sugar is dissolved. Remove from heat and set aside to cool.

Combine watermelon, tomatoes, & basil in a large bowl. Pour cooled vinegar mixture and olive oil over the fruit. Gently stir to combine. Can season with salt if desired. Chill until serving.

My sister recommended this recipe and I couldn't resist trying another fruit soup. It's so refreshing and quite good. It would be lovely as a light dessert.


CHILLED CANTALOUPE SOUP
(allrecipes.com)
Print This Recipe

1 cantaloupe - peeled, seeded and cubed
2 c. orange juice
1 Tb. fresh lime juice
1/4 tsp. ground cinnamon

Peel, seed, and cube the cantaloupe. Place cantaloupe and 1/2 cup orange juice in a blender or food processor; cover, and process until smooth. Transfer to large bowl. Stir in lime juice, cinnamon, and remaining orange juice. Cover, and refrigerate for at least one hour. Garnish with mint if desired.

Saturday, August 28, 2010

Winner!

And the random winner of the Party Food cookbook is Ryan G. who said, "I just moved into a new apartment so this book would be great for hosting guests!! Right now I’m stuck with potato skins and taco cups, but would love to branch out to other fun foods!"

Thank you all for entering and for the comments! We will continue to try and provide a wide variety of recipes and hopefully incorporate many of your requests!

Congratulations, Ryan! We hope you enjoy! We will e-mail you to get your snail mail address and we will send it to you!

Thursday, August 26, 2010

Weekend Fare: Raspberry Crumb Coffee Cake w/Maple Frosting

This coffee cake is so delicious and goes along with the raspberries for this week. The combination of raspberry, cinnamon, vanilla, and maple is scrumptious. What a perfect recipe for weekend brunch, overnight company, or just because. Hope you enjoy it as much as we did!


RASPBERRY CRUMB COFFEE CAKE w/ MAPLE FROSTING
(adapted slightly from Emeril Lagasse)
Print This Recipe

1 teaspoon butter
1 1/2 cups fresh or frozen raspberries
1 1/2 cups sugar
1 lemon, juiced
1/4 cup water
2 tablespoons cornstarch
1 stick plus 4 tablespoons butter
2 eggs
4 cups all-purpose flour
1 teaspoon baking powder
1 teaspoon baking soda
1/2 teaspoon salt
1/2 teaspoon ground cinnamon
1 cup buttermilk or sour milk
1 teaspoon pure vanilla extract
1/2 cup brown sugar
1 cup powdered sugar
2 tablespoons pure maple syrup
2 tablespoons milk


Preheat the oven to 350 degrees F.

Grease an 11 by 7 by 2-inch rectangular pan with the teaspoon of butter. In a saucepan, combine the raspberries, 1/2 cup of the sugar and lemon juice. Bring the mixture to a boil and reduce to a simmer. Simmer the mixture for 3 minutes. In a small bowl, whisk the water and cornstarch together. Stir the slurry into the fruit mixture. Cook and stir the mixture for 4 minutes. Remove the pan and cool completely.

 In the bowl of an electric mixer, cream 8 tablespoons of butter and remaining 1 cup of the sugar. Add the eggs, 1 at a time. In a small mixing bowl, sift 3 1/2 cups flour, baking powder, baking soda, salt and cinnamon together. Add the flour mixture and buttermilk, alternately to the butter mixture. Mix thoroughly. Mix in the vanilla.

 In a small bowl, combine the remaining butter, remaining flour and brown sugar together. Using your hands, combine the mixture until it resembles a fine crumb-like consistency. Spread half of the batter into the prepared pan. Spread the fruit mixture over the batter. Drop heaping spoonfuls of the remaining batter over the fruit mixture, about 1-inch apart. Sprinkle the crumb mixture over the entire pan. Bake for 40 to 45 minutes or until golden brown.

 In a mixing bowl, whisk the powdered sugar, maple syrup and milk together. Set aside. Remove from the oven and let cool for 5 minutes before drizzling glaze over top. Cut into slices and serve warm.

Wednesday, August 25, 2010

Off the Shelf: Farm to Fork

Farm to Fork: Cooking Local, Cooking Fresh by Emeril Lagasse is everything we promote on this blog: fresh, seasonal, delicious. However, after much perusing, I feel it is aimed at the cook with plenty of time and money on her hands, and I am not that.

Gorgeous photos entice you at ever turn as Emeril goes through the herb garden; milk, eggs, and cheese; leafy greens; the three sisters: corn, beans and squash; nightshades (tomatoes and eggplant); berries, figs, and melons; the orchard; cole crops: broccoli, cabbage, and cauliflower; thistles, stalks, and pods; roots, shoots, tubers, and bulbs; winter fruits; from the mill; fresh off the dock; out on the range; and home economics: preserving the harvest.

As you can see, this is a very thorough book, and there are a few recipes that are simple enough to tempt the home cook, such as: basil-macerated peaches, roasted butternut squash soup, spiced zucchini bread, apricot clafouti, and roasted brussel sprouts. Otherwise, we're looking at things like: Corn, tomato, and lobster salad, lemon-scented orecchiette pasta with fava beans and fresh tarragon, tomato, zucchini, and leek galette with roasted garlic goat cheese, spiced blackberry soup with caramelized peaches and candied almonds, and wild mushroom ragout over creamy polenta.

I tried the Provencal-Style Stuffed Zucchini, and although the recipe looked a little intimidating, the result was not difficult and tasted amazing: so much so that we enjoyed the leftovers just as much. I highly recommend it. I also tried the apricot clafouti which turned out well and was enjoyed by all.

I would recommend this book as an inspiration to get ideas from and then create your own meals. It is worth checking out of the library.


PROVENCAL-STYLE STUFFED ZUCCHINI
(Farm to Fork)
Print this recipe


2 cups (about 2 oz.) diced French baguette or other crusty bread, preferably day-old (1/2-inch dice)
1/2 cup finely grated Parmigiano-Reggiano cheese
1/4 cup packed fresh parsley leaves
1 Tbsp. minced garlic
1/2 tsp. salt, plus more if needed
1/4 tsp. freshly ground black pepper, plus more if needed
3 Tbsp. extra virgin olive oil
8 small zucchini (each about 7 inches long and 1  1/4 to 1  1/2 inches wide)
4 ounces fresh lean mild pork sausage
3/4 cup minced onions
1 cup finely chopped peeled and seeded tomatoes (about 2 medium tomatoes)

Pulse the diced bread in a food processor until you have an even mix of fine and coarse crumbs. Add 1/4 cup of Parmesan, the parsley leaves, 1  1/2 tsp. of the minced garlic, 1/4 tsp. of the salt, and 1/4 tsp. of the pepper, and process until evenly mixed. Reserve 2 Tbsp. of the breadcrumb mixture for the filling.

Mix 1  1/2 Tbsp. of the exra-virgin olive oil into the remaining breadcrumbs, transfer the mixture to a small container, and set it aside.

Lay the zucchini on a flat work surface, and using a sharp knife, slice off the top quarter of each squash lengthwise. Next, slice a sliver off te bottom of each squash to help keep it stable. Using a small melon baller or spoon, remove the inner flesh from the zucchini to form a small boat shape, leaving a shell that is approximately 1/4 inch thick. Cut the zucchini pulp into 1/4-inch dice, and reserve it separately. Lightly salt the inside of the zucchini shells with the remaining 1/4 tsp. salt. Set them, h0llow side down, on paper towels to drain while you prepare the filling.

Heat 1 Tbsp. of the olive oil in a 12-inch skillet. Add the sausage and saute until it is golden, using a spoon to break it into small pieces, about 6 minutes. Add the onions and cook until they are soft, 3 to 4 minutes. Add the chopped zucchini and cook for 2 minutes. Add the tomatoes and the remaining 1  1/2 tsp. garlic, and cook, stirring until the moisture has evaporated and the filling comes together, 2 minutes. Remove the skillet from the heat, stir in the reserved 2 Tbsp. breadcrumb mixture, and season with additional salt and pepper if necessary.

Preheat the oven to 350F.

Rub the outside of the zucchini with the remaining 1/2 Tbsp. olive oil, and season them lightly with salt and pepper. Turn the zucchini hollow side up, and lightly pat the insides with paper towels. Using a tablespoon or other small spoon, fill the zucchini with the warm filling. Top with reserved breadcrumbs. Lay the zucchini in a baking dish, and bake for 30 minutes, or until golden brown and crispy on top.

6 to 8 servings.

Tuesday, August 24, 2010

My Kitchen View

So, we have lots of tomatoes! And I'm thinking that I simply must make a tomato pie one of these days. I've never made one and never eaten one but I'm pretty sure I would love it. I also must make BLTs (Bacon, Lettuce, and Tomato on buttered, toasted bread with real mayo) - they are a summer staple and one of my mom's favorites! Do you have favorite tomato recipes?

Last night, we had vegetarian taco salad...so simple and filling. We really enjoy using black beans and cheese as the proteins over mixed greens with sour cream or plain yogurt, salsa, avacado, tomatoes, and tortilla chips. It was delicious and healthy. One of my personal goals lately has been to incoroporate more vegetarian meals into our diet. My family doesn't mind eliminating meat for a few meals a week and I love the challenge of finding creative ways to enjoy meatless meals.

My latest, fun project was the cupcakes for my two-year-old son's birthday. He chose them from a great book - Hello, Cupcake. The book has amazingly creative cupcakes that are do-able for the home baker. Last year I made circus cupcakes from the book - they were super cute but I'm happy to report that these were less time consuming and generally easier. :) My little guy was thrilled with the results and I changed up the cupcakes to work with the time constraints and ingredients available. I did a cupcake display instead of 24 nearly identical cakes. I liked the result! Check out the book if you are a cupcake fan! The picture below is the main design - little fishbowls.


Don't forget to enter the GIVEAWAY! It's a super cool, fun, and inspiring cookbook!

Monday, August 23, 2010

Market Fresh: Raspberries

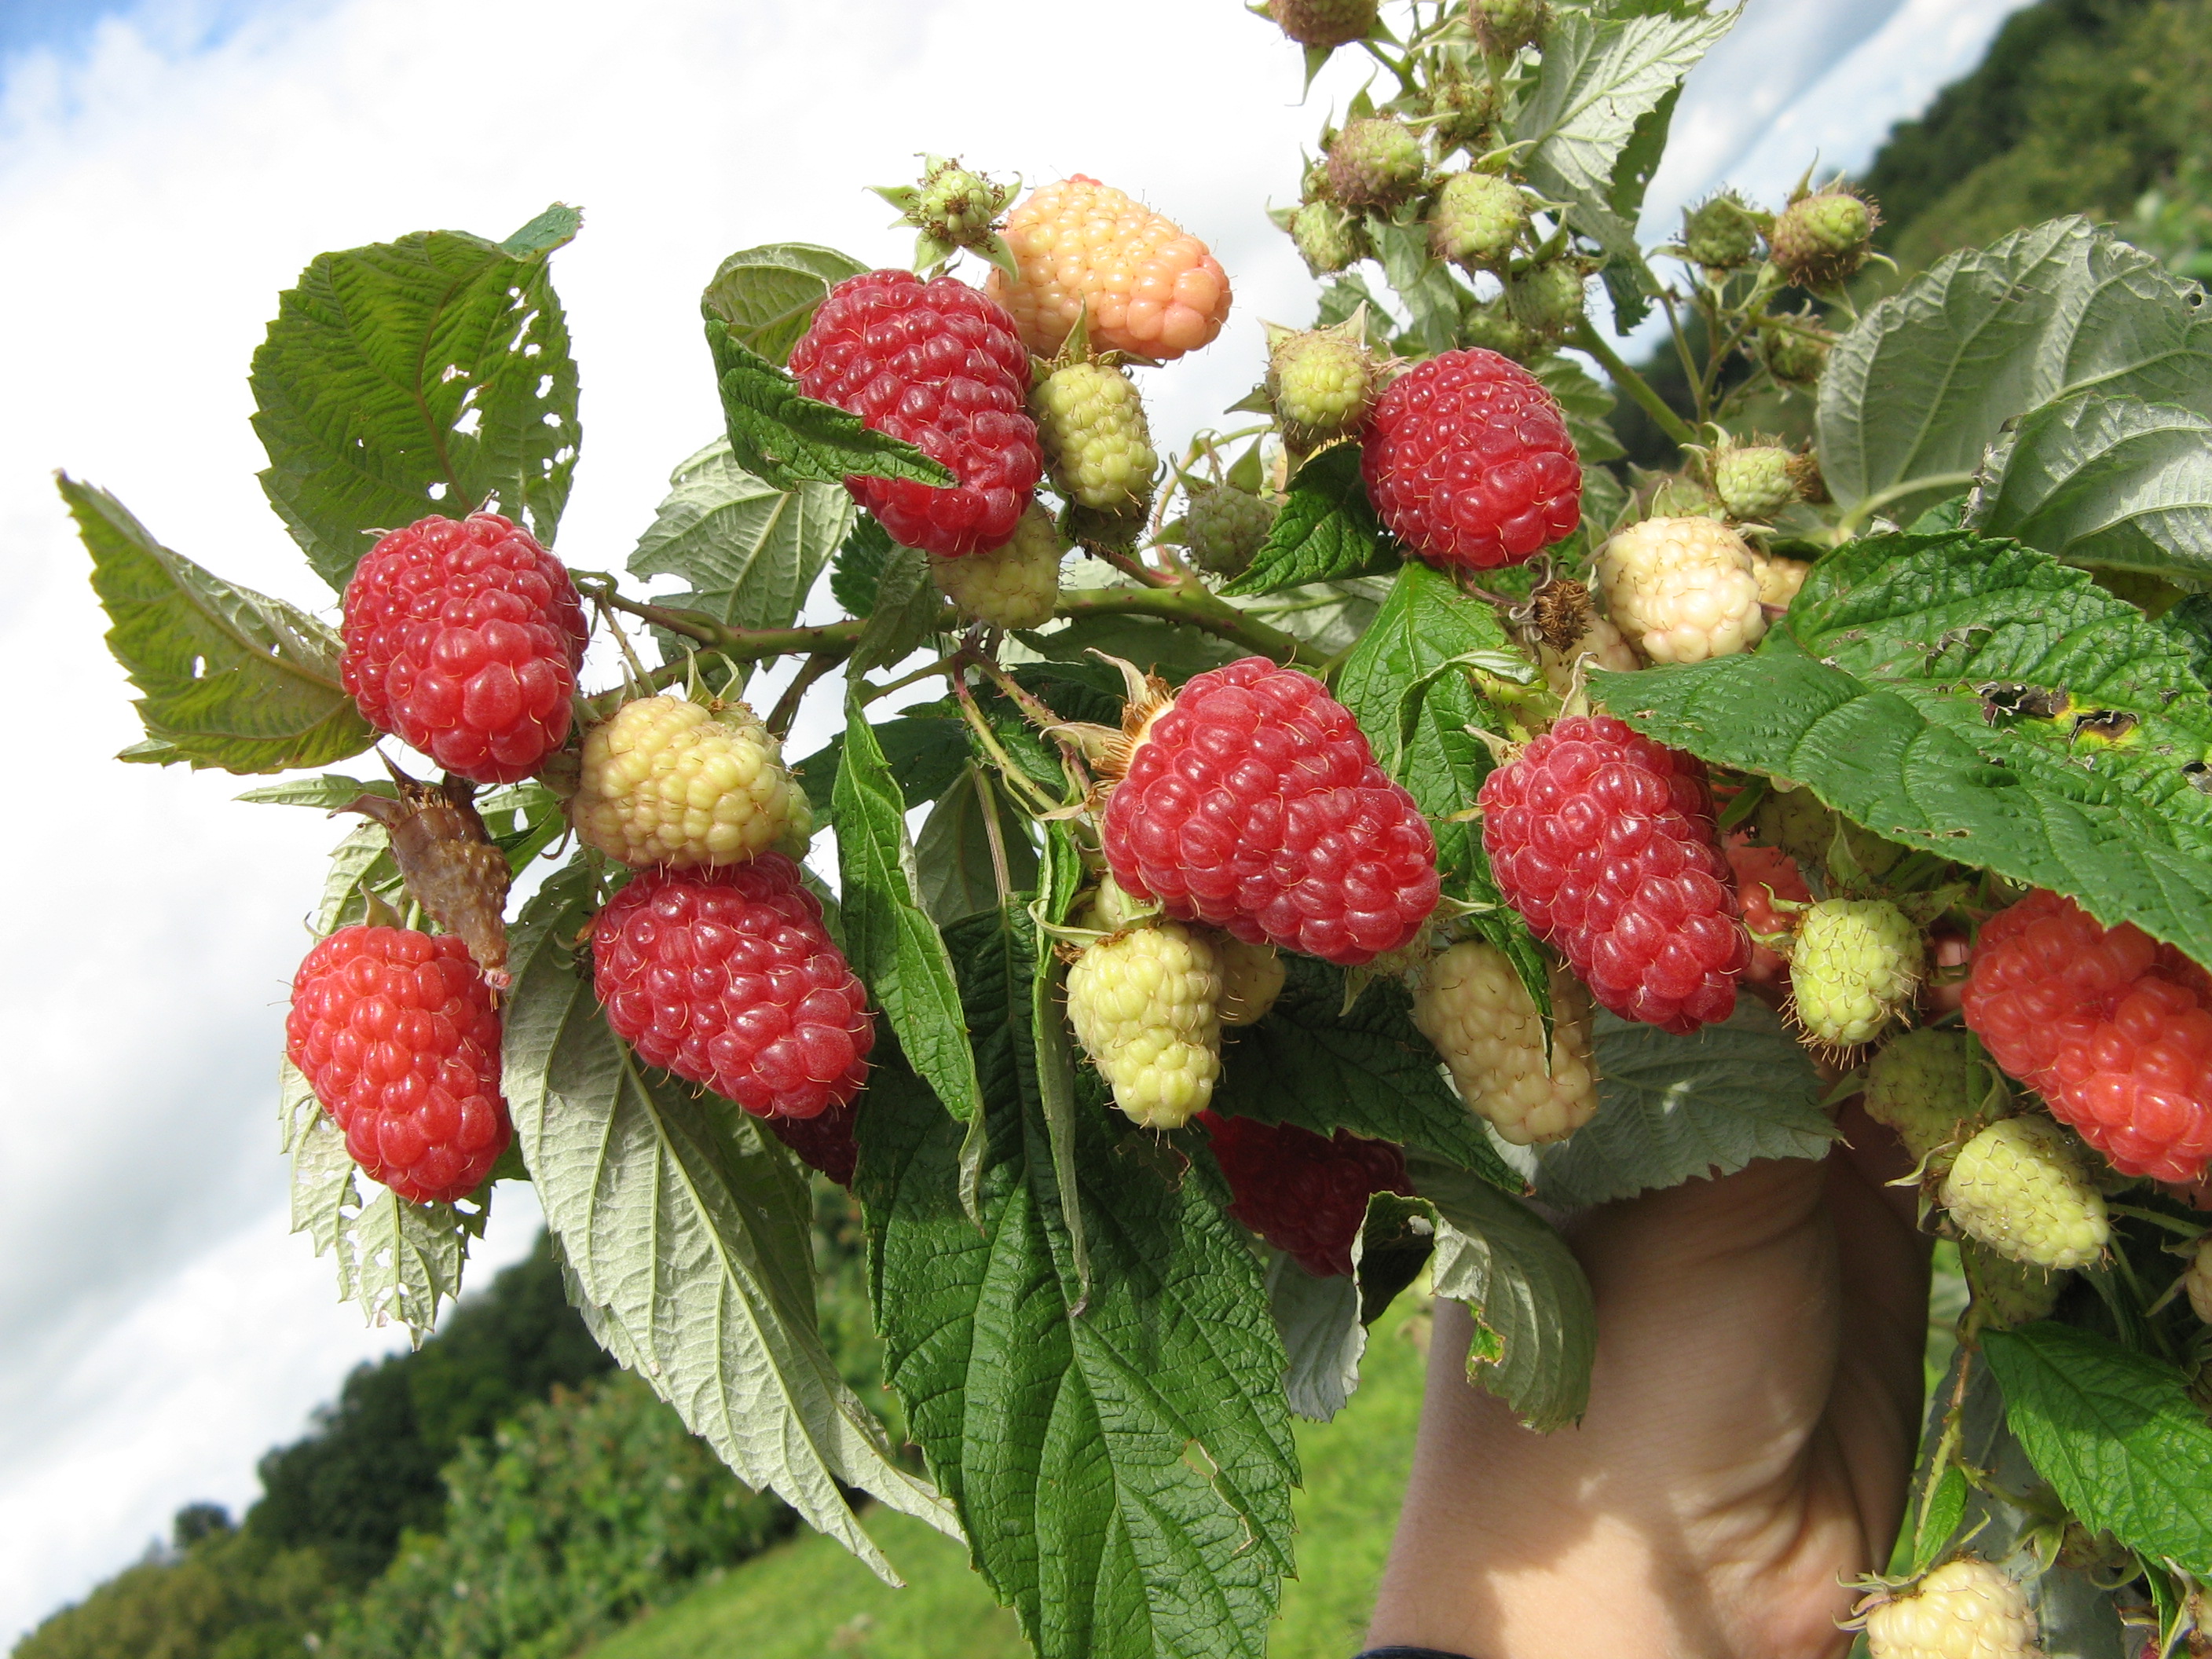
Picking raspberries is a yearly tradition in our family. We love to go out into the country and hide among the raspberry canes, popping berries into our mouths as we pick buckets full to freeze for the winter.


We freeze our raspberries on cookie sheets and then, once frozen, transfer them to freezer bags. They do lose some of their sweetness once they are frozen, but we still enjoy them in pies, crisps, muffins, and smoothies throughout the year.

I decided to try a savory dish with raspberries and found this recipe for grilled raspberry chicken. Unfortunately, that evening my grill decided not to start, so we had to bake the chicken instead. It still tasted terrific, the mustard and raspberry making a winning combination with the chicken. However, I'm sure it would be even better grilled.

As the recipe suggested, I topped the chicken with a few frozen (but thawed) raspberries. I think I preferred the chicken on its own with the cooking juices/sauce rather than with the whole raspberries.

I've also included a recipe for raspberry pie because fruit pies are my very favorite.


GRILLED RASPBERRY GLAZED CHICKEN
(eatbetteramerica.com)
Print this recipe


1/2 cup raspberry jam (I used Smucker's seedless Spreadable Fruit)
1 Tbsp. Dijon mustard
6 boneless skinless chicken breasts (about 1  3/4 lb)
1   1/2 cups fresh raspberries or frozen raspberries (thawed and drained)

Heat gas or charcoal grill in. In a small bowl, mix jam and mustard.

Carefully brush grill rack with canola oil or vegetable oil. Place chicken on grill over medium heat. Cover grill; cook 20-25 minutes, brushing occasionally with jam mixture and turning once, until juices in chicken run clear. Discard remaining jam mixture.

Serve chicken topped with raspberries.

Note: You can also bake the chicken at 350 for 40-50 minutes with the glaze on top of the chicken.

Serves 6.


RASPBERRY PIE
(The Cooks Next Door)
Print this recipe


pastry for a two-crust pie

8 cups fresh or frozen raspberries
juice of 1 lemon
1 cup sugar
1/4 cup cornstarch

Mix together cornstarch and sugar. Add lemon juice and sugar mixture to raspberries. Pour into a pastry-lined pie plate and top with pastry crust that has vent holes cut into it. Bake at 375F for 60-90 minutes (timing depends on fresh or frozen berries) until center of pie is bubbling. Allow to cool (pie will thicken as it cools).

Serves 8.

Other ideas for raspberries include using them to top a pavlova, serving them with an easy pannacotta, and stirring them into gluten-free muffins.

Friday, August 20, 2010

Weekend Fare & A Giveaway

Last night I made this scrumptious pizza - pizza dough, drizzled with olive oil, topped w/sliced fresh tomatoes (from our garden), scattered w/fresh chopped basil, seasoned w/salt & pepper, topped w/Italian blend shredded cheese, and finished w/leftover chopped grilled chicken. Yum. It was fresh and delicious. So there you have an idea for a sauceless pizza...had I grilled it, I have not doubt it would have been in my top favorite pizzas of all time. Anyway...

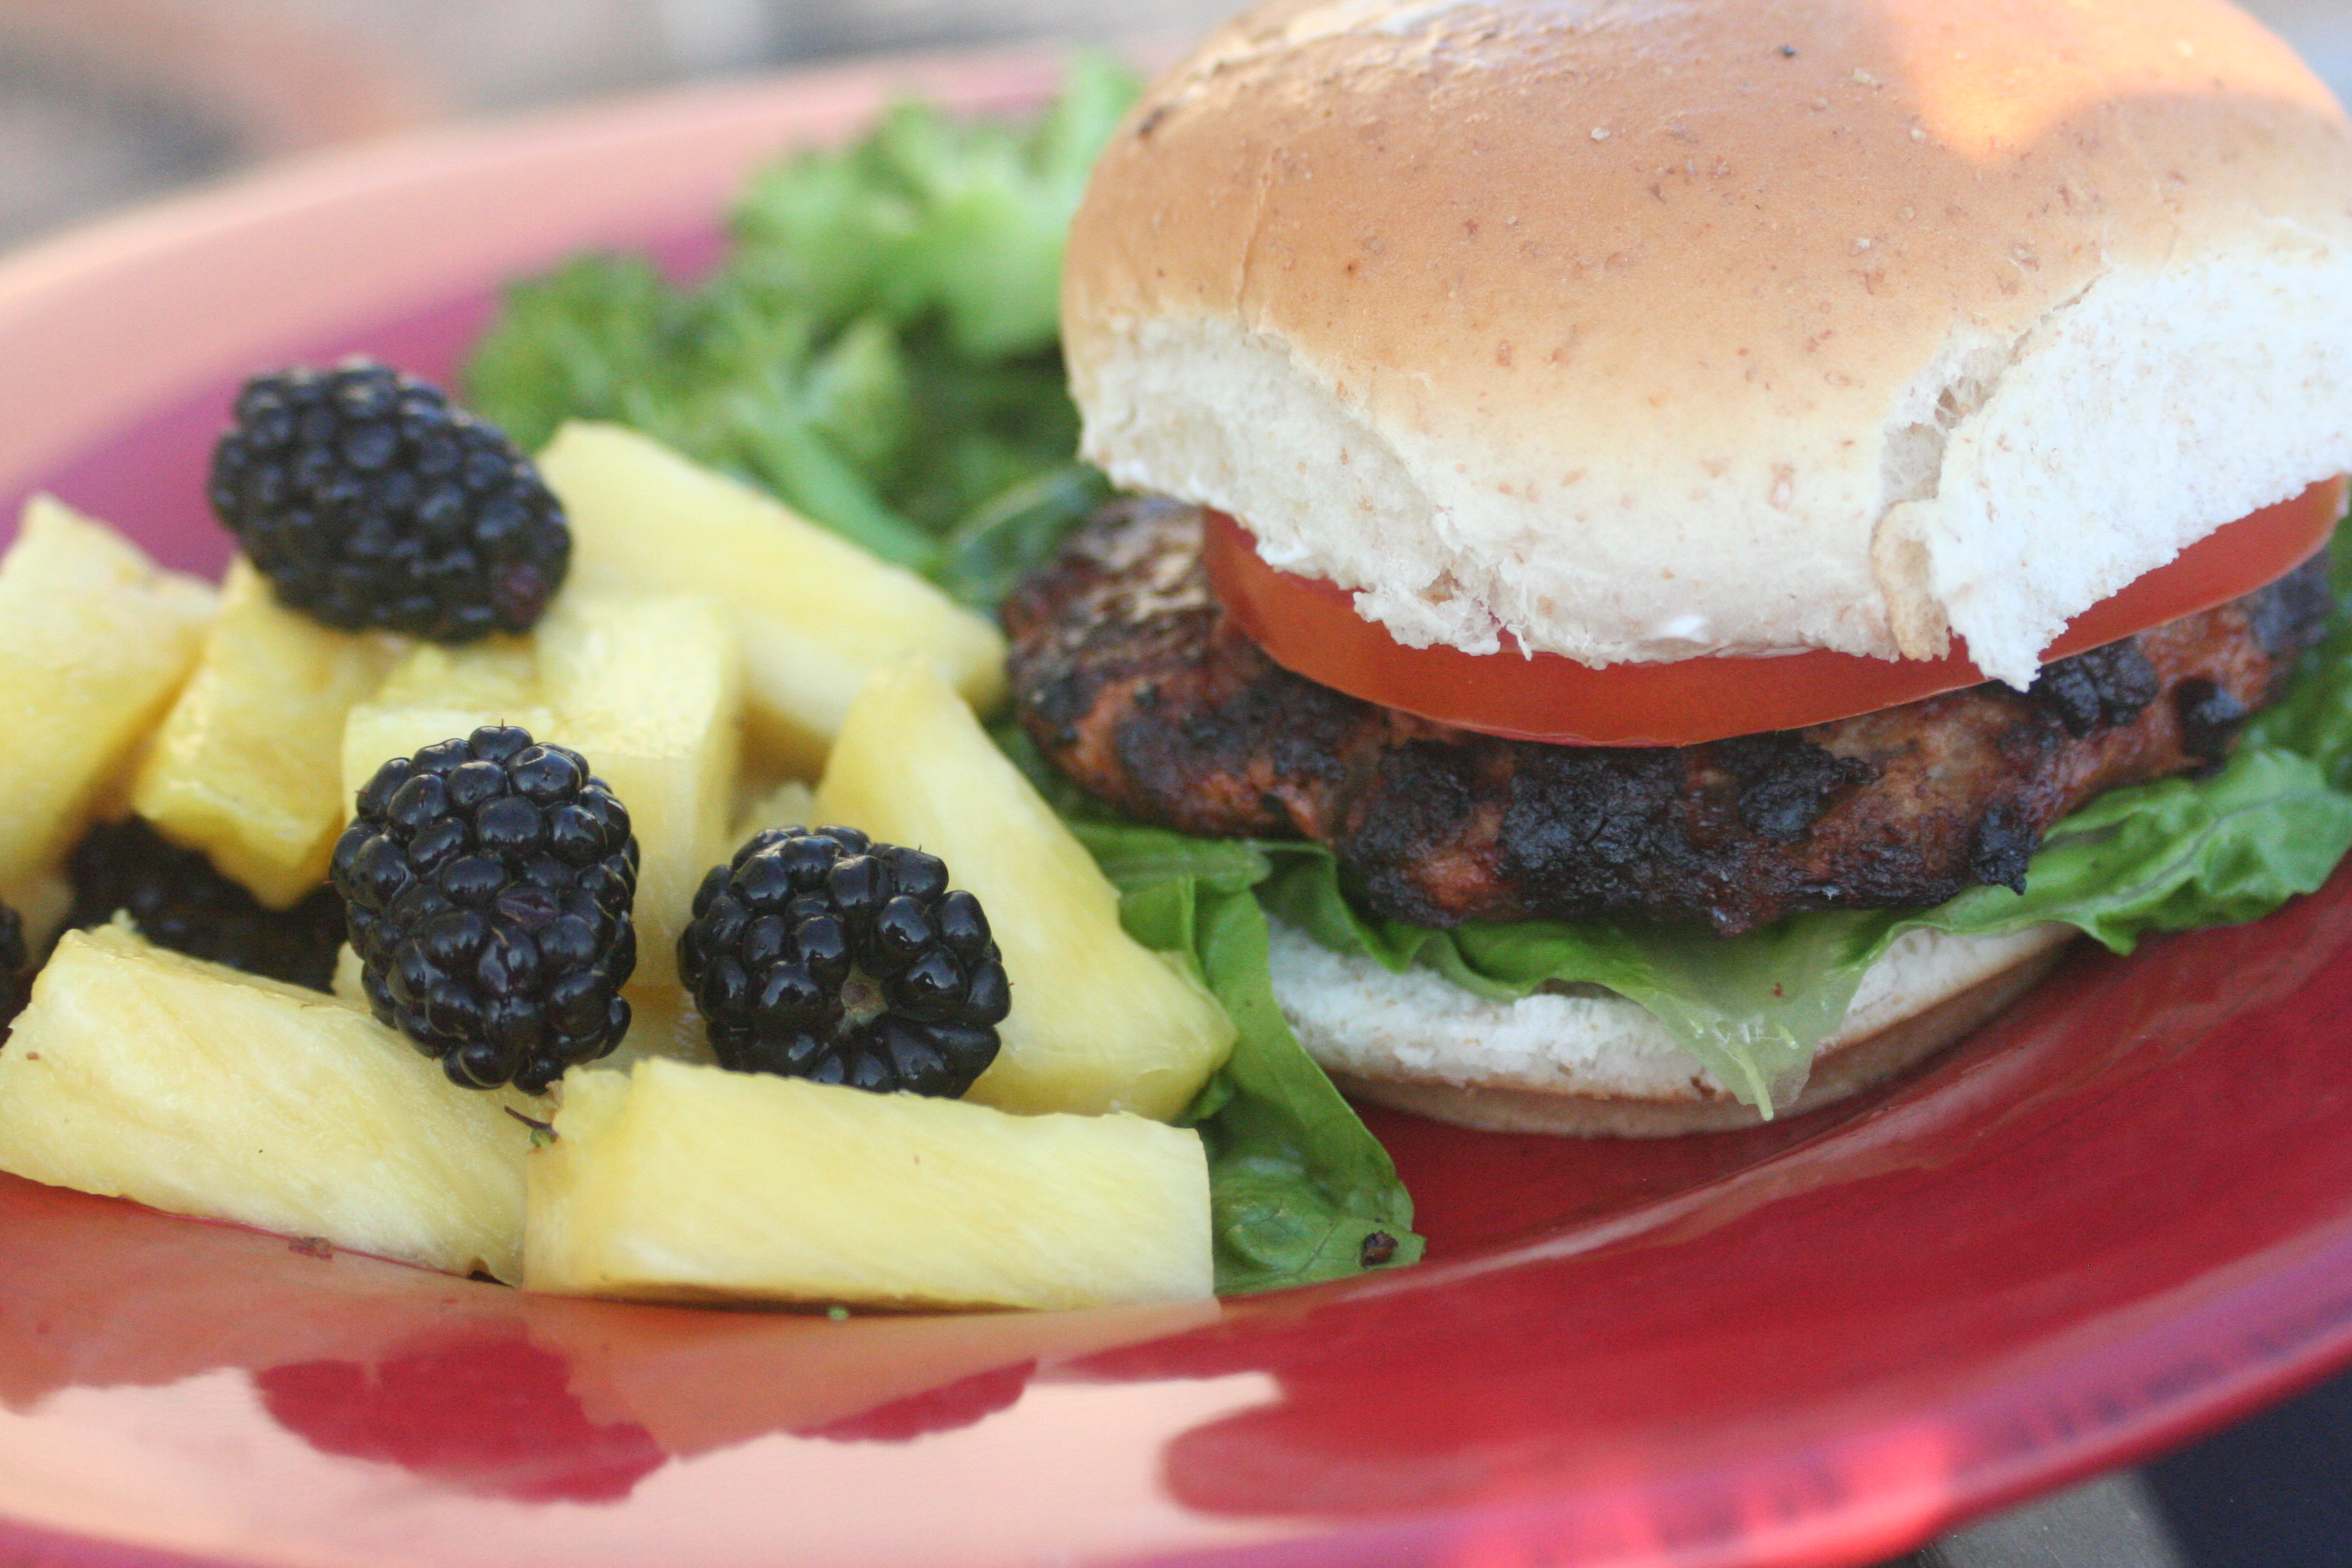
Homemade pork burgers are a delicous alternative to the classic hamburger. I created these one night with some ground pork from the farmer's market. We all enjoyed the sweetness added through the red pepper and the twist on a grilled burgers.


PORK BURGER
Print This Recipe

1 lb. ground pork
1/2 red onion (or any onion will do), finely chopped
1/4 red pepper, finely diced
1 clove garlic
2 tsp. smoked paprika
Salt & pepper to taste
1 egg
lettuce, tomato, mayo, ketchup, mustard (opt.)

Combine all ingredients. Grease & pre-heat grill or grill pan. Divide meat mixture into 6 patties. Grill until thoroughly cooked. Serve on a bun or lettuce with desired toppings. Enjoy.


_________________________________________________________


A GIVEAWAY!


It's about time for another giveaway! I'm not sure I want to actually give this book away - it's so fun and has such great, do-able ideas for entertaining. Without further ado, here it is:


Doesn't it just make you want to plan a party just from the cover? Party Food has plenty of delicious-sounding recipes for your next dinner party or birthday bash and the beautiful photos will inspire your creativity.  


TO ENTER:
- Leave a comment on this post telling us anything you would like related to cooking, the blog, an ingredient, or whatever topic you would like.
- Make sure we have a way to contact you!

For additional entries (just leave us a comment telling us which ones you have done!):
- Subscribe via the link to the right or with google reader.
- Add us to your blog roll.
- Join our facebook group – The Cooks Next Door.
- Facebook about this giveaway.
- Tweet about this giveaway.
- Blog about this giveaway.

There you go! You could earn as many as 7 entries. And if you already are in our group, subscribe etc, let us know and we will add in the extra entries!

I will close this giveaway on Wednesday, August 25, 2010 and randomly choose a winner. All the best!

Thursday, August 19, 2010

A Friday Post

Weekend Fare & a Giveaway are coming tomorrow! It was one of those weeks... :) See you in the morning!

Wednesday, August 18, 2010

Off The Shelf: Cooking with Flowers and Lavender


Summer is a great time to think about cooking with lavender and other flowers. This week we have two books to get you started in the right direction. (And, if you don't have lavender growing in your own garden, you can find it in the spice section of any good supermarket, or health food store.)

The Lavender Cookbook by Sharon Shipley has 182 pages full of recipes that ALL use lavender! After the basics (such as lavender rubs, sugar, syrup and butter), there are four chapters devoted to the four seasons with recipes such as: Lavender Scones, Lavender Chicken Breasts, Lavender Lemon Buttered Chicken, Old-Fashioned Cherry Pie with Lavender, California Lavender Pasta Salad, Lavender Lemon Cookies, Hot Lavender Cranberry Punch, Baked Spicy Pork Chops with Lavender and Apple, Lavender Blueberry Banana Bread, and Lavender Roasted Beets.

Not only can you cook with lavender, but you can use a myriad of other flowers to accent and decorate your cooking. This book, with plenty of photos, helps you identify safe flowers you can eat and gives you ideas on how to use flowers such as: yarrow, hollyhocks, borage, chicory, fuchsia, sunflower, day lily, honeysuckle, phlox, rose, red clover, and nasturtium.

I decided to try a green salad with sliced peaches and laced with nasturtium flowers and 'Alaska' nasturtium leaves. For the dressing I used a lavender vinaigrette out of the lavender cookbook. The dressing was a nice complement to the salad, and the taste of lavender was not "in your face" as it could have been. Lavender-Honey ice-cream from David Lebovitz was incredible.


LAVENDER VINAIGRETTE
(The Lavender Cookbook)
Print this recipe


1/3 cup extra-virgin olive oil (I used half canola, half olive oil)
1/3 cup balsamic vinegar
1/2 tsp. sea salt
1/2 tsp. dried culinary 'Provence' lavender buds, finely ground in a spice grinder (I just chopped them with a knife)

In a small bowl, whisk together the oil, vinegar, salt, and lavender.

Makes about 2/3 cup.


LAVENDER-HONEY ICE CREAM
(The Perfect Scoop)
Print this recipe


1/2 cup good-flavored honey
1/4 cup dried or fresh lavender flowers
1  1/2 cups whole milk
1/4 cup sugar (I left this out as it is quite sweet with just the honey)
pinch of salt
1  1/2 cups heavy cream
5 large egg yolks

Heat the honey and 2 tablespoons of the lavender in a small saucepan. Once warm, remove from the heat and set aside to steep at room temperature for 1 hour.

Warm the milk, sugar, and salt in a medium saucepan. Pour the cream into a large bowl and set a mesh strainer on top. Pour the lavender-infused honey into the cream through the strainer, pressing on the lavender flowers to extract as much flavor as possible, then discard the lavender and set the strainer back over the cream.

In a separate medium bowl, whisk together the egg yolks. Slowly pour the warm mixture into the egg yolks, whisking constantly, then scrape the warmed egg yolks back into the saucepan.

Stir the mixture constantly over medium heat with a heatproof spatula, scraping the bottom as you stir, until the mixture thickens and coats the spatula. Pour the custard through the strainer and stir it into the cream. [If the custard curdles -- simply whizz in your blender.] Add the remaining 2 teaspoons  lavender flowers (I left these out) and stir until cool over an ice bath.

Chill the mixture overnight in the refrigerator. The next day, before churning, strain the mixture, again pressing on the lavender flowers to extract their flavor. Discard the flowers, then freeze the mixture in your ice cream maker according to the manufacturer's instructions.

Makes about 1 quart.

Tuesday, August 17, 2010

Counter Culture

I finally made it to our local farmer's market last week! Our CSA has made trips to the farmer's market not entirely necessary.

There were so many beautiful things to choose from: peaches, heirloom tomatoes, green beans, huge melons, fresh corn, and even a few early acorn squash.


We have a fresh pasta stand as well. Fresh pasta is so superior to dried that it should almost be classified as a different food. If you haven't tried it, you must treat yourself! Someday, I'd love to try making some myself.


The baked goods always look so enticing:


I love the creative goodies that appeal to the children.


The highlight of the whole market was the free grilled corn, donated by all the vendors.


I bought some corn and tried it the next day -- absolutely delicious. In fact, I think I prefer this to boiled corn. If the corn is very fresh, you don't need to soak it overnight. Lay the corn (husk and all) on a hot grill and cook 5 minutes on either side.


The peaches look so amazing. I bought a big box of seconds for $5 and we ate and ate and ate for half the week, including 2 peach pies.


Another thing we tried on the grill this week was grilled eggplant rolls. We grilled slices of eggplant brushed with olive oil and then filled with a feta and mint filling. Very good!


And that resulted in this delicious salad of leftovers for lunch the next day:


I thought I'd put my menu from last week down, just so you can see what we really eat:

Monday: leftover steak that was tough, turned into Chinese Beef over brown rice

Tuesday: this pasta dish of squash, bacon and pasta

Wednesday: lentil soup from the freezer (busy day!)

Thursday: caprese salad, sautéed potatoes, kale chips, and sweet corn

Friday: homemade pizza with sautéed eggplant and sausage (the pig I ordered arrived this week and my freezer is full of sausage, hams, roasts, and bacon!)

School starts on Monday! Life will continue to be busy -- just in a different way! There's still plenty of summer food left. If you haven't visited your local farmer's market, why not give it a try!

Monday, August 16, 2010

Market Fresh: Okra

Okra is abundant in our garden at present. You can also find it at the Farmer's Market. It has never been a favorite vegetable of mine (it's a texture thing) but my husband loves it and, as we have discovered this sumer, so do our boys! I enjoyed it more this time than I ever have before - perhaps in part to these wonderful recipes (both of which happen to be by Alton Brown). If you have never tried okra or have had a past negative opinion, I encourage you to give these okra recipes a try.

I love how the cornmeal compliments the okra but doesn't overpower it. The textures work great together. I also like that is pan fried - not deep fried. Actually, these were just plain amazing - we couldn't get enough of these tasty pieces!


WET FRIED OKRA (Alton Brown)
Print This Recipe

1 pound okra, stems removed
1/2 cup cornmeal
Vegetable oil, for frying
Kosher salt

Cut the okra into 1/4-inch pieces and place into a colander. Rinse under cold water and allow to drain only slightly.

Place the cornmeal into a sealable ziptop bag. Add the okra and shake to coat thoroughly.

Add enough vegetable oil to a cast iron or stainless steel skillet in order to completely cover the bottom of the pan. Place over medium heat and heat until the oil reaches 370 degrees F (when you put a drop of water in, it sizzles). Add the okra all at once and fry until golden brown on 1 side, approximately 6 to 7 minutes. Do not disturb until the bottom is golden brown. Turn the okra with a spatula and do not disturb until the majority of the other side is golden brown as well, approximately 3 to 4 minutes. Now stir occasionally until all of the okra is golden on all sides, approximately another 3 to 4 minutes. Remove the okra from the pan with a slotted spoon or spatula to a cooling rack set over a newspaper-lined sheet pan. Season, to taste, with salt and allow to cool for 1 to 2 minutes before serving.

My husband absolutely loved this dish and all of the boys declared, "Yum." I think it's definitely a keeper. The flavors are excellent - the texture of the okra bothered me a little cooked this way but the flavor contrast makes me overlook the texture.


OKRA & TOMATOES (adapted slightly from Alton Brown)
Print This Recipe

1 pound okra, rinsed and trimmed
3 tablespoons olive oil
1 1/2 cups finely chopped onion
1 1/2 teaspoons kosher salt
1 tablespoon minced garlic
2 cups peeled and chopped tomato
1 tablespoon minced fresh ginger
1 teaspoon freshly black pepper 
1/2 teaspoon ground cardamom


Cut each okra pod in half lengthwise and set aside. If there are any pods longer than 4 inches, cut them in half crosswise and then lengthwise.

Heat the olive oil in a 4-quart saucepan over medium heat until shimmering. Add the onions along with the salt and cook until they begin to turn golden, approximately 4 minutes. Add the garlic and cook for 1 minute longer. Add the tomatoes and bring the mixture to a boil. Decrease the heat to low and add the ginger, pepper, cardamom and okra. Stir to combine. Cook, uncovered for 20 minutes. Remove from the heat, taste and adjust the seasoning as desired. Serve immediately.

Thursday, August 12, 2010

Weekend Fare: Tomato Basil Bean Salad

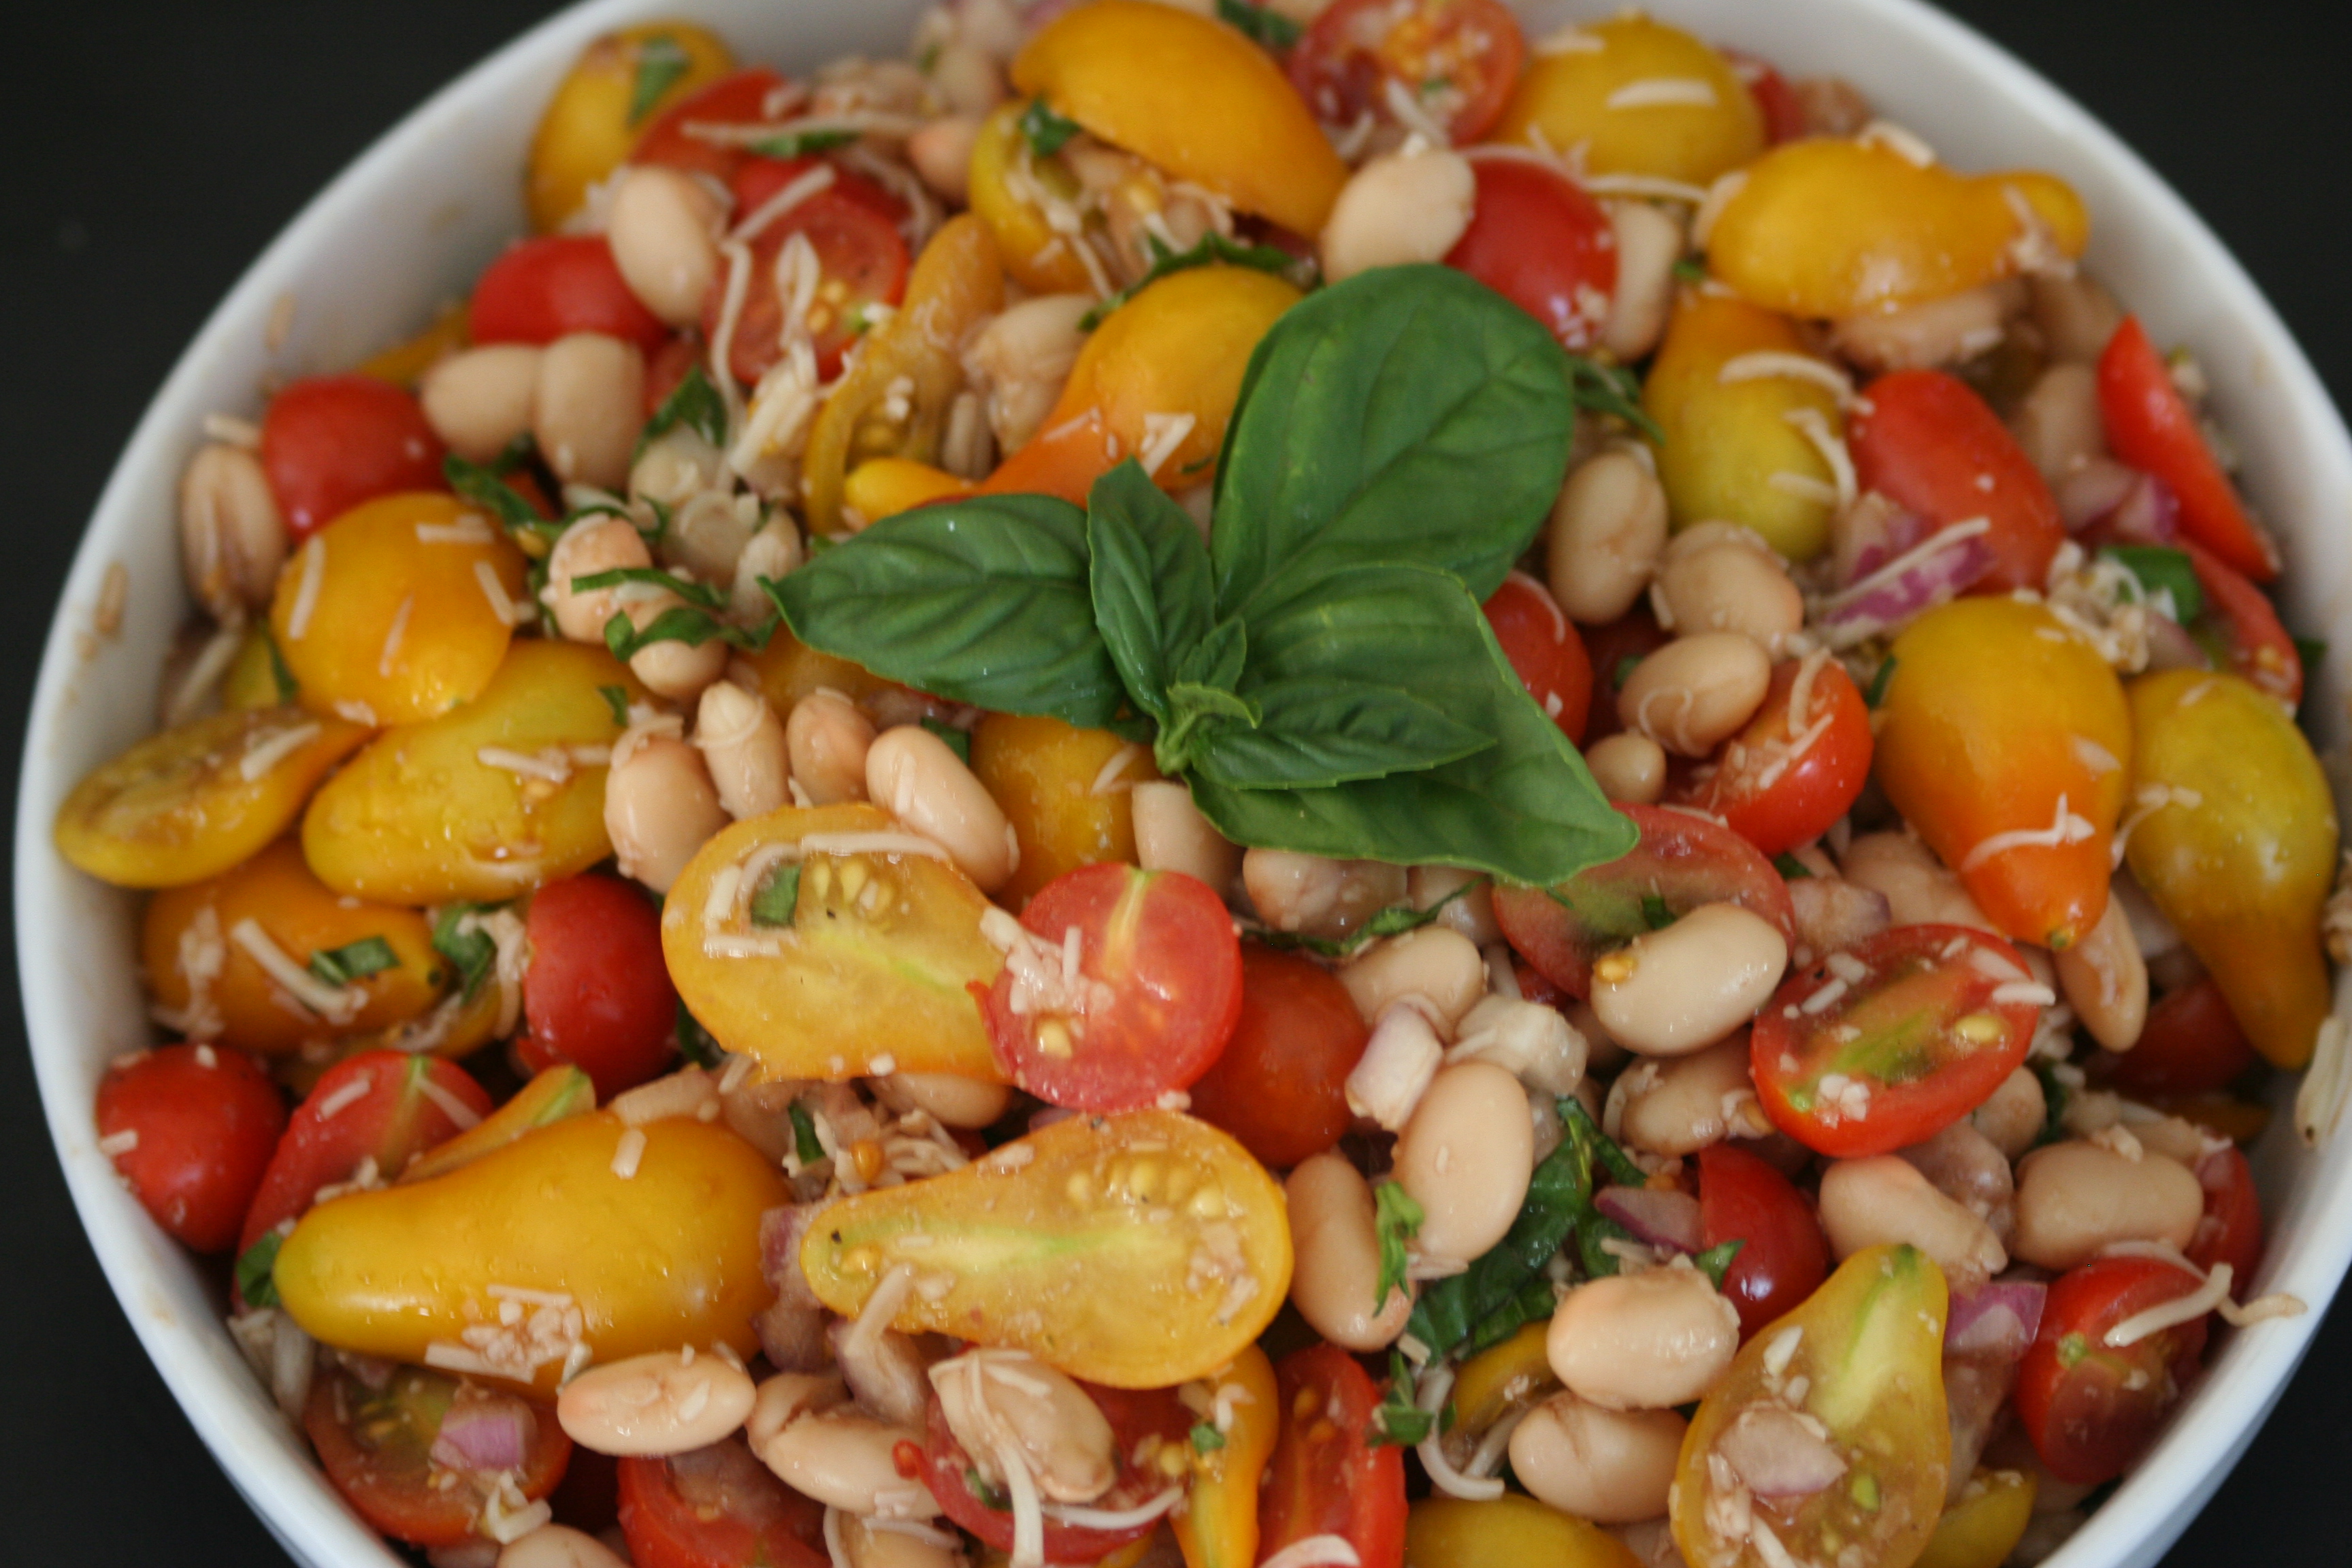
This is an orginal recipe I came up with for a picnic using ingredients I had on hand.  The tomato and basil came straight from the garden. This can be served at room temperature or for fuller more balanced flavors, chill for 1 hour before serving. It is a perfect picnic dish because nothing will spoil. Have a great weekend!

IMG_6580


TOMATO BASIL BEAN SALAD
Print This Recipe


1 - 16 oz. can white beans, drained & rinsed
1 med. red onion, finely diced
1/4 c. fresh basil, finely chopped or chiffonade
3-4 c. fresh cherry tomatoes, halved*
1/2 c. mozerralla cheese, small diced or shredded**
1 tsp. salt
1/4 tsp. pepper
1/4 c. olive oil
2-3 Tb. balsamic vinegar

Gently combine all ingredients. Chill, garnish with fresh basil (opt) & serve.  Makes 8-10 side dish servings.

* I used a combination of three types of small tomatoes including yellow pear which gave great color and flavor but is not necessary.
** Since I used everything that I already had on hand, I used shredded Italian Blend cheese.  I would have prefered to use a fresh mozzerella or a block of mozzerella cubed.

Wednesday, August 11, 2010

Off The Shelf: August Magazines

It's so fun browsing the various food magazines we receive in the mail and then deciding which ones will make the cut and what recipes we will try. It gives us a chance to try things maybe we wouldn't and to enjoy our subscriptions. So here are our picks for this month!

Saveur (Alaina) - This magazine features Greek food which I love! I thoroughly enjoy this publication - it has interesting articles about travel, food, techniques and more. It perhaps does not have as many recipes as some of the more well-known cooking magazines but the recipes they feature are excellent. I like that they choose a theme (or a couple of themes) and include several recipes that tie into that theme.

It was tough choosing the recipe I wanted to try, so I made two.  The first I already mentioned a couple of weeks ago - a Greek Salad. The second was this Greek Lasagne. It was wonderful! I'm not generally a big casserole fan but I loved this - it was a little time consuming but so worth it. The flavors and textures worked so well together. It made alot - I served 4 adults and 3 kids and still had half a casserole left which we enjoyed as leftovers. This recipe would be excellent for the occasions that you take a meal to someone.


GREEK LASAGNE (PASTITSIO) - Saveur, August 2010
Print This Recipe

FOR THE MEAT SAUCE:

1⁄3 cup extra-virgin olive oil

2 green bell peppers, cored, seeded, and minced

2 medium yellow onions, minced

1 lb. ground beef, veal, or pork

3 oz. dry-cured chorizo, minced

2 cups canned crushed tomatoes

1⁄3 cup red wine

1⁄4 tsp. crushed red chile flakes

2 fresh or dried bay leaves

1  2" cinnamon stick

Kosher salt and freshly ground black pepper,  to taste

Freshly grated nutmeg, to taste

FOR THE BÉCHAMEL AND PASTA:
8 tbsp. unsalted butter

1 cups  flour

4 cups milk

1 cup grated Parmesan cheese

3 eggs, separated

Kosher salt and freshly ground black pepper, to taste

Freshly grated nutmeg, to taste

1lb. No. 2 Greek macaroni, bucatini, or elbow macaroni

2 tbsp. extra-virgin olive oil

1. Make the meat sauce: Heat oil in a 12" skillet over medium-high heat. Add peppers and onions and cook, stirring often, until soft, 8–10 minutes. Using a slotted spoon, transfer onion mixture to a plate and set aside. Add ground meat and chorizo to skillet and cook, breaking meat up into tiny pieces, until browned, 6–8 minutes. Add reserved onion mixture, along with tomatoes, wine, chile flakes, bay leaves, and cinnamon and bring to a boil. Reduce heat to medium and cook, stirring often, until sauce thickens, about 15 minutes. Remove sauce from heat, discard bay leaves and cinnamon, and season with salt, pepper, and nutmeg; let cool.

2. Make the béchamel: Heat butter in a 4-qt. saucepan over medium-high heat. Add flour and cook, whisking constantly, until smooth and slightly toasted, 1–2 minutes. Add milk; cook, whisking often, until sauce coats the back of a spoon, 8–10 minutes. Remove from heat, add 3⁄4 cup cheese and egg yolks; season with salt, pepper, and nutmeg. Stir until smooth; set aside.

3. Heat oven to 350°. Bring a large pot of salted water to a boil; add pasta and cook halfway through, about 5 minutes. Meanwhile, whisk egg whites in a large bowl until frothy. Stir in remaining cheese; drain pasta in a colander and then toss with egg white–cheese mixture to coat evenly. Set aside.

4. Grease a deep 9" x 13" baking dish with olive oil. Place half the pasta mixture on bottom of dish and cover evenly with meat sauce. Top with remaining pasta mixture. Pour béchamel over pasta, spreading it evenly with a rubber spatula. Bake until the top is golden brown, about 1 hour. Transfer to wire rack; cool 20 minutes before serving.

SERVES 10 – 12


Bon Appetit
(Alaina) - Yum. That describes this entire issue. I was especially tempted by their many desserts - just look at the cover! Even my 2 year old was taken by this issue and insisted on looking at it several times and pointing out the photos of delicious looking food while saying, "Mmm!"

This is an issue I will hang on to and hopefully make many more of the recipes. I chose to make the Sour Cream Pound Cake w/Lavendar Peaches. Cooking with lavendar is new to me and so I really wanted to give this a try. And the verdict is - go.make.this.recipe. It was so summery and absolutely delicious. Halfway through the recipe as I was making the lavendar simple syrup and I was a little nervous - it smelled so floral. But by the end, with the peaches infused into the syrup, the result was a perfect balance of fruit and floral. And let's not forget the cake - with vanilla bean and sour cream, it was moist and flavorful. I will definitely cook with lavendar again!


SOUR CREAM POUND CAKE w/LAVENDAR PEACHES - Bon Appetit, August 2010
Print This Recipe

CAKE
3/4 c. plus 1 Tb. flour
1/4 c. cornstarch
3/4 tsp. baking powder
1/2 tsp. fine sea salt
3/4 c. sugar
10 Tb. unsalted butter, room temperature
1 vanilla bean, split lengthwise
1 lg. egg
1 lg. egg white
2 tsp. vanilla extract
1/2 c. sour cream

Preheat oven to 325. Butter a metal loaf pan (8 1/2 x 4 1/2 x 2 3/4 inch). Dust pan with flour; tap out excess. Sift 3/4 c. plus 1 Tb. flour, cornstarch, baking powder, and salt into medium bowl. Combined sugar and butter in large bowl; scrape in seeds from vanilla bean (reserve bean for lavender syrup). Using electric mixer, beat sugar mixture until fluffy. Add egg, egg white, and vanilla extract; beat until mixture is pale and thick, about 2 minutes. Beat in sour cream. Add flour mixture; beat just until blended. Spread batter evenly in prepared pan.
Bake cake until tester inserted into center comes out clean, 56-58 minutes. Cool in pan on rack 15 minutes. Turn cake out, then turn top side up. Cool completely. (Can be made 1 day ahead. Wrap in foil and store at room temperature.)

LAVENDER SYRUP & PEACHES
1 1/2 c. sugar
3 Tb. dried lavender blossoms
4 medium firm but ripe peaches, pitted, cut into 3/4-inch wedges
3 Tb. fresh lemon juice
1 c. chilled heavy whipping cream

Combine 2 1/4 c. water, sugar, lavender, and reserved vanilla bean in saucepan. Boil, stirring until sugar dissolves. Remove from heat; cover and let steep 10 minutes. Strain syrup into medium bowl; discard lavender. Pour 2 Tb. lavender syrup into small bowl; reserve for whipped cream. Cover and chill. Return remaining syrup to same saucepan; add peaches and lemon juice and bring to boil. Reduce heat; simmer about 5 minutes. Transfer peaches to bowl. Boil syrup in pan until reduced to 1 c., 12-14 minutes (it took longer for me). Pour over peaches. Chill uncovered 2 hours.
Beat cream and 2 Tb. reserved syrup in medium bowl to soft peaks. Slice cake. Serve with peaches, syrup, and cream.


Cooking Light (Heather): The August edition is a thick, summer issue with plenty of good ideas. We tried the Sweet and Spicy Citrus Tilapia and it was so very good. I don't cook a lot of fish, but this recipe makes me want to put it on our menu more often. It was easy and delicious and everyone had clean plates.

I also tried their recipe for Quick and Easy Pickles and a huge jar is sitting in my refrigerator right now. It was a great way to use garden surplus (it works for cucumbers and zucchini!).

Summer Squash and Corn Chowder is on my list of things to make -- it looks so delicious in the magazine picture and would be a great way to use up extra corn and squash!

The issue is very festive with page after page of summer food. Many of the recipes are a bit more gourmet than I would make, but they are fun to look through and there are a handful of really good and useful recipes for the average cook.


SWEET AND SPICY CITRUS TILAPIA
(Cooking Light, August 2010)

Print this recipe

4 (6-ounce) tilapia fillets

cooking spray

1/2 cup fresh orange juice (about 1 orange)

3 Tbsp. fresh lime juice

1 Tbsp. brown sugar

1 Tbsp. extra virgin olive oil

2 tsp. lower sodium soy sauce

1/2 tsp. salt

1/2 tsp. ground cumin

1/4 tsp. black pepper

1/4 tsp. ground red pepper

2 garlic cloves, crushed

1/2 tsp. paprika

Arrange fish in a single layer in a shallow roasting pan coated with cooking spray. Combine orange juice and next 9 ingredients (through garlic); pour over fish. Let stand 15 minutes.

Preheat broiler. Sprinkle fish with paprika; broil 15 minutes or until desired degree of doneness. Drizzle sauce over fish. Serves 4.

NOTE: I didn't have any orange juice in the house (and Alaina didn't either!) so I had to improvise: I removed the brown sugar and put in about 3 Tbsp. of orange marmalade to replace the orange juice and brown sugar. It was perfect!

  Martha Stewart Living (Heather): We don't often include Martha Stewart magazine because it's not exclusively a food magazine. However, this month it included the most amazing summer recipe that is also extremely easy -- all it takes is time to boil the pasta and you are finished!


Tomato and Basil Pasta is the pasta version of Caprese Salad. If you love that salad, you will love this pasta. My kids loved it too. We've made it twice and it is on the menu for this week again. You could also add some Kalamata olives to dress it up a bit.


TOMATO AND BASIL PASTA
(Martha Stewart, August 2010)
Print this recipe

1/4 cup extra virgin olive oil
3 garlic cloves, thinly sliced
1/2 tsp. coarse salt
1/2 tsp. freshly ground black pepper
1 pound cooked short pasta
4 medium tomatoes
1 pound fresh mozzarella cheese
basil leaves


Combine olive oil, garlic cloves, salt and pepper in a large bowl. Toss in cooked and drained pasta. Tear tomatoes and mozzarella and scatter over pasta. Garnish with basil leaves and sprinkle with pepper. Serves 4.
Tuesday, August 10, 2010

My Kitchen View

This weekend we enjoyed the great outdoors! We camped at McCormick's Creek State Park and thoroughly enjoyed it. We made the traditional hotdogs and s'mores of my childhood - no camping trip would be complete without them! We also had pies made in our pie irons. We made burrito pies - tortillas, refried beans, cheese, and salsa cooked over the fire and peach pies - buttered bread, peach pie filling, and a couple of marshmallows cooked. Delicious! I wish I had pictures but keeping three young boys safe around the fire and just getting dinner completed took quite a bit of effort. :)

On the cherry front, I must share that I invested in a cherry pitter and haven't looked back. If you like cherries, go buy one...you will not regret it. It makes cherry dishes so much easier and we all enjoy eating them pit-free - it's not only more polite but it's less messy!


We've been enjoying things from our garden! Recently I made a garden-fresh pasta that included summer squash, basil and fresh tomatoes! We all loved the vegetables, parmesan garlic cream sauce, onion, and bacon over the sun-dried tomato pasta. It was a use-what-we have kind of night and it worked!


What's been happening in your kitchens and gardens?

Monday, August 9, 2010

Market Fresh: Cherries

Cherries are perhaps one of my very favorite fruits. I like them sweet or tart and I am hard-pressed to pass up a piece of cherry pie or a jar of preserves. The flavor and texture of this wonderful fruit amaze me every summer. I'm content enough to just sit with a bowl of cherries and eat them by themselves but I wanted to share some different uses for them. And yes, there is a cherry salsa - I thought it only fitting after the yummy blueberry salsa Heather posted a couple of weeks ago! My two-year-old gobbled it down though we all liked it!

I found and adapted these recipes from a couple of cherry grower websites. They were all delicious and showcase cherries in some different ways. It was fun using them in a couple of more savory dishes and the honeydew and cherry salad was very refreshing! Hope you enjoy!


CHERRY ROMAINE SALAD w/SMOKED TURKEY
Print This Recipe

1 head Romaine lettuce, medium-chopped
1/2 cup crumbled feta cheese
1/4 cup diced green onion or chives
1 can (11-ounce) mandarin oranges
1 cup smoked turkey, diced
2/3 cup sweet cherries, washed, pitted and halved (I used Ranier)
balsamic vinaigrette (recipe below)
Balsamic Vinaigrette:
1/3 cup extra-virgin olive oil
2 tablespoons balsamic vinegar
1 tablespoon dijon mustard
1 teaspoon honey
1/4 teaspoon salt
freshly ground pepper to tasteToss all salad ingredients together except cherries in a large bowl.Whisk all Balsamic Vinaigrette ingredients together in a bowl. Drizzle balsamic vinaigrette over salad, reserving 1 tablespoon of vinaigrette, and toss salad. Drizzle remaining vinaigrette over cherries and toss to coat. Arrange salad on individual plates and sprinkle with cherries.Serves 4


MINTY CHERRY & HONEYDEW SALAD
Print This Recipe

1/4 honeydew melon, seeds and skin removed, and cut into 1/2" cubes
1/4 cup minced fresh mint plus mint sprigs for garnish
2 tablespoons light honey
1 1/2 cups pitted fresh cherries
lemon juice
juice of 2 limes

Put the cantaloupe, honeydew melon, and minced fresh mint in a bowl and turn several times. Put the honey in a bowl with the lemon juice and stir until the honey dissolves, a minute or two. Pour this over the melons and turn several times. Add the cherries, turning them in as well. Pour the lime juice over all, garnish with mint sprigs and serve.

Serves 6


FRESH CHERRY SALSA
Print This Recipe

1 cup pitted fresh sweet cherries (I used a combination of bing & ranier cherries)
2 tablespoons chopped fresh basil
2 tablespoons finely chopped green peppers
1 teaspoon lemon juice
1/4 teaspoon grated lemon peel
1/8 teaspoon salt
dash bottled hot pepper sauce

Chop cherries in food processor or manually. Combine all ingredients; mix well. Refrigerate at least 1 hour. Makes 2 servings.

Thursday, August 5, 2010

Weekend Fare: Kabobs

We recently had a family gathering and made beef and chicken kabobs. They were delicious! I marinated the meats, soaked the bamboo skewers in water, and then slid the chunked meat onto the sticks. My brother took over with the grilling but they were delicious served with a side of rice and salads.

Both of these recipes were adapted from the Food Network website (Alton Brown & Emeril Lagasse).


STEAK KABOBS
Print This Recipe

1/2 cup olive oil
1/3 cup soy sauce
4 scallions, washed and cut in 1-inch pieces 
2 large cloves garlic
1/4 cup lime juice
1/2 teaspoon red pepper flakes
1/2 teaspoon ground cumin
3 tablespoons brown sugar
2 pounds steak, cut into 1 - inch pieces

Combine all ingredients and pour over the steak pieces. Marinate for at least 2 hours. Skewer meat and grill to desired doneness.

CHICKEN KABOBS
Print This Recipe

4 chicken breasts, cut into 1 -inch cubes
Kosher salt
1/3 cup good olive oil
2 teaspoons grated lemon zest (2 lemons)
1/3 cup freshly squeezed lemon juice
1 tablespoon minced garlic (3 cloves)
1 tablespoon minced fresh rosemary leaves
Freshly ground black pepper

Sprinkle the chicken with salt. Combine the olive oil, lemon zest, lemon juice, garlic, rosemary, and 1 teaspoon pepper in a small measuring cup. Place the chicken in a ceramic or glass dish. Pour the lemon marinade over the chicken pieces. Cover the dish with plastic wrap and refrigerate for at least 4 hours or overnight. Stir the chicken 2 or 3 times while marinating. Skewer chicken and grill until done.

Wednesday, August 4, 2010

Off The Shelf: The Perfect Scoop


After my recent ice-cream maker purchase a friend recommended David Lebovitz' The Perfect Scoop. I've found it chock full of great ideas. The book covers ice-creams, sorbets and sherbets, granitas, sauces and toppings, and mix-ins. Check out some of the flavors, which range from traditional to way-out:

Vanilla, Chocolate-Raspberry, Coffee Frozen Yogurt, Cinnamon Ice Cream, Green Tea Ice Cream, Fresh Ginger Ice Cream, Date, Rum and Pecan Ice Cream, Orange Popsicle Ice Cream, Oatmeal-Raisin Ice Cream, Goat Cheese Ice Cream, Cheesecake Ice Cream, Lavender-Honey Ice Cream, Sweet Potato Ice Cream with Maple-Glazed Pecans, Sour Cherry Frozen Yogurt, Pear-Caramel Ice Cream, Olive Oil Ice Cream, Avocado Ice Cream, Fresh Mint Ice Cream;

Mango Sorbet, Cantaloupe Sorbet, Lime Sorbet, Lemon Sherbet, Chocolate-Tangerine Sorbet, Apricot Sorbet, Blackberry Sorbet, Strawberry-Rhubarb Sorbet, Pineapple Sorbet;

Espresso Granita, Plum Granita, Nectarine Granita, Strawberry Granita, Grape Granita, Mojito Granita, Pink Grapefruit Granita, and Kiwifruit Granita.

The books ends with more sauces and toppings than you can imagine. It is the "perfect handbook" for anyone wanting to make gourmet ice-creams at home.

I chose to try the Strawberry-Sour Cream Ice Cream. It was incredibly smooth and delicious. The sour-cream added a delightful sour note to balance the sweetness of the sweetened berries. It was most enjoyable just churned, rather than hardened in the freezer. I highly recommend it!


STRAWBERRY-SOUR CREAM ICE CREAM
(The Perfect Scoop)
Print this recipe


1 pound (450g) fresh strawberries, rinsed and hulled
3/4 cup sugar (I used 1/4 cup)
1 Tbsp. vodka or Kirsch (alcohol helps keep ice-cream from freezing too hard; it is optional)
1 cup sour cream
1 cup heavy cream
1/2 tsp. freshly squeezed lemon juice

Slice the strawberries and toss them in a bowl with the sugar and vodka or kirsch, stirring until the sugar begins to dissolve. Cover and let stand at room temperature for 1 hour, stirring every so often.

Pulse the strawberries and their liquid with the sour cream, heavy cream, and lemon juice in a blender or food processor until almost smooth but still slightly chunky.

Refrigerate for 1 hour, then freeze in your ice cream maker according to the manufacturer's instructions.

Makes about 1  1/4 quarts.

This post contains affiliate links.

Tuesday, August 3, 2010

Counter Culture

Summer is a beautiful time in the kitchen. There are so many fresh, colorful, delicious foods to set on the table. Here is a pictorial tour of what's been happening on my counters:

Fried Squash Blossoms: these are a once-a-year treat! Stuffed with ricotta, garlic and herbs, and then fried in a mesa flour batter, they are an amazing appetizer. One hint: pick your flowers early in the day before they close up! Otherwise they are just too hard to stuff.


Grilled Pizza: I did go ahead and try Bobby Flay's recipe. We all loved it. The grilled pizzas did take a lot longer than I hoped. First we had to cook enough flatbread for 8 people, then we had to put on the toppings and get them all back on the grill.


Once I resigned myself to this being an "event" rather than just a quick dinner, things went a lot better. It's an ideal meal to make with company on your back patio with a beautiful evening to enjoy.


Kale Chips: You may have noticed that Kale Chips are all the rage on the internet this year. When a large bunch of kale arrived in our CSA produce recently I decided to join the crowd. Surprise, surprise! The kale chips were absolutely amazing and I'll be making those again! (Here is a recipe to try.)


Jam: One day a friend came over and we made jam: peach, peach-ginger, strawberry-rhubarb, and mint jelly. The sheet that comes inside the pectin boxes has just about any basic recipe on it and we followed that for most of what we did. For the peach-ginger jam, I added chopped crystallized ginger to the peach recipe. (In case you are wondering what's wrong with the mint jelly -- the jar pictured was the leftovers in the pot, including the scum.)


I finally harvested some rainbow swiss chard from my garden!


It seems once a summer we sit down to an all yellow meal!


I hope you all are also enjoying the delicious produce of summer!