Thursday, December 22, 2011

Gingerbread Cookies

We enjoyed having friends over to decorate giant gingerbread people - candy, icing, sprinkles, the works! It was much less work than houses for our age group.

So I was in search of the perfect gingerbread cookie recipe and I think this one is pretty close! The recipe I adapted it from received great reviews but after reading them and reading the recipe, I adjusted the spices. So, this is my version of gingerbread.

I rolled these out but I'm also thinking you could form them into balls, dip the bottom of a cup in sugar and flatten the cookies before baking. If you do the latter, I think the refrigeration time would matter less.

These make your house smell wonderful and they are truly delicious - not too sweet. It was so fun making memories with my kids and their friends as they decorated their people. Their cookies were be-decked with candy - too cute! My examples are not nearly as cute. :)


GINGERBREAD COOKIES
Print This Recipe

3 c. flour
1 tsp. baking soda
1 1/2 tsp. ground cinnamon
1 1/2 tsp. ground ginger
1 tsp. ground allspice
3/4 tsp. ground cloves
1/2 tsp/ salt
1/4 tsp. freshly milled black pepper
2 stick unsalted butter, softened
1/4 c. vegetable shortening, at room temperature
1/2 c. packed light brown sugar
2/3 c. unsulfured molasses
1 large egg


Position the racks in the top and bottom thirds of the oven and preheat to 350 degrees F.

Combine the flour, baking soda, cinnamon, ginger, allspice, cloves, salt and pepper into a medium bowl.  Set aside.

In a large mixer, beat the butter and vegetable shortening until well-combined, about 1 minute.  Add the brown sugar and beat until the mixture is light in texture and color, about 2 minutes. Beat in the molasses and egg.  Gradually mix in the flour mixture to make a stiff dough.  Divide the dough into two thick disks and wrap each disk in plastic wrap.  Refrigerate until chilled - at least 3 hours.  (The dough can be prepared up to 2 days ahead.)

To roll out the cookies, work with one disk at a time, keeping the other disk refrigerated.  Remove the dough from the refrigerator and let stand at room temperature until just warm enough to roll out without cracking, about 10 minutes. (If the dough has been chilled for longer than 3 hours, it may need a few more minutes.) Place the dough on a lightly floured work surface and sprinkle the top of the dough with flour.  Roll out the dough 1/8 inch thick, being sure that the dough isn't sticking to the work surface (run a long meal spatula or knife under the dough occasionally just to be sure, and dust the surface with more flour, if needed).  For softer cookies, roll out slightly thicker (about 1/4 inch or a little less).  Using cookie cutters (or these templates - I printed the large boy and girl on cardstock and cut around them), cut out the cookies and transfer to nonstick cookie sheets, placing the cookies 1 inch apart.  Gently knead the scraps together and form into another disk.  Wrap and chill for 5 minutes before rolling if it is sticking and then cut out more cookies.

Bake until the edges of the cookies are set and crisp, 10 to 12 minutes.  Cool on the sheets for 2 minutes, then transfer to wire cake racks to cool completely.  Decorate as desired.  (The cookies can be prepared up to 1 week ahead, stored in airtight containers at room temperature.) Makes about 3 dozen depending on size of the cookies.

Wednesday, December 21, 2011

Champagne Cranberry Cocktail


These lovely cocktails will be making an appearance at our Christmas Brunch. They are beautiful and festive. If you like them sweeter (as my husband prefers), I think you could add a sugar cube in the bottom. These are quick and easy and lovely!

Oh and you can easily serve them to all of your guests by substituting sparkling white grape juice!


CRANBERRY CHAMPAGNE COCKTAIL
adapted slightly from Food Network

Print This Recipe

1-ounce cranberry juice (sweetened)
1 wedge lime
Chilled Champagne or sparkling white grape juice
Cranberries (frozen)

In a Champagne flute add cranberry juice and a squeeze of lime. Top off the glass with Champagne or sparkling white grape juice. Garnish with 3 or 4 cranberries or sparkling white grape juice. Makes 1 cocktail.


Tuesday, December 20, 2011

Sauteed Brussels Sprouts with Cream

If you're looking for a different, quick, and seasonal side dish to accompany your Christmas feast this year, I'd like to propose these Sauteed Brussels Sprouts with Cream. And that proposition comes from one who is generally not a fan of Brussels sprouts. This is easy enough for a quick weeknight side, but special enough for a holiday table.

The other evening, my husband told me twice how much he enjoyed the Brussels sprouts I fixed for supper. Coming from him, that is a huge compliment! The idea for the recipe goes to The Bonne Femme Cookbook: Simple, Splendid Food That French Women Cook Every Day. But, as usual, I added my own twist.

These Brussels sprouts will definitely be gracing our dinner table again.


SAUTEED BRUSSELS SPROUTS WITH CREAM
(slightly adapted from The Bonne Femme Cookbook)
Print This Recipe

1 pound Brussels sprouts
1 Tbsp unsalted butter
1 Tbsp olive oil
salt and freshly ground pepper to taste
2 to 4 Tbsp heavy cream

Trim the stem ends of the Brussels sprouts and cut length-wise into 1/4-inch-wide slices. Place in a saucepan and add enough water to cover. Bring to a boil and cook for 4 minutes (do not overcook--you want the green color to sparkle). Drain, rinse under cold running water, and drain again.

Wipe the saucepan dry, and melt the butter with the olive oil in the same pan over medium-high heat. Add the Brussels sprouts and sauté briefly, until nicely coated and just a little more tender, about 2 minutes. Season to taste with salt and freshly ground pepper. Drizzle cream over the Brussels sprouts and gently toss to coat. Serve.

Monday, December 19, 2011

Cocoa Chocolate Chip Meringues

I'm going to squeeze in one more chocolate treat recipe for you. Made with whipped egg whites and sugar, meringues are much lower in fat than the average Christmas cookie or candy. This particular recipe is flavored with cocoa powder and chocolate chips and the chocolate flavor certainly shines through. These aren't overly sweet, making them a nice change. And, as an added bonus, they are naturally gluten-free.

My husband and I both enjoyed these crispy little cookies. I know they'll become a regular holiday treat in our house.


COCOA CHOCOLATE CHIP MERINGUES
(from Gluten-Free Christmas Cookies by Ellen Brown)
Print This Recipe

3 large egg whites, at room temperature
1/4 tsp cream of tartar
pinch of salt
3/4 c. granulated sugar
1/3 c. unsweetened cocoa powder
1/2 tsp vanilla extract
1 c. miniature chocolate chips

Preheat the oven to 275°F. Line two baking sheets with parchment paper.

Place egg whites in a grease-free mixing bowl and beat at medium speed with an electric mixer until frothy. Add the cream of tartar and salt, raise the speed to high, and beat until soft peaks form. Add sugar, 1 Tablespoon at a time, and continue to beat until stiff peaks form and meringue is glossy. Beat in cocoa and vanilla. Gently fold in chocolate chips.

Scoop meringue into either a pastry bag fitted with a large star tip, or into a ziploc bag with the corner cut off. Pipe the meringue through bag of choice by heaping 1-Tablespoon portions onto prepared baking sheets. Bake for 30 minutes. Turn off the oven, and allow meringues to stay in the oven for an additional 30 minutes. Transfer to a cooling rack to cool completely.

Makes 3 to 4 dozen depending on size.

Saturday, December 17, 2011

Peanut Butter Pretzel Truffles

Have you been on pinterest? It's this amazing site that is really like an online scrapbook of ideas. It makes you feel completely inadequate and empowered all at the same time. There are so many categories like cool crafts, awesome looking recipes, fashion ideas, and even fitness plans. Anyway this is actually not a commercial for pinterest but it is where I found this recipe. They were called Chubby Hubby Truffles (after some rather well known ice cream) or Peanut Butter Pretzel Truffles.

These are quick, very easy, and they look really nice. They are a wonderful combination of salt and sweet and the creamy peanut butter is a nice texture with the crunch of the pretzels. In full disclosure - I was not thrilled with how big I accidentally made them. These are really good!


Peanut Butter-Pretzel Truffles
adapted from Brown Eyed Baker

Makes About 18-24 truffles

1½ c. pretzel pieces
½ c. creamy peanut butter (I used Skippy)
1 Tb. unsalted butter, at room temperature
2 Tb. light brown sugar
3 Tb. powdered sugar
1 1/2 c.  milk or semisweet chocolate chips
1 Tb. vegetable shortening

Put the pretzel pieces into a resealable plastic bag and crush into very small bits - I used my food processor.

In a small bowl, combine the peanut butter, butter, brown sugar and salt. Stir until all of the ingredients are completely blended and smooth. Add the pretzel bits to the peanut butter mixture and mix thoroughly. Add the powdered sugar and mix until completely combined.

Line a small baking sheet or plate with wax paper. Using a small cookie scoop, or about 2 teaspoons worth of peanut butter mixture, gently roll  into a ball (I put a little butter on my hand to reduce sticking and had to wash my hands after every 5 or so). Place the ball on the wax paper-lined cookie sheet and repeat with the remaining peanut butter mixture. Place the baking sheet into the refrigerator and chill for at least 30 minutes.

When ready to dip the truffles, microwave the chocolate chips and vegetable shortening together in a small bowl at 50% power in 30-second increments, stirring after each, until completely melted and smooth.

Dip each peanut butter-pretzel ball into the melted chocolate and use a fork or spoon to roll it around, ensuring that it is completely coated with chocolate. Let any extra chocolate drip off and place back on the wax paper-lined sheet. Repeat with all of the peanut butter-pretzel balls.

Return the baking sheet to the refrigerator and again chill for at least 30 minutes. Garnish with a drizzle of melted peanut butter (melt the peanut butter for 30 seconds in the microwave and use a fork to drizzle) and crushed pretzels, if desired. Store in an airtight container in the refrigerator.

Friday, December 16, 2011

White Chocolate Almond Truffles

Continuing in our week of chocolate, I thought I'd share a white chocolate recipe. These are rich, quite sweet little treats, that don't taste strongly of almonds or white chocolate. The flavor seemed almost caramelly to me. But not even exactly that either. :) Still, these would make a unique addition to your holiday treat repertoire.

I did find the rolling of these to be incredibly tedious. Truffle rolling is always messy, but somehow these just didn't want to be rolled. See my note below the recipe with a possible alternative finish to these candies.


WHITE CHOCOLATE ALMOND TRUFFLES

1 pound white chocolate
1 cup heavy cream
1 cup natural almond butter
1/2 cup sugar
pinch of salt
1 cup blanched almonds

Break chocolate into pieces no larger than a lima bean. Either pulse chocolate in a food processor fitted with a steel blade or chop by hand.

Heat cream, almond butter, sugar, and salt in a saucepan over medium heat, stirring frequently, until mixture comes to a simmer. Stir in chocolate. Remove the pan from the heat, cover the pan, and allow chocolate to melt for 5 minutes. Whisk mixture until smooth, and transfer to a 9 x 9-inch baking pan. Chill mixture for at least 4 hours, or overnight.

While mixture chills, preheat the oven to 350°F. Place almonds on a baking sheet, and toast for 5 to 7 minutes, or until lightly browned. Remove the pan from the oven, and in a food processor fitted with a steel blade, pulse to finely chop the almonds. Or chop finely by hand. Set aside.

Place chopped almonds in a bowl. Using a spoon, scoop out 2 teaspoons mixture, and gently form it into a ball. Roll balls in chopped almonds, and then refrigerate for 30 minutes or until firm.

Cook's Note: If I make them again, I think I might grease my square pan, sprinkle in a layer of finely chopped, toasted almonds, pour in and spread the hot truffle mixture, and then sprinkle the top with the remaining chopped toasted almonds. Then, instead of little truffle balls, you could cut truffle squares.

Variation: Substitute natural peanut butter and dark chocolate to make chocolate peanut butter truffles.

Wednesday, December 14, 2011

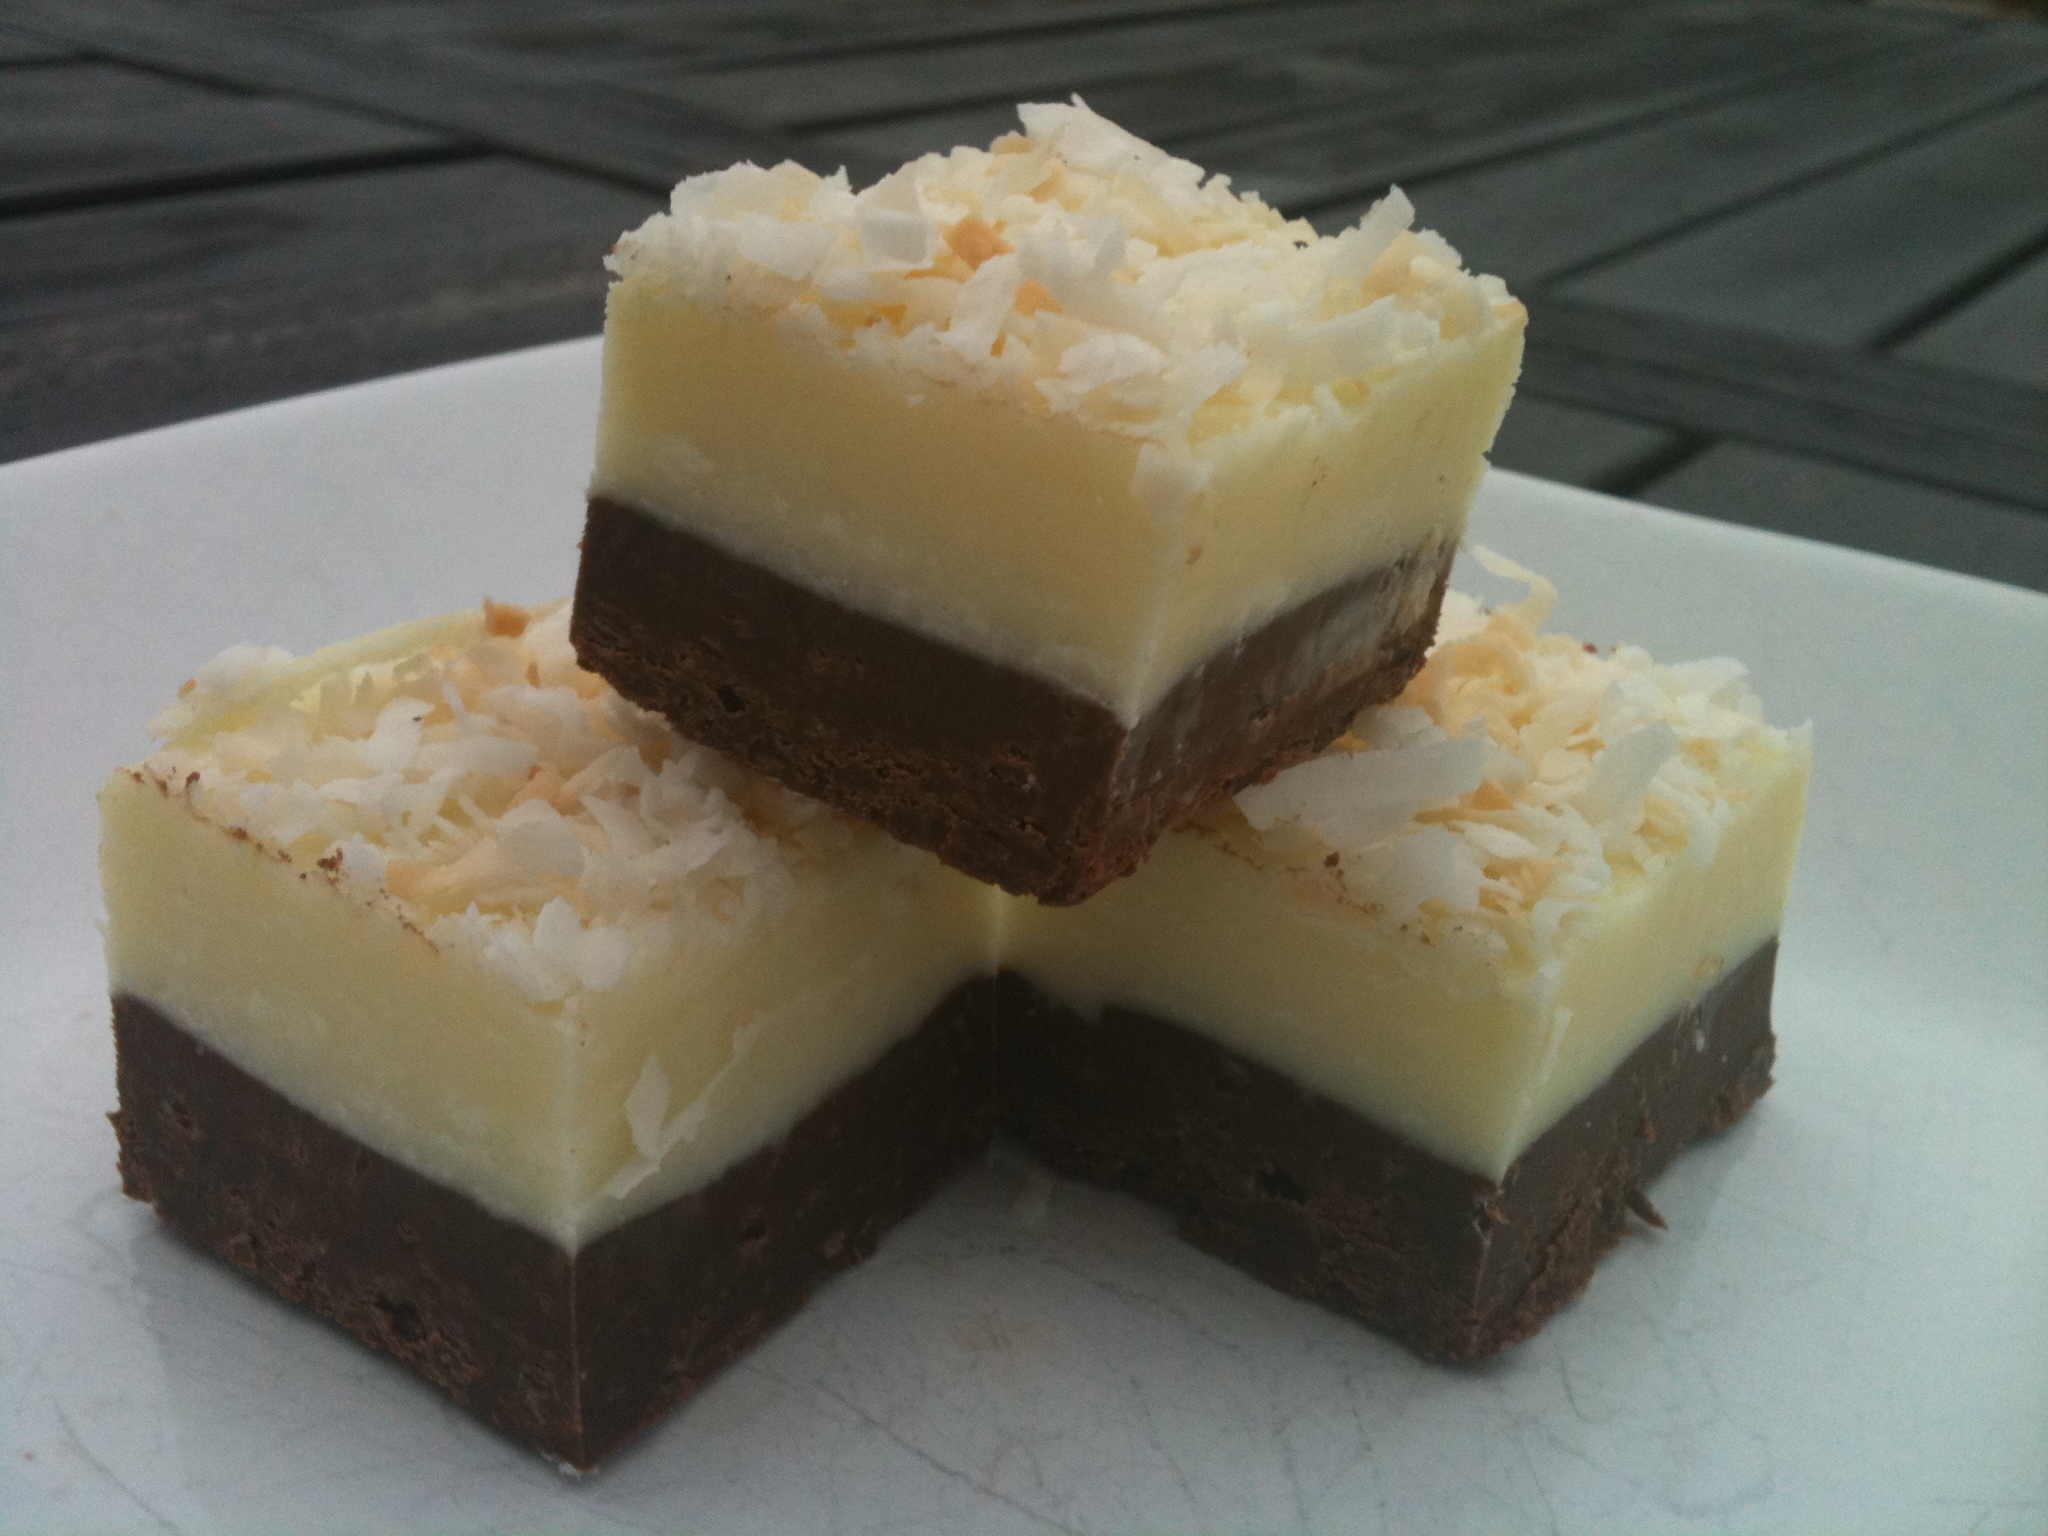
Mocha Coconut Fudge

When How Sweet It Is posted this recipe, I knew immediately that I would be trying it. I mean really, with her willingness to interrupt our busy plans with this recipe, how could I refuse? :) The flavor combination was an instant win in my book - kind of an extra rich and sweet twist on a yummy frappucino I enjoy occasionally - ahem.

This recipe was super quick, super decadent, and totally yum. I think we may have a new fudge recipe to add to our annual favorites - peanut butter, chocolate, and butter pecan. We may like fudge - the vote is still out - you can send me more recipes to, you know...make sure!

Let me tell you a little secret about this recipe...I made it in the microwave. You can certainly use the double boiler as the recipe recommends but I noticed that she mentioned the microwave as an option and I was sold. You see, I was up to my eyeballs in cookie baking when I threw this recipe in to the mix between shuffling cookies into the oven. So, yes, it was easy. :) You can go here for her original awesome recipe. I'm going to post my microwave version in case you are lazy like me.

Seriously, how pretty is this?! This would make aa really great gift! Oh and I forgot to mention - my mom thought this was wonderful.


Mocha Coconut Fudge
Adapted from How Sweet It Is
Print This Recipe

12 oz. semisweet chocolate, chopped (I used 2 c. semi-sweet chocolate chips)
12 oz. white baking chocolate, chopped (I used 2 c. white chocolate chips)
1 can (15oz) sweetened condensed milk (mine was 14 oz which was no problem), divided
1 1/2 Tb. espresso powder or instant coffee (I used the latter - two packets of an instant because that's what I had)
1 tsp. vanilla extract
1 1/2 tsp. coconut extract
1 Tb. coconut oil, divided
1/2 c. flaked coconut, toasted (350 degrees for about 10 minutes but watch it carefully so it doesn't burn!)

Line an 8×8 pan with buttered foil.

Add semisweet chocolate to microwave safe bowl and microwave for 30 seconds. Stir and microwave for 30 more seconds. Add in half of the sweetened condensed milk (I eyeballed it), the coffee powder and 1/2 tablespoon (1 1/2 tsp.) of coconut oil. Return to microwave for 30 seconds. Remove and stir. Continue 30 second increments until fully melted and smooth. Stir in the vanilla. Spread evenly in the bottom of the pan. Mixture will be quitethick. Place in the freezer for 30 minutes (or less if your me and you want to hurry).

Add white chocolate to a micorwave safe bowl and heat for 30 seconds. Add in remaining condensed milk and coconut oil and return to microwave for 30 seconds. Stir. Microwave 30 more seconds if needed until mixture is completely melted. Add coconut extract and thoroughly combine. Remove fudge from freezer and add white chocolate on top, spreading evenly to coat. Top with toasted coconut, then chill in the refrigerator for 60-90 minutes.

When ready to cut, fill a large cup with hot water or run knife under the tap. Dip a sharp knife into the water, then blot on a towel. Use knife to cut fudge into your desired size of squares.

This is SO rich and SO good - I think you could easily cut this into 1 inch squares which would make for 64 pieces of fudge. :) Enjoy and go thank How Sweet It Is for this deliciousness and check out her site! If you like chocolate, coffee, and coconut, you will LOVE this.

Tuesday, December 13, 2011

Cinnamon-Honey Truffles

Any chocolate loving person is bound to enjoy truffles. They are so deeply rich and chocolatey. I was intrigued by this particular recipe (which I found in some cookbook or other and promptly forgot the name) because the cream is steeped in spices and honey. I loved the idea; however, the spices were very subtle in the end result. If you want more of the cinnamon to shine through, I'd try doubling the amount of cinnamon stick. Or, you can do like I did and sprinkle a little cinnamon into the cocoa powder that you roll the truffles in. Either way, these are delicious drops of chocolate, perfect for a holiday goody tray.


CINNAMON-HONEY TRUFFLES
Print This Recipe


8 ounces dark bittersweet chocolate (at least 60% cacao), very finely chopped
1/2 c. heavy cream
1 Tbsp honey
1/2 tsp vanilla extract
1/2-1 cinnamon stick, 1 1/2-3 inches long (depending on the depth of spice you want)
2 whole cloves
pinch of sea salt
2 1/2 Tbsp unsalted butter, at room temperature
1/4 c. unsweetened dutch-process cocoa powder, sifted

Place the chocolate in a medium heatproof bowl. (It is very important to chop the chocolate very finely to allow it to melt properly.)

In a small saucepan over medium heat, combine the cream, honey, vanilla, cinnamon stick, cloves, and salt. Bring to a boil, reduce the heat to low, and simmer for 5 minutes. Remove from the heat. Pour the cream through a fine-mesh sieve held over the chocolate, discarding the contents of the sieve, and let stand for 2 minutes. Using a rubber spatula, gently stir the chocolate mixture in a circular motion until it has completely melted. Add the butter and stir until incorporated. Cover the bowl with plastic wrap and set aside at room temperature for 30 minutes to set the chocolate. Then refrigerate the chocolate for 30 minutes, or until the chocolate is able to be scooped and rolled into balls.

Line a rimmed baking sheet with waxed paper. Using a small spoon or scoop, scoop out 1-inch balls of chocolate and gently roll them into irregularly shaped truffles. Place them on the prepared baking sheet. Return the truffles to the refrigerator and chill until firm, about 1 hour.

Place the sifted cocoa powder in a shallow bowl. One at a time, roll the truffles in the cocoa, coating evenly. Makes about 30 truffles.

Cook's Note: The truffles will keep up to 2 weeks in the refrigerator.

Monday, December 12, 2011

Cocoa Thumbprints

Welcome to our week-long Christmas treats extravaganza! Our focus will be on chocolate, but we might sneak something else in as well. We hope you find plenty of inspiration for your holiday baking!

I enjoy a good jam-filled thumbprint cookie. Last year I made lovely little butter thumbprint cookies. This year I was imagining a chocolate cookie base with a berry jam center. And what do I find in the December issue of Food Network Magazine? That's right, Cocoa Thumbprints!

I tinkered with the recipe a bit to make them gluten-free. I cut-back on the sugar by a couple of Tablespoonfuls. And I used a slightly sweet, four-fruit jam as the center. Oh my, these are tasty!

As usual, if you are not gluten-free, feel free to substitute all-purpose flour and omit the xanthan gum.


COCOA THUMBPRINTS
(slightly adapted from Food Network Magazine, Dec. 2011)
Print This Recipe

1 1/2 c. gluten-free all-purpose flour
scant 3/4 c. sugar
1/2 c. unsweetened Dutch-process cocoa powder
1 tsp baking powder
1/2 tsp salt
1/2 tsp xanthan gum
6 Tbsp unsalted butter, melted
2 eggs, lightly beaten
1/4 c. confectioner's sugar (for rolling)
1/4 c. granulated sugar (for rolling)
favorite jam (for filling)

In a medium bowl, whisk together the flour, scant 3/4 cup sugar, cocoa powder, baking powder, salt, and xanthan gum. Add the melted butter and eggs and stir until combined. Cover and refrigerate the dough until firm, about 30 minutes.

Preheat the oven to 325°F. Line 2 baking sheets with parchment paper.

Place the confectioner's sugar and the granulated sugar in two separate bowls. Roll scant Tablespoonfuls of dough into balls. Roll each in granulated sugar and then in confectioner's sugar. Place 1-inch apart on baking sheets.

Make a deep indentation with thumb in each cookie. Place 1/2 teaspoon of jam in the indentation. Bake 10 to 12 minutes, or until the cookies are puffed and slightly cracked. Let cool 3 minutes on the baking sheet. Then transfer to a wire rack until completely cooled.

Friday, December 9, 2011

Simple Food, Beautiful Presentation

This is a topic that I often struggle with. A reader asked about  how I try to make something look beautiful on the table. I must give my mom credit, she has always presented food nicely even when it was just the family - no pots or pans on the table, table properly set etc. Here are a few tips I've learned over the years:

1) Choose the appropriate size of bowl or serving dish.

2) Use herbs to garnish - they are gorgeous and edible. Oh and I'm not talking about the diner piece of curly parsley on the side of the plate. :)

3) Think about the colors on the table and the colors of the food. I would put carrots in a white dish so the orange color pops but I would avoid putting mashed potatoes in white if possible.

4) Think outside the box - don't be limited by your bowls and plates. You can often stack, combine, or find different uses for what you already have.

5) Look for clearance or second hand dinnerware, serving pieces, and table clothes. It's always rewarding to find great deals that make your table beautiful.

6) Arrange the food. Take a minute and look at the dish - garnish, mound, fix.

7) When preparing a buffet, try to use various heights of dishes. You can easily but books or boxes underneath a cloth to raise regular dishes or you can use pedestal dishes.


In the first picture, I like the subtle color of the plate with the bright vegetables. In the second picture, even though the rice is white, the lentils really pop. I like the square dish and the way that the rice extended beyond the lentils - it frames the dish.


This square bowl is one of my favorites! The components of the salad look so pretty being towards the top.


While this isn't my favorite photo, it does show the different heights and the different ways I use dishes. I like to use simple dishes so the food is really the star. Most of the dishes on the table are dishes that we use everyday as well as for entertaining.


***Stay tuned - next week is devoted to Christmas goodies - especially chocolate! We will have new recipes for you every day!***

Wednesday, December 7, 2011

Mocha Mousse Pie

'Tis the season for lots of sweet treats!  My husband requested a chocolate dessert for Thanksgiving. This naturally gluten-free pie fit the bill. Perhaps you'll find a place for this on your holiday table.

I took this recipe from The Pioneer Woman. The only adjustment I made was to decrease the amount of sugar and still I think it's plenty sweet. This pie is fluffy, yet rich, and incredibly delicious with notes of chocolate and coffee shining through. I love the nut crust on this, but you could just as easily use a crushed cookie crust, regular pre-baked pie crust, or even just serve the filling in cups without any sort of crust. As a disclaimer, this pie does contain raw eggs.


MOCHA MOUSSE PIE
(very slightly adapted from The Pioneer Woman)
Print This Recipe


Crust
1 cup Pecans, Finely Chopped
1/4 cup Brown Sugar
2 ounces, weight Semi Sweet Chocolate Grated
2 Tablespoons Kahlua
Dash Of Salt

Filling
2 sticks Butter, room temperature
1-1 1/4 cup Sugar
2 teaspoons Instant Coffee Granules
1 teaspoon Kahlua
3 ounces, weight Semi-sweet (or Bittersweet) Chocolate
1 teaspoon Vanilla Extract
4 whole Large Eggs

To make the crust, combine chopped pecans (which you can chop in the food processor, if desired), brown sugar, grated chocolate, and salt. Stir with a fork to combine, and then drizzle in Kahlua, stirring until combined. Press mixture into a pie pan, bringing it up the sides a bit. Set aside (do not bake) or refrigerate until needed.

In small microwave safe bowl, melt 3 ounces of unsweetened baking chocolate until smooth and completely melted (about 45 seconds on high). Set aside to cool.

In a large bowl of an electric mixer fitted with the whisk attachment, beat butter, sugar, 2 teaspoons instant coffee, and 1 teaspoon Kahlua until fluffy, about 1 1/2 minutes. When melted chocolate is cooled, drizzle it into the butter/sugar mixture as it beats on medium speed; use a rubber spatula to get it all out. Add 1 teaspoon of vanilla extract. Beat the mixture thoroughly until combined, scraping the sides if necessary.

On medium speed, add the four eggs, one at a time, over a period of 20 minutes; leave about 5 minutes between each egg addition (allowing the mixer to run for 5 minutes with each egg addition). Scrape sides of bowl halfway through this process. The filling will gradually lighten in color and become fluffier. Pour filling into the pie crust.

Smooth out the pie filling and place pie in the refrigerator to chill for at least two hours.

Serve with whipped cream and more grated chocolate, optional.

Tuesday, December 6, 2011

Lentil Pasta Soup

Lentil soup is pretty much one of my family's favorites. It's comforting, healthy, and just plain delicious. One thing I love about cooking with lentils is that they are quick and easy to prepare - you don't have to soak the beans or let them cook for hours like most dried beans.

Anyway, I've made many variations of lentil soup and this one did not disappoint. I adapted it from a Giada De Laurentiis recipe. The pasta made it extra good and we definitely enjoyed this meatless, hearty soup. It's heathy and easy - perfect for winter and perfect for these busy holiday prep days!


LENTIL PASTA SOUP
Print This Recipe

2 Tb. olive oil
1 medium onion, chopped
2 carrots, peeled and diced
2 garlic cloves, minced
1 tsp. salt
1/2 tsp. freshly ground black pepper
1 (14 1/2-oz.) can diced tomatoes
1 1/4 c. lentils (I used a combo of green and red)
11 cups chicken broth (or vegetable to make it vegetarian)
3/4 tsp. dried thyme
1 c. dried elbow pasta
Parmesan cheese (opt.)
Olive oil for drizzle (opt.)


Heat the oil in a  large pot over medium heat. Add the onion and carrots and saute for a couple of minutes. Add the garlic, salt, and pepper and saute until all the vegetables are tender, about 5 minutes. Add the tomatoes (do not drain). Simmer until the juices evaporate a little and the tomatoes break down, stirring occasionally, about 8 minutes. Add the lentils and mix to coat. Add the broth and stir. Add the thyme. Bring to a boil over high heat. Cover and simmer over low heat until the lentils are almost tender, about 30 minutes.

Return to a boil and stir in the pasta. Simmer until the pasta is tender but still firm to the bite, about 8 minutes. Season with salt and pepper, to taste.

To serve: sprinkle with the Parmesan cheese and drizzle with olive oil.

Friday, December 2, 2011

Pizza Stuffed Peppers

All to often I have pull-open-the-fridge-what-do-I-have-for-supper moments. For reasons I truly can't understand, I've yet to be able to tackle regular meal planning. With my bent towards organization and order, this baffles me. However, the fact remains. Therefore, I frequently find myself flying by the seat of my pants for weeknight meals. Thus, this recipe came to be with ingredients I had on hand and in the time I had available.

Not only are stuffed peppers a lovely presentation, but they are tasty and nutritious. I used pizza seasoning and flavors as my inspiration; however, if you're the type of person who keeps pepperoni around, feel free to chop some up and add that to the filling for an even "pizzaier" flavor. Many of the measurements are approximate, so use this recipe as a guide to create your version of pizza stuffed peppers. If you want the filling, saucier, add more tomato sauce or jarred pasta or pizza sauce. If you want more meat than rice, or vice versa, increase accordingly. If you want more veggies, chop them up and cook with the meat. You get the idea. And, as I used mini peppers, I can't tell you exactly how many larger peppers you would need here, maybe 4 or 5?

I hope you enjoy this quick weeknight meal for a taste of a little something different!


PIZZA STUFFED PEPPERS
Print This Recipe


1 c. cooked brown or white rice
3/4 lb ground beef
1 onion, chopped
1/2 bell pepper, chopped
1 small can tomato sauce
1 tsp pizza seasoning
1 clove garlic, minced
salt and pepper to taste
grated cheese of choice
Whole bell peppers, large or small, tops cut out and seeded
Prepared pasta or pizza sauce (opt.)

Cook rice according to package instructions.

Preheat oven to 350°F.

While rice is cooking, brown the ground beef in a skillet over medium heat. Add the chopped onion and chopped bell pepper and continue to cook until the meat is no longer pink, stirring occasionally. Mix in the cooked rice, tomato sauce, pizza seasoning, and garlic. Heat through. Season with salt and pepper to taste. Stir in as much grated cheese to suit taste.

Spoon mixture into prepared bell peppers and place them standing up in a lightly greased 8x8 baking pan. If you like, pour some prepared pasta sauce over the peppers and sprinkle with additional grated cheese.

Bake peppers for 20 minutes, or until the peppers are tender.

Wednesday, November 30, 2011

10 Appetizer Ideas

One reader asked about hot appetizer ideas. IT seem that around this time of year, it is a popular pitch-in request! Personally, I love appetizers - they make a great, fun dinner and a festive start to a meal or contribution to a party. However, I don't usually have a lot of time to spend on them so I have a few quick (but super tasty) recipes that I depend on!


1) BBQ meatballs or mini sausages (or both!) - I usually use pre-made, frozen meatballs...shhh...don't tell. :) Put them in your crockpot and pour your favorite, nice quality bbq sauce over it and cook on low.

2) Hot Chipped Beef dip - My mom's recipe and definitely delicious! This is delicious with crackers!

3) Jalapeno Popper Dip - My boss made this last year and I LOVED it! This is my version of it. I serve it with crackers and cubed bread.

4) Baked Brie (pictured above) - You can find large wheels of brie fairly affordably at the large discount warehouses. I slice the top rind off and cover with any manner of things - jams, nuts & honey, or nuts, honey, & fruit. You can bake it until melty or you can even microwave it. Serve with sliced pears, apples, crackers, and bread. This is probably my most requested appetizer at family events. :)

5) Orange Cranberry Dip - You might notice a theme of dips but they are just so easy. I have one of the little dipper crockpots which makes keeping these warm and making them very easy.


She didn't specifically ask for cold appetizers but here are five of my favorites:

1) Antipasti platter - an assortment of olives, marinated vegetables, cheese and cured meats. You can make this as simple or as elaborate as you like! The marinated mozzarella above is easy and delicious!

2) Cheese ball & crackers - There are so many, many variations! You can  make a large cheese ball or small individual ones.

3) Cheese tray - Use 3-4 different cheeses and arrange on a platter. Garnish with grapes and assorted fresh fruit. Serve with crackers.

4) Hummus - You can make your own or buy it prepared! You can serve with fresh vegetables, pita, tortilla chips, and/or crackers.

5) Cream Cheese dip - Spread cream cheese on a plate, top with your favorite preserves (cherry is my favorite!). Serve with crackers.

What are your favorite appetizer recipes? Or what are your favorite appetizers to eat?

Tuesday, November 29, 2011

Pumpkin Cranberry Spice Cookies

Do you have pumpkin and cranberries leftover after your Thanksgiving festivities? If so, these cookies are a perfect way to use them up. I brought these cookies to a movie night with some friends. They were very well received.

Don't let the long ingredient list intimidate you. These come together easily and while the pumpkin cream cheese frosting is an extra step, it takes the cookies to the next level of deliciousness! As usual, these are gluten-free. However, if you can eat regular wheat flour, then just use that in place of the gluten-free flour, and omit the xanthan gum.

Because these cookies have a soft, cakey texture, they are best enjoyed within a couple of days of baking. Otherwise, pop the extras in the freezer to enjoy another time.


PUMPKIN CRANBERRY SPICE COOKIES
Print This Recipe


2 1/4 c. all-purpose gluten-free flour mix
2 tsp baking powder
1 tsp baking soda
1 tsp xanthan gum
1 1/2 tsp cinnamon
1/2 tsp ginger
1/4-1/2 tsp nutmeg
1/8 tsp cloves
1/2 tsp salt
1/3 c. brown sugar, packed
1/3 c. white sugar
1/2 c. butter, softened
2/3 c. pumpkin puree
2 eggs
1 tsp vanilla
1/2 c. plain yogurt
2/3 c. chopped fresh of frozen cranberries

Icing
2 1/2 Tbsp butter
1 1/2 - 2 c. powdered sugar
2 Tbsp heavy cream
3/4 tsp vanilla
2 Tbsp pumpkin puree
1/4 tsp cinnamon
dash each of ginger, nutmeg, and cloves

Preheat oven to 375°F. Line a baking sheet with parchment paper.

In a large bowl, sift together the flour, baking powder, baking soda, xanthan gum, spices, and salt.

In a separate bowl, combine the sugars and butter and using a mixer, beat until fluffy and lightened in color. Add the pumpkin puree and beat until combined. Add eggs one at a time; mixing completely between each. Stir in the vanilla.

To the pumpkin mixture, add the flour mixture alternating with the yogurt. Mix between each addition. Stir in the cranberries.
Drop by rounded Tablespoonfuls onto the prepared baking sheet. Bake for 10-12 minutes (mine took the full 12 minutes) or until edges are golden. Cool completely on a wire rack.

For the icing: Heat the butter in a saucepan until lightly browned, but not burned, stirring constantly. Remove from heat and whisk in the cream and vanilla. Add some powdered sugar to make a paste. Then add the remaining powdered sugar slowly, whisking until fully combined (add powdered sugar until icing is desired consistency). Stir in spices and the pumpkin puree.

Monday, November 28, 2011

Balsamic Figs w/Yogurt Cream Cheese & Walnuts

Seriously, I have been missing out. I have always associated figs with those packaged fig cookies which were a treat as a child. My goodness people, if you have not eaten a fresh fig, get yourself to the store immediately and buy some. They are splendid. Maybe I've had them before but it seems I would remember...

These were a splurge at the farmer's market. We wanted to try something new and the seller had samples. One taste and we were totally hooked. We debated how to prepare them and finally settled on this recipe. It was inspired by a recipe on Food Network, I believe. They were difficult to successfully photograph but they were not difficult to eat. This dessert is not super sweet but it is comforting and delicious. It would be a lovely treat during the hustle and bustle of the holidays!


BALSAMIC FIGS with YOGURT CREAM CHEESE & TOASTED WALNUTS
Print This Recipe

8 figs, sliced in 1/2

Balsamic Reduction:
1/4 c. orange juice
1/8 c. balsamic vinegar
2 Tb. honey

Combine and boil for 5 minutes to reduce to a more syrupy consistency.

Heat broiler. Toss the figs in the balsamic reduction and then place cut side up on a pan and broil for 5-6 minutes until caramelized.

3 Tb. chopped Walnuts, toasted in butter

Yogurt Cream Cheese:
1/4 c. cream cheese
1/4 c. plain yogurts
1 Tb. honey

Beat until smooth.

To serve: place figs on plate and drizzle the remaining reduction from the pan, spoon the yogurt cream cheese over them and top with the walnuts.

Thursday, November 24, 2011

HAPPY THANKSGIVING!

We wish you and your family a wonderful Thanksgiving!


Thank you from the bottom of our hearts for making our blog re-launch very successful! It has surpassed our expectations. We look forward to continuing to bring you recipes, photos, and ideas from our kitchens!


 Today we are thankful for our mom and our grandmothers - they each instilled in us a love of gathering around the table. They also taught us many kitchen skills. We are incredibly blessed to have all three of these women in our lives! And we are thankful for our supportive families who taste, critique, and encourage us in our blogging ventures.


Happy cooking. Happy gathering. Happy eating.


 All the best,


Alaina & Stephanie

Wednesday, November 23, 2011

Grits Dressing

I saw this recipe in this month's issue of Bon Appetit and was immediately intrigued - no bread in dressing? However, grits are one of my favorite things - I simply love them. Yes, I know I was born (and live) a little farther north than the normal grit suspects. :) If you want a traditional, stuff-in-the bird dressing than this probably isn't for you. If you want something new or want a unique and delicious side dish (maybe instead of corn?) than I definitely recommend  it.

As for me, I'm sitting in the kitchen hoarding the dish and wishing I hadn't made only half of the recipe. Do I really have to share? The thing about this rich and creamy side is that I would actually make it for brunch or for a holiday side. While my waistline may not approve of frequent feasting on this dish, it is a wonderful treat. Mmmm, I love the holidays.   


GRITS DRESSING

(adapted very slightly from Bon Appetit, November 2011)
Print This Recipe

Unsalted butter (for dish)
1 c. coarse stone-ground grits (I used Bob's Red Mill Yellow Corn Grits)
1 c. (about 10 ounces) chopped bacon
6 large eggs
1/2 c. heavy cream
2 c. coarsely grated cheddar (about 8 ounces), divided
2 Tb. chopped fresh chives
1/4 tsp. sweet paprika (I only had smoky and since there was bacon in it, I went with it)
Kosher salt
freshly ground pepper

Butter a 2-qt. baking dish. Bring 4 cups water (or chicken stock would be really great) to a simmer in a large saucepan. Gradually whisk in grits. Reduce heat to low; gently simmer, stirring often, until grits begin to thicken. Continue cooking, stirring often and adding water by 1/4 cupfuls it too thick, until tender and very thick* (about 5 cups), about 1 hour. (The amount of water and cooking time will vary depending on the type of grits used - mine took 1/2 hour or a little less.) Remove pan from heat and let cool slightly.

Meanwhile, cook bacon in a large skillet over medium heat until crisp, 5–7 minutes. Transfer bacon to paper towels to drain.

Preheat oven to 350°. Whisk eggs and cream in a medium bowl; whisk into grits in 3 additions. Stir in 1 3/4 cups cheese, chives, paprika, and bacon. Season to taste with salt and pepper. Transfer grits mixture to prepared dish and smooth top with a spoon. Sprinkle remaining 1/4 cup cheese over.

Transfer baking dish to oven and bake until puffed, golden, and just set in the middle, about 1 hour. Let cool for 10 minutes before serving.

*When they say VERY THICK, they really mean it. Mine were not thick enough - I did not need to smooth the top with a spoon (it was thin enough to settle out on it's own). :) They still worked out great!

Tuesday, November 22, 2011

Sweet Potato Maple Bacon Pie

Deliciouness abounds in this pie. I absolutely love the combination of sweet and salty. The candied bacon and maple cream kind of stole the show - as in, I could eat a whole bowl of just those two combined. :) Seriously though, this pie was good! I served it to my parents and husband and they all proclaimed it delicious and they were all surprised at how much they LOVED the bacon.

Personally, I still like pumpkin pie better than sweet potato (it's a texture thing) but I would totally make this again and serve it to guests and especially find more uses for that bacon. This is really an awesome twist on the traditional pumpkin pie. I'm already dreaming of the leftovers for breakfast. [Just a small note - the bacon looks dark in the picture but it was not burned I assure you!]

There are a few steps to this pie but it is not difficult and the steps do not need to be completed all at once.


SWEET POTATO MAPLE BACON PIE
Print This Recipe

1 pie crust in a pie pan (you can make your own or buy a prepared one)
2 c. pureed sweet potato
2 eggs slightly beaten
1 c. evaporated milk
2 Tb. maple syrup
2/3 c. sugar
1/2 tsp salt
1 1/4 tsp cinnamon
1/2 tsp ginger
1/2 tsp nutmeg
1/2 tsp cloves

Preheat oven to 425 degrees. Combine the sweet potato, milk, egg, and maple syrup in the blender. Add the spices. Pour into the crust. Bake at 425° for 15 minutes.  Then decrease oven to 350° and bake for 35-45 minutes until set.

CANDIED BACON
3 strips bacon, roughly chopped (mine was fairly thick)
1 tsp. maple syrup
1 tsp. brown sugar

Toss the bacon with brown sugar and maple syrup. Cook until crisp stirring and moving continually. It cooks fairly quickly and you need to keep an eye on it. Drain and cool completely.

MAPLE CREAM
1 c. whipped cream
2 Tb. maple syrup
1 tsp. vanilla extract

Just before serving, whip the cream for 1 minute. Add maple syrup and vanilla. Whip until stiff peaks form. Spread on top of pie. Top with candied bacon pieces.

Monday, November 21, 2011

Autumn Chopped Salad

I enjoyed concocting this seasonal salad, packing it full of the colors, flavors, and textures of fall. And to tie it all together, a lovely fall-inspired maple vinaigrette to drizzle over top.

This would be a perfect addition to your Thanksgiving table. It will definitely be a part of our menu because right now, it's my new favorite salad!


AUTUMN CHOPPED SALAD WITH MAPLE-DIJON VINAIGRETTE
Print This Recipe


6-8 oz. Mixed lettuces (leaves torn or chopped)
1 pear
1 apple
1/4-1/2 c. dried cranberries or fresh pomegranate seeds
1/4-1/2 c. chopped pecans or walnuts
4 green onions, sliced (or chopped red onion, if you prefer)
2 strips bacon, cooked and crumbled (opt.)
2 oz. plain or honey goat cheese, crumbled

Wash and spin dry lettuce before placing in a large bowl. Top with pear, apple, onion, and dried cranberries. Drizzle with vinaigrette and toss to coat. Sprinkle salad with nuts, bacon, if using, and goat cheese. Serves 4.

MAPLE-DIJON VINAIGRETTE

2 Tbsp olive oil
1 Tbsp pure maple syrup
1 Tbsp whole grain Dijon mustard
1 tsp white wine vinegar
salt and pepper to taste

Combine all ingredients in a glass jar. Shake well.

Sunday, November 20, 2011

Thanksgiving Recipes!


We just wanted to link back to last year's posts for Thanksgiving recipes! There are some great twists on the Thanksgiving classics. Within those posts there are also links to other of our holiday favorites! We are planning and preparing for our Thanksgiving celebrations and anticipating some wonderful food this week.

Thanksgiving Sides

Thanksgiving Sides Part 2

Pies (includes a gluten free pie crust recipe!)

We will continue to feature recipes this week that are perfect for the holidays! Happy cooking and planning!

Saturday, November 19, 2011

Nantucket Cranberry Pie

Cranberries are in abundance this time of year and this dessert is a perfect way to capture the beauty and flavor of the cranberry. This is really more like an upside down cake, but for whatever reason, it's called a pie. It's super simple, so if you aren't a lover of all things pie, you might just enjoy adding this sweet treat to your Thanksgiving Day dessert spread. I ate the entire pan myself, (granted, it was just a half a recipe, I didn't eat it all in one day, and my husband apparently doesn't like cranberries, but still...) and enjoyed every bite!

I found this recipe on The Pioneer Woman blog. But I did decrease the sugar from her recipe. I like my cranberries to retain a little bit of their tartness. If I make this again, I think I'll add a bit of orange zest to the cranberries and maybe a squeeze or two of fresh orange juice. Or, you could do as I did here and add the orange zest to your whipped cream! Also, if you don't care for the flavor of almond extract, you might try substituting vanilla extract.

I made this gluten-free by subbing in my gluten-free all-purpose blend and it worked out great.


NANTUCKET CRANBERRY PIE
(slightly adapted from The Pioneer Woman)
Print This Recipe


2 heaping cups cranberries, fresh or frozen
1/2 c. chopped pecans or walnuts
1/2 c. sugar
orange zest (opt.)
1 c. flour (or gluten-free flour blend)
3/4-1 c. sugar (depending on how tart/sweet you want it)
1 stick of butter, melted
2 eggs, lightly beaten
1 tsp almond extract
1/4 tsp salt
1 Tbsp coarse sugar for sprinkling (opt.)

Preheat oven to 350°F.

Liberally butter a cake or pie pan. Pour in the cranberries. Sprinkle with the chopped pecans, orange zest, and 1/2 c. sugar.

In a bowl, combine flour, 3/4-1 c. sugar, melted butter, eggs, almond extract, and salt. Stir gently to combine the ingredients.

Slowly pour the batter over the cranberries, making sure to cover the surface. Spread gently, if needed.

Bake for 45 to 50 minutes. If using coarse sugar, 5 minutes before removing from the oven, sprinkle the surface with 1 Tbsp of coarse sugar.

Serve with freshly whipped cream or ice cream.

Friday, November 18, 2011

Gluten-Free Pie Crust

If you are new to the gluten-free lifestyle, the holidays may seem rather daunting. However, this time of year can be joyful in the kitchen for you as well. You don't have to pass up on all desserts. If you have a favorite all-purpose gluten-free flour blend, you can very often substitute one-for-one by replacing all-purpose wheat flour, with your gluten-free mix. For some recipes you will need to add a little xanthan gum for texture, but that's about it.

And, if you love pie, I'm here to share my favorite pie crust recipe. I've posted this before, but thought now would be a great time to remind you how possible it is to live gluten-free. This recipe is quite simple and freezes well, if you want make several batches to have on hand. I've served this to gluten eaters and they don't notice a difference. So, go ahead, eat a piece of pie this holiday season!


TRADITIONAL PIE CRUST
(from The Gluten-Free Good Health Cookbook)
Print This Recipe

1 c. + 2 Tbsp Brown Rice Flour Mix*
2 Tbsp sweet rice flour
1 Tbsp sugar
1/2 tsp xanthan gum
1/4 tsp salt
6 Tbsp cold unsalted butter, cut into 6 pieces (don't use margarine)
1 large egg
2 tsp orange juice or lemon juice

In the bowl of an electric mixer, mix together the flours, sugar, xanthan gum and salt. Add the butter and mix until the mixture is crumbly and resembles a coarse meal.

Add the egg and orange juice. Mix on low speed until the dough holds together; it should not be sticky. Form the dough into a ball using your hands and place on a sheet of wax paper. Top with a second sheet of wax paper and flatten the dough into a 1-inch thickness. Roll out the dough (if it seems tacky, refrigerate for 15 minutes). Remove top wax paper and invert into 9-inch pie pan. Remove second sheet of wax paper and crimp the edges. Fill with desired filling.

Makes 1 9-inch pie crust.

*Brown Rice Flour Mix: 2 c. Brown rice flour; 2/3 c. Potato starch (not potato flour!); 1/3 c. Tapioca flour.


Pumpkin Dutch Apple Pie

Pie is probably my favorite dessert. And I love that the typical Thanksgiving dessert is an array of pies. I always want a sliver of each kind, which likely works out to be at least two slices! :) However, if your Thanksgiving celebration is on the small side and you don't need to make more than one kind, how do you decide which flavor makes the cut? Well, here's a pie that does double duty as both pumpkin and apple pie. This just might be your solution for Thanksgiving this year.

While browsing online, I found a recipe for this pie, but I didn't stick with the original, instead I decreased the sugar and increased the spices. The original version lacked the pumpkin pie spice element.

I tried this pie both warm from the oven and then cold the next morning. The chilled slice was definitely my preferred  way as the chilling time allowed the complexity of the spices and flavors to develop. So, if you decide to make this for your celebration, make it Wednesday and pop the pie into the fridge for your next day festivities.

This pie can easily be made gluten-free by substituting your favorite all-purpose gluten-free flour blend for the regular all-purpose flour. And by making a gluten-free pie crust. The version you see below is 100% gluten-free, so it works out quite well!


PUMPKIN DUTCH APPLE PIE
Print This Recipe


1 unbaked 9-inch deep-dish pie shell (use your favorite gluten-free recipe for a gf version)

Apple Layer
2 c. peeled, cored, thinly sliced apples
2 Tbsp sugar
2 tsp all-purpose flour
1 tsp lemon juice
1/4 tsp cinnamon

Pumpkin Layer
1 1/2 c. pure pumpkin (not pumpkin pie filling)
1 c. evaporated milk
1/2 c. sugar
2 large eggs, lightly beaten
2 Tbsp butter, melted
1 tsp cinnamon
1/2 tsp ginger
1/4 tsp nutmeg
1/8 tsp cloves
1/4 tsp salt

Crumb Topping
1/2 c. all-purpose flour
1/3 c. chopped pecans
1/4 c. sugar
3 Tbsp butter

Preheat the oven to 375°F.

Roll out pie crust and place into a 9-inch deep dish pie plate.

In a bowl, combine all of the apple layer ingredients. Pour into the pie shell. In another bowl, combine all of the pumpkin layer ingredients. Pour over the apple mixture in the pie shell.

For the crumb topping, combine the flour, pecans, and sugar in a bowl. Cut in the butter using a pastry blender or two butter knives until the mixture resembles coarse crumbs.

Before adding the crumb topping, bake for 30 minutes. Then remove from the oven and sprinkle with the crumb topping. Lower the oven to 325°F and bake for an additional 20-30 minutes until the custard sets. Cool completely on a wire rack.

Enjoy cold with whipped cream!

Thursday, November 17, 2011

Sweet Potato Biscuits

These were so quick to put together! They were very simple and went perfectly with the soup and salad I had made for dinner. They were light and fluffy and had terrific flavor.

I think these would be wonderful for Thanksgiving. You could change them up by adding maple syrup instead of sugar or by adding a little cinnamon. They bake for less than 15 minutes which makes them ideal to pop in right as people are gathering (and the oven is finally empty) and then pull them out warm as everyone is filling their plate. I served them with just butter but a maple butter or orange butter would also be good or a drizzle of honey.  


SWEET POTATO BISCUITS
(Food Network Magazine, November 2011, Paula Deen)
Print This Recipe

3/4 c. cooked mashed sweet potato (about 1 large sweet potato)
1/3 to 1/2 c. whole milk, as needed
1 1/2 c. all-purpose flour, plus more for dusting
2 Tb. sugar (I think maple syrup would be delish - you would not need quite as much milk)
1 Tb. baking powder
1 tsp. salt
6 Tb. cold unsalted butter, cut into small bits


Place a rack in the center of the oven and preheat to 425 degrees F. Grease a baking sheet (with butter, oil or cooking spray).

In a small bowl, whisk together the sweet potato and 1/3 cup milk. Set aside.

In a large bowl, whisk together the flour, sugar, baking powder and salt. Cut in the butter with your hands, a pastry blender or two knives until the mixture resembles coarse meal. Add the sweet potato mixture and fold gently to combine. Add the remaining milk a little at a time until all the flour is moistened. The amount of milk you will need will depend on the moisture of the sweet potato.

Sprinkle a small handful of flour on a work surface. Turn the dough out onto the surface and knead lightly 2 to 3 times with the palm of your hand until the mixture comes together. Pat the dough out into a 1/2-inch-thick round.

Using a biscuit cutter, cut the dough into biscuits. Gently reroll the scraps and cut out more biscuits. Place the biscuits on the prepared baking sheet and bake until light golden brown and firm to the touch, 12 to 14 minutes. Serve these fluffy biscuits warm or at room temperature. Makes 9-12.

Wednesday, November 16, 2011

Sage Squash

Squash is such a fall speciality. It is featured in recipes and in decorations. It evokes feeling of fall, warmth, and comfort and there are SO many varieties. As Steph and I wandered through the farmer's market, we admired many squash and finally settled on a buttercup squash. It was a new one for both of us. While I prefer delicata and perhaps butternut squast over the buttercup, I did really enjoy this recipe. You could successfully substitute your favorite squash in this recipe.

If you are looking for a new side dish or a different way of preparing squash, then you will surely enjoy this. It is simple but delicious and certainly fancy enough for your holiday feasting.


SAGE SQUASH
Print This Recipe
1 Squash of your choice (about 3 -4 cups cubed)
1 tsp. olive oil
1 tsp. butter, melted
Salt & pepper to taste
2 Tb. butter
1/2 onion, diced
1 tsp. fresh sage
1/2 tsp. fresh rosemary

Preheat oven to 425 degrees.

Peel and cube the squash. Toss with olive oil, 1 tsp. melted butter, salt and pepper to taste (about 1/2 tsp salt, 1/4 tsp. pepper). Roast until tender about 15-20 minutes.

Melt 2 Tb. butter in a sauté pan. Add onion and cook until tender. Add sage and rosemary and a little more butter if needed and sauté until fragrant and onion is lightly browned. Add roasted squash and gently toss to coat with butter onion mixture. Garnish with more sage if desired.


Tuesday, November 15, 2011

Roasted Radishes

I would not characterize myself as a big fan of radishes. Sometimes I enjoy them, sometimes I find them too strong. I have mostly (maybe always?!) eaten them raw. Radishes grow best in cooler weather (early spring or fall) and the tops are edible also. They are easy to store and there are a number of varieties. We've grown them in our garden and I have used them in salads or on a crudites tray with dip.

When I saw a recipe for roasted radishes, I knew I had to try them. It was easy and best of all, I really couldn't stop eating them. They were delicious! I tried them with and without a squeeze of lemon juice and never did decide which I preferred. They were good hot from the oven and still good at room temperature. These would be such a unique addition to your holiday table. The colors are gorgeous and so festive!


ROASTED RADISHES
Print This Recipe

1 bunch of radishes
1 Tb. butter, melted
1/2 tsp. salt
fresh ground pepper
fresh parsley, chopped
fresh lemon juice (optional)

Preheat the oven to 425 degrees. 1/4 or 1/8th the radishes depending on their size. Toss the radishes with the butter, salt, and pepper. Roast for 20 minutes or until tender. Remove from the oven and sprinkle with fresh parsley. Squeeze lemon over all if desired.

Sunday, November 13, 2011

Raw Kale Salad

If you're looking for a seasonal salad with a nutritional powerhouse kick, look no further than this, either to grace a holiday table, or for a burst of health in between the sugar-laden days of the holiday season.

Kale is the popular super-food of the moment. Raw kale is particularly vogue. Those two reasons, along with personal curiosity, inspired me to try this raw kale salad (recipe inspired by a Vegetarian Times recipe). And while I enjoy kale slow sauteed with onions and spices, as well as pureed in green soup, I did not find the raw version up to my particular taste buds. Don't get me wrong, it wasn't bad, in fact this salad is loaded with lots of flavor and the health benefits are numerous, I just know kale is a vegetable I'd rather eat cooked. However, I hear rave reviews of raw kale, so give this a try, you're body will thank you and perhaps you'll find that raw kale is your style of salad!


RAW KALE SALAD WITH TURNIPS
Print This Recipe


12 oz bunch kale, preferably lacinato/tuscan, stem removed, leaves cut into thin strips or chiffonade
1 Tbsp olive oil
1 tsp apple cider vinegar
1/2 tsp salt, divided
1/2 c. whole pecans
2 Tbsp pure maple syrup
1 Tbsp olive oil
1/8 tsp cayenne pepper
1/2 cup turnip, peeled and grated
1/2 cup carrot, grated
2 green onion, thinly sliced on the diagonal

Dressing
1 Tbsp lemon juice
2 tsp grated lemon zest
2 tsp olive oil
2 tsp low-sodium soy sauce
1 tsp agave nectar

Place kale in a bowl, and pour olive oil, vinegar, and salt over top. Using your hands, gently massage mixture into kale for 2 to 3 minutes. Let rest for 30 minutes.

Preheat oven to 375°F. Line baking sheet with parchment paper. In a bowl, toss together pecans, maple syrup, olive oil, dash of salt, and dash of cayenne. Spread nut mixture in single layer on baking sheet; bake 8 to 10 minutes, or until pecans are brown and fragrant, stirring frequently. Cool in pan.

To make dressing, whisk together all the dressing ingredients and season with salt and pepper, if desired.

Stir turnip, carrot, and green onion into the kale mixture. Toss with dressing and garnish with pecans.

Monday, August 15, 2011

Just Desserts: Peanut Butter-Banana Mousse

You may have guessed by our more infrequent posting lately (especially from me) that things have been busy. We thoroughly enjoy cooking and blogging and sharing our recipes and posts with you however, we have decided that we need to take a break, re-evaluate, and plan for the blog future. There are 100s of recipes already here, so we hope you will keep stopping by! We do plan to return to blog world with exciting new recipes and format changes. We appreciate your support, interest, subscriptions, and most of all for making the recipes and giving us feedback! See you soon!

Happy Cooking,
Alaina & Stephanie, The Cooks Next Door


_______________________________________

(Stephanie) - This is a super quick, yummy little treat. Just three ingredients! Although I've never made what I've seen called banana soft-serve ice cream, I'm guessing this mousse recipe is quite similar. I copied this recipe down on a piece of paper sometime ago, I'm pretty sure that it came from Food Network, but now I can't remember.

I love that this dessert can be considered healthy and can be made without planning ahead or turning on the oven. Hope you enjoy this prefect summer treat!


PEANUT BUTTER-BANANA MOUSSE
Print This Recipe

3 frozen chopped bananas
1/3 cup peanut butter
2 Tablespoons honey
pinch of salt

Puree in a food processor until smooth. Top with chopped peanuts and a drizzle of chocolate sauce.

Wednesday, August 10, 2011

Weekend Fare: Baked Blueberry Oatmeal

You know what's better than a bowl of oatmeal for breakfast? A piece of baked oatmeal! The inspiration for this recipe came from Tasty Kitchen. I "healthy-fied" the recipe and it's become a breakfast favorite. Most weeks I make a batch and we eat it for 3 or 4 breakfasts. This dish comes with high recommendations from both Jeremy and I!


BAKED BLUEBERRY OATMEAL
Print This Recipe


1 Tablespoon + 1/3 cup melted coconut oil or butter
2 Tablespoons coconut sugar, sucanat, or turbinado, divided
1 1/2-2 cups fresh or frozen blueberries
1/2 teaspoon cinnamon
1/2 cup milk
1/4 cup maple syrup
2 eggs
1 teaspoon vanilla
2 cups old fashioned oats (for gluten-free, make sure to be certified gluten-free oats such as Bob's Red Mill brand)
1/4 cup ground flax seed
1/4 cup shredded coconut
2 1/2 teaspoons baking powder
1/4 teaspoon baking soda
1/2 teaspoon salt
1/4 cup sliced almonds

Preheat the oven to 350°F. Lightly grease an 8x8 pan. Melt coconut oil or butter and pour 1 Tablespoon in bottom of the pan. Pour fruit into the pan and sprinkle with 1 Tablespoon sugar and cinnamon. Set aside.

In a bowl mix together the milk, maple syrup, eggs, vanilla, and remaining melted coconut oil.

In another bowl, whisk together the oats, flax seed, coconut, baking powder, baking soda, and salt. Stir the wet ingredients into the dry and mix well. Pour mixture over the fruit and smooth the top. Sprinkle the top with almonds and remaining 1 Tablespoon of sugar.

Bake for 40 to 50 minutes, or until browned on the top and blueberries are bubbly. Cool slightly. Serve with milk.

Wednesday, August 3, 2011

Baker's Delight: Peach Pie

Summer fruit pie has been on my mind. So, last week I made three batches of pie crust and froze two. The other one I made into a peach-blueberry pie. Each bite was like a taste of summer!

Since it's just Jeremy and I here, a 9-inch pie is a little too much for us. I found a lovely 6-inch Pyrex pie plate at the thrift store and it's become my go-to pie baking pan. One 9-inch pie crust becomes a top and bottom crust for this little pan. When I made this pie, I cut the recipe in half, but aired on the side of a heavy-half. If you want to make the recipe into a peach-blueberry pie, substitute a cup or two of blueberries for some of the peaches.


PEACH (-Blueberry) PIE
(slightly adapted from Pie Pie Pie)
Print This Recipe

Basic pie dough for a 9-inch, 2-crust pie (I made a gluten-free pie crust)

1/2 cup sugar
1/3 cup all-purpose flour (for gf, use a gf all-purpose flour)
1/2 teaspoon cinnamon
1/4 teaspoon nutmeg
1/4 teaspoon salt
3 Tablespoons fresh lemon juice
3 pounds peaches, halved, pitted, and thinly sliced, to make about 7 cups fruit
2 Tablespoons unsalted butter, cut into small pieces

Preheat the oven to 425°F. Roll out half of the dough for the bottom crust and fit it into a 9-inch pie pan. Roll out the remaining dough for the top crust and set it aside on a sheet of waxed paper.

In a large bowl, stir together the sugar, flour, cinnamon, nutmeg, and salt with whisk until evenly mixed. Add the lemon juice and peaches and toss until the fruit is completely coated with the sugar mixture. Pile the peaches in the dough-lined pan, mounding them slightly in the center. Scatter the butter over the fruit.

Put on the top crust, then trim and flute the edges. With the point of a sharp knife, cut several vents in the top for steam to escape.

Bake for 25 minutes, then reduce the heat to 350°F. Bake for another 25-30 minutes, or until the crust is golden brown and you see juices bubbling through the vents.

Serve warm or at room temperature.

Monday, August 1, 2011

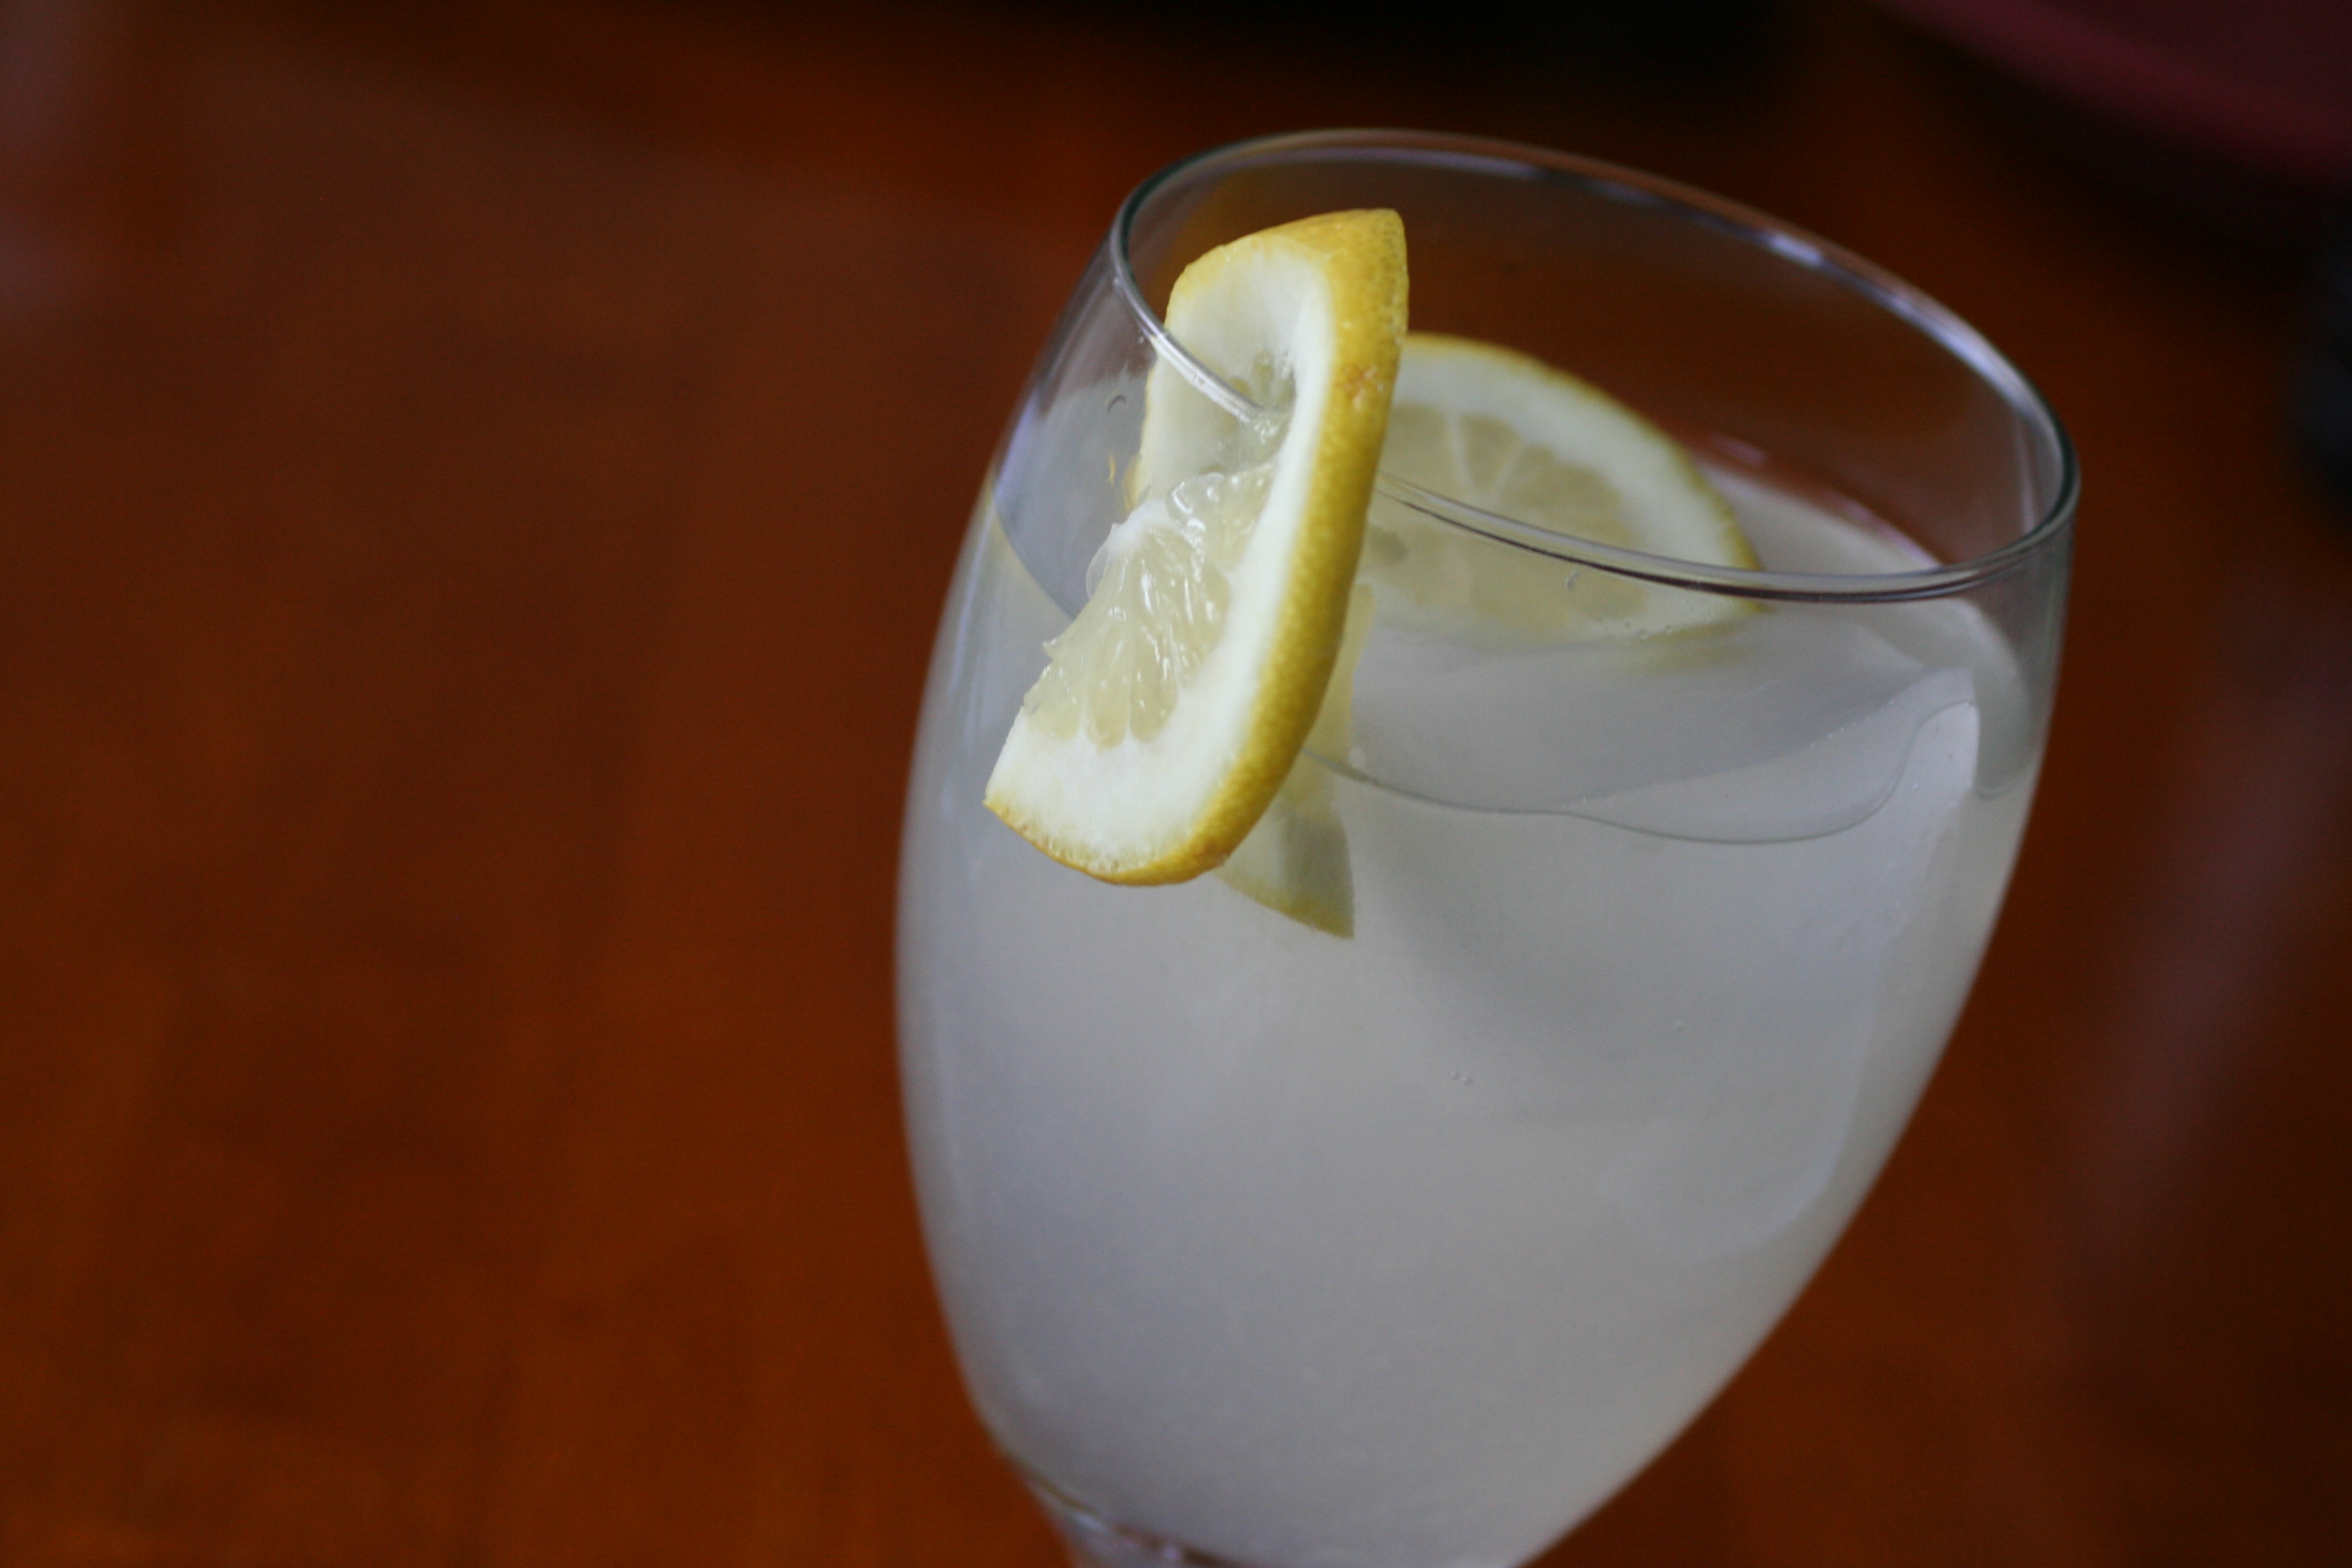
Beverages: Lemonade (sugar-free)

Fresh-squeezed lemonade has been a staple in our refrigerator this summer. Once a week I fill a half-gallon jar and we enjoy it throughout the week. This recipe is super easy and nutritious as it uses stevia to sweeten it, so there is no big sugar hit to your body. Though I know you can find stevia many places, I've found reasonably priced powdered stevia at Trader Joe's.

I followed a recipe from The Whole Life Nutrition Cookbook by Alissa Segersten. I love both her cookbook and her blog because they offer inspiring, nourishing recipes.


STEVIA LEMONADE
(from The Whole Life Nutrition Cookbook)
Print This Recipe

1/2 cup fresh-squeezed lemon juice
4 cups filtered water
2 teaspoons powdered stevia

Whisk all ingredients together and refrigerate.

Friday, July 29, 2011

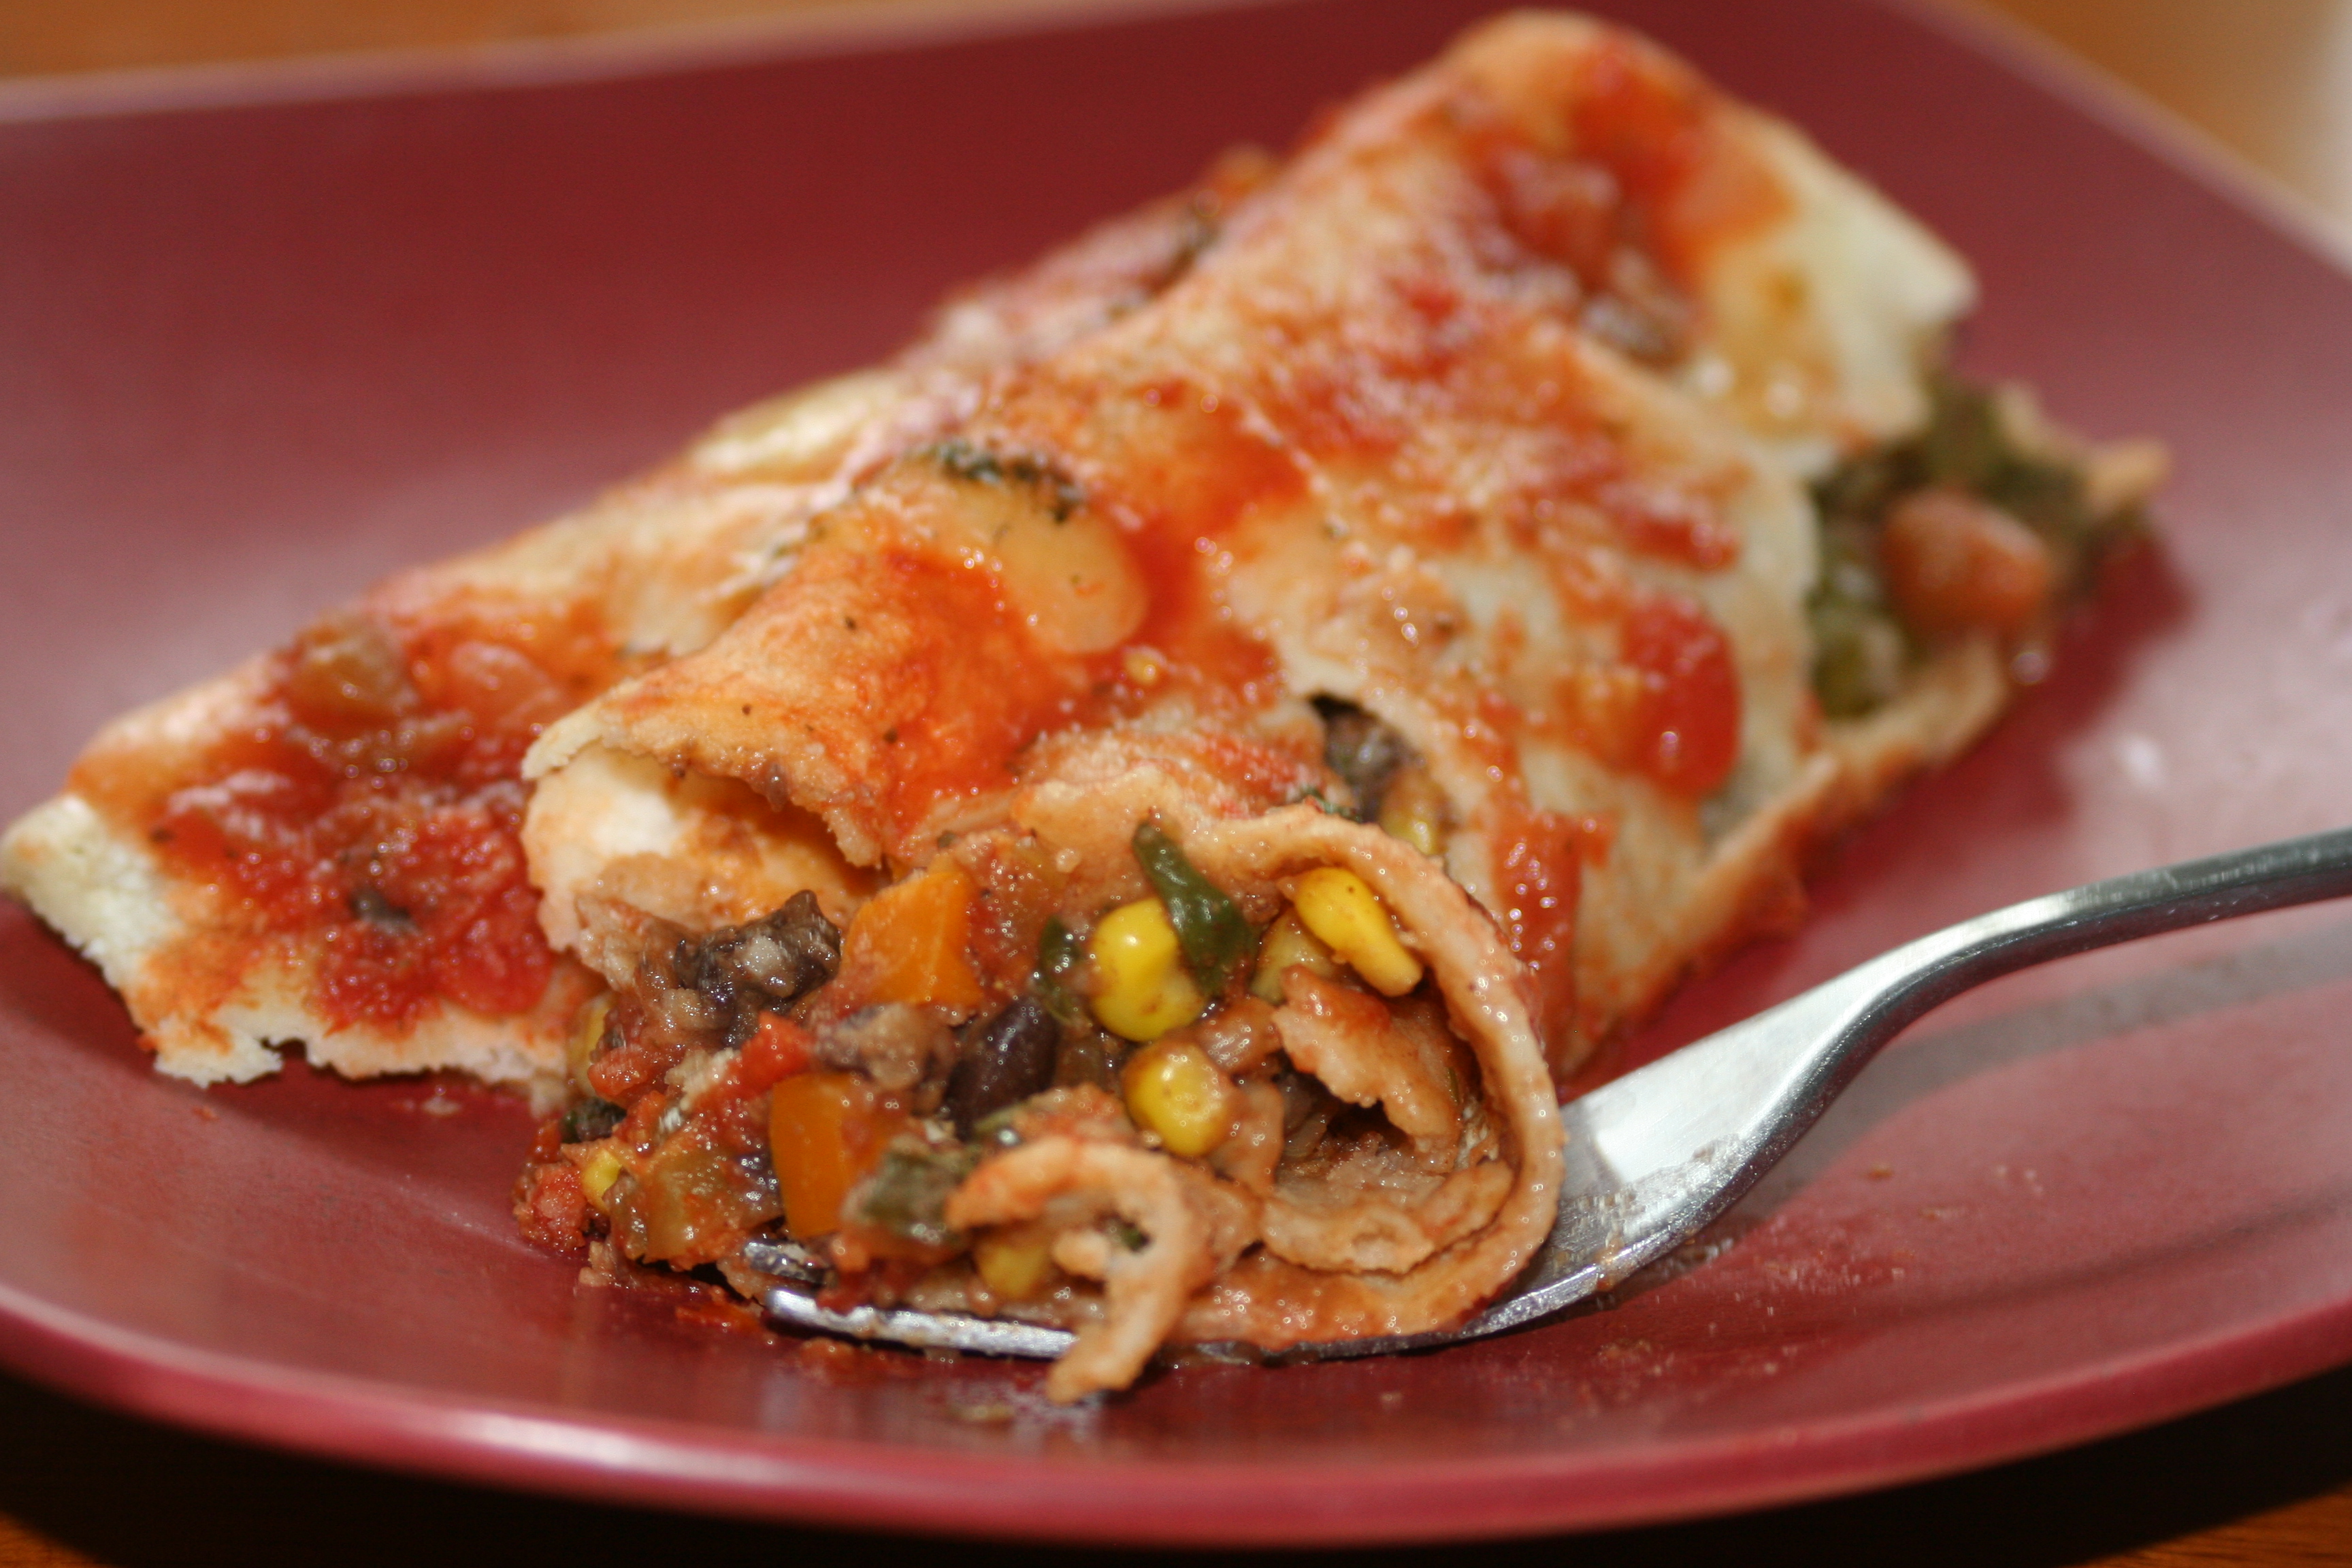
Vegetarian: Black Bean Enchiladas

Mexican food nearly always sounds good to me. I found this recipe while blog-hopping. It's quite easy, and while I baked them, this recipe also works in the crock-pot. I pumped up the veggies in the recipe, because I like to do that. We both enjoyed this new (for us) take on Mexican.

These enchiladas are vegetarian, but you can easily add some leftover cooked meat to the filling.


SLOW COOKER BLACK BEAN ENCHILADAS
(slightly adapted from The Kitchn)
Print This Recipe

Serves 4-6

1/2 yellow onion, diced small
1 bell pepper, diced small
1 tomato, diced small
Big handful of fresh spinach, thinly shredded
1 16-ounce can black beans, drained and rinsed
1 cup frozen corn
2 teaspoons chili powder
1 teaspoon cumin
1 teaspoon salt
1 1/2 cups cheese, shredded and divided - we like monterey jack
2 16-ounce jars of your favorite salsa
12 6”-8” tortillas, flour or corn (use corn tortillas for gluten-free enchiladas)
Optional: 1 cup leftover meat - chicken, pork, hamburger, or shredded beef

In a medium bowl, mix together the onion, pepper, tomato, spinach, black beans, corn, spices, meat (if using), and 1/2 cup of the cheese. Pour about a cup of salsa (half a jar) into the bottom of the slow cooker and spread it around evenly.

Scoop about 1/3 cup filling into one of the tortillas, roll it up, and nestle it into the bottom of the crock pot. Repeat with the half of the remaining filling, rolling tortillas until the entire bottom of of the crock pot is filled. Spread another cup of salsa over this layer and sprinkle it with another 1/2 cup of cheese.

Continue with the remaining filling and tortillas to create a second layer. Top with another cup of salsa, but reserve the remaining 1/2 cup of cheese for later. Place the lid on the slow cooker and cook on HIGH for 2-4 hours. In the last 15 minutes of cooking, sprinkle the leftover cheese over the top and let it melt.

Serve the enchiladas with the remaining salsa. Leftovers will keep for up to a week in the refrigerator.

Cook's Note: To bake these enchiladas in the oven, layer the rolled tortillas in a 9x13 baking pan and cover with aluminum foil. Bake at 400° for 20 minutes. Uncover, sprinkle with cheese, and bake uncovered for an additional 5-10 minutes.

Monday, July 25, 2011

Simple Supper: Lemon Pepper Shrimp Scampi

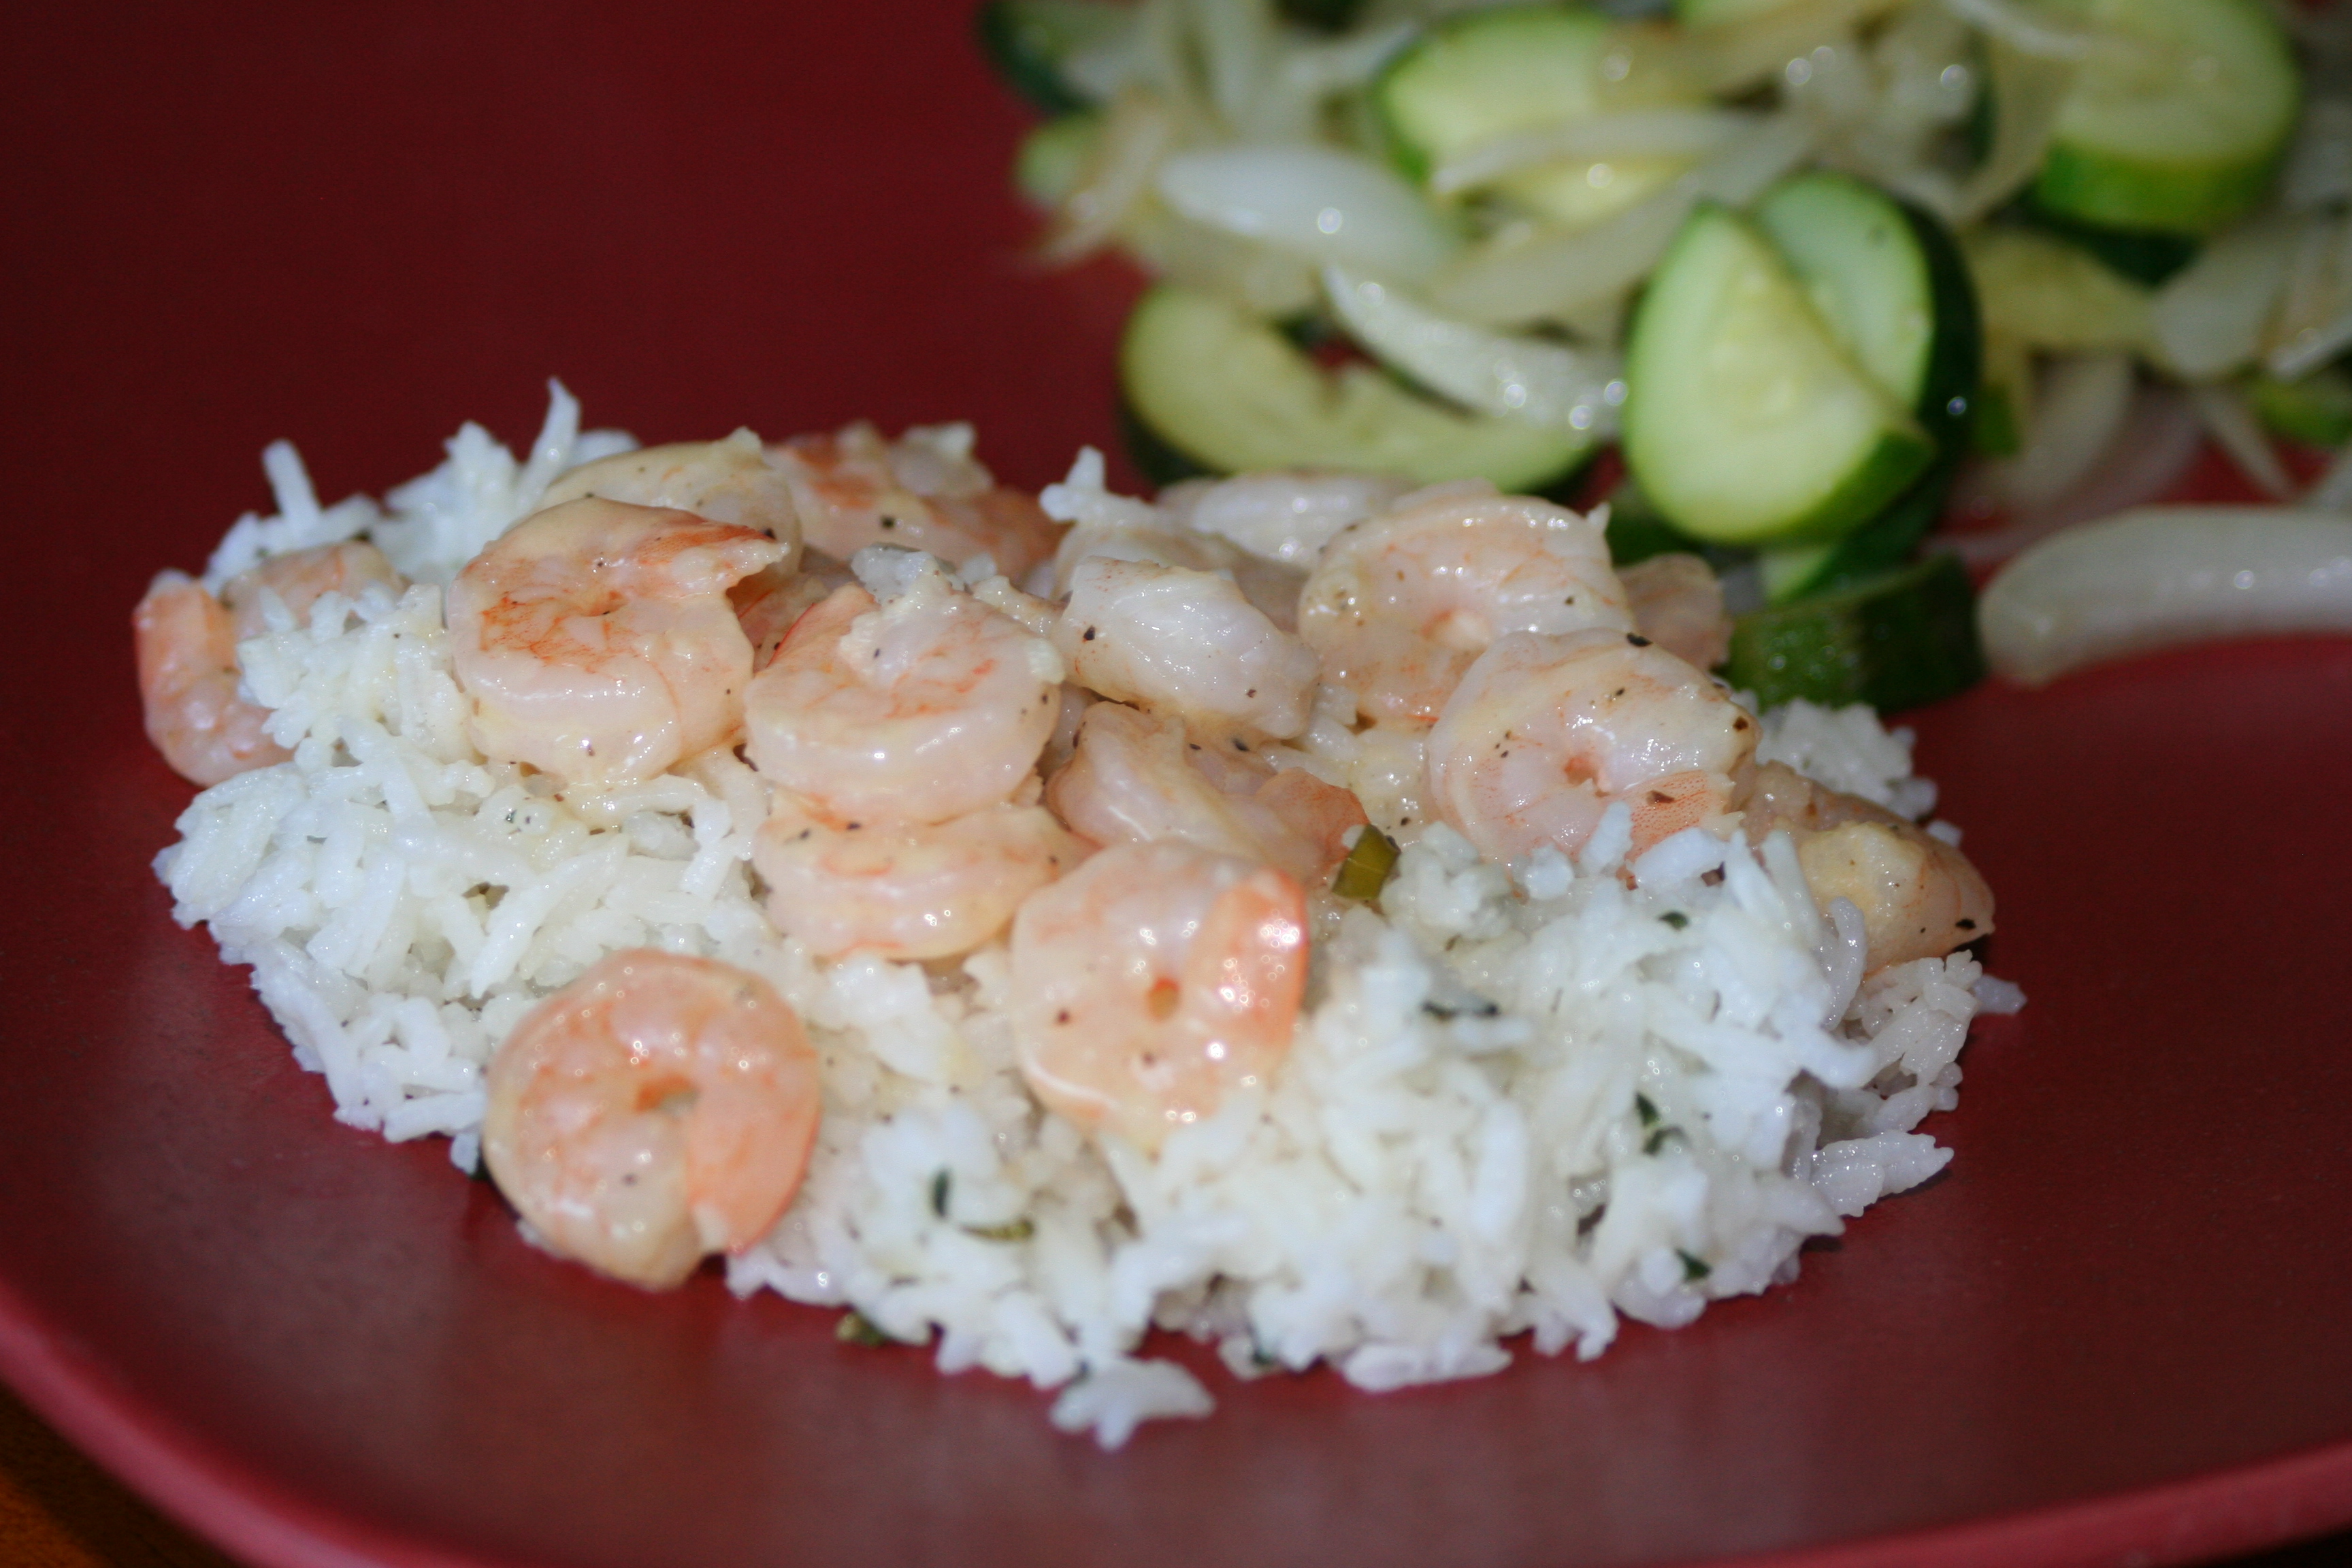
On Friday, at the end of a long day (and after it'd been awhile since the grocery store and I visited), I was thankful for the frozen bag of shrimp in my freezer. Within 20 minutes I'd cooked up this light and simple shrimp dish for supper. I used rice in place of the orzo and substituted mixed, chopped fresh herbs in place of the parsley. This meal will definitely be added to our supper rotation. To balance out the meal, add a green salad, or other lightly sauteed veggies.


LEMON PEPPER SHRIMP SCAMPI
(from Cooking Light)
Print This Recipe

1 cup uncooked orzo (use rice to make gluten-free)
2 Tablespoons chopped fresh parsley
1/2 teaspoon salt, divided
7 teaspoons unsalted butter, divided
1 1/2 pounds peeled and deveined jumbo shrimp (I actually used medium shrimp)
2 teaspoons minced garlic
2 Tablespoons fresh lemon juice
1/4 teaspoon black pepper

Cook orzo according to package directions, omitting salt and fat. Drain. Place orzo in a bowl. Stir in parsley and 1/4 teaspoon salt; cover and keep warm.

While orzo cooks, melt 1 Tablespoon butter in a large skillet or wok over medium-high heat. Sprinkle shrimp with remaining 1/4 teaspoon salt. Add half of shrimp to pan; saute 2 minutes or until almost done. Transfer shrimp to a plate. Melt 1 teaspoon butter in pan. Add remaining shrimp to pan; saute 2 minutes or until almost done. Transfer to plate.

Melt remaining 1 Tablespoon butter in pan. Add garlic and cook 30 seconds, stirring constantly. Stir in shrimp, juice, and pepper; cook 1 minute or until shrimp are done.

Wednesday, July 20, 2011

Baker's Delight: Lemon Pound Cake w/Lemon Cream

I adapted a recipe for plain pound cake into a lemon pound cake. And I came up with a lemon cream to add the lemon flavor. Any kind of berry would be delicious topping this cake - I chose lightly sweetened strawberries. It was the perfect dessert for a summer dinner party!


LEMON POUND CAKE
Print This Recipe

1 3/4 c. flour
1/2 tsp. salt
1 c. unsalted butter, room temperature
1 1/2 c. sugar
3 lg. eggs
1 tsp. vanilla extract
1 tsp. lemon extract
zest of 2 lemons
1/4 c. milk

Preheat oven to 350 degrees. Butter and flour a 9x5x3 loaf pan. Combine flour and salt in a bowl and set aside.

Using a mixer, beat butter in large bowl until fluffy. Gradually add sugar, beating until well vlended. Beat in eggs 1 at a time. Beat in extracts and zest. Beat in half of the flour mixture, then milk, then remaining flour. Spread batter evenly in prepared pan.

Bake cake until golden and tester comes out clean - about 1 hour and 15 minutes. Cool cake in pan 10 minutes. Cute around pan sides to loosen cake. Turn cake out onto rack and cool completely.

LEMON CREAM

4 oz. cream cheese
1/2 c. sugar
1 c. heavy whipping cream
Juice of 1 lemon
Zest of 1 lemon

Whip the cream cheese and sugar together until light and fluffy. Add zest and juice and mix until fully combined. Add whipping cream and whip until stiff peaks form.

Monday, July 18, 2011

International Cuisine: Orange Chicken

Orange Chicken isn't an authentic Asian dish as far as I know, but you'll find it in many take-out Chinese restaurants. Since take-out Chinese is not a part of our diet, I like to make my own take-out from time to time. This isn't as gooey, rich, and breaded as you'll likely find at your local eatery. But it's tasty, definitely healthier, and best of all can be made at home.

This recipe is from one of my favorite gluten-free cookbooks, Artisanal Gluten-Free Cooking by Kelli and Peter Bronski. I added some crisp-cooked broccoli to the chicken and sauce and served it over brown rice.


ORANGE CHICKEN
(from Artisanal Gluten-Free Cookbook)
Print This Recipe

2/3 cup orange juice
1/4 cup tamari wheat-free soy sauce
1 Tablespoons dry sherry
1 Tablespoon + 1 teaspoon brown sugar
2 teaspoons cornstarch
1-2 Tablespoons olive oil
3 garlic cloves, minced
1 Tablespoon minced fresh ginger
zest of 1/2 orange, julienned
4 boneless, skinless chicken breasts, cubed

Mix together the orange juice, soy sauce, sherry, brown sugar, and cornstarch in a saucepan. Stir to dissolve the cornstarch. Heat over medium heat until the mixture comes to a boil and thickens, stirring occasionally. Remove from the heat.

Heat the olive oil in a skillet over medium-high heat. Add the garlic, ginger, and zest and sauté until fragrant. Add the chicken and sauté until browned and cooked through.

Add the orange sauce to the chicken and heat through.

Wednesday, July 13, 2011

Baker's Delight: Strawberry Pie

I love fresh strawberry pie. It makes me think of my mom, as I associate it with her late April birthday. I used local strawberries to make this lightly sweetened pie. I wasn't in the mood to work on a pie crust, so I just made a coconut crust (shredded coconut and melted butter), but really, I'd recommend going to the trouble of a regular pie crust. Strawberry pie doesn't keep fabulously well, so you'll want to eat it within a couple days.

I have this lovely cookbook devoted solely to pies! I found this recipe in there--fresh berries are mixed in with mashed and lightly cooked berries. It's super easy, delicious, and isn't the deep red color of this gorgeous?


FRESH STRAWBERRY PIE
(from Pie Pie Pie by John Phillip Carroll)
Print This Recipe

Prepare  your basic pie crust recipe for a 9-inch pie shell

1 3/4 to 2 pounds fresh strawberries, 6-8 cups, depending on berry size
1/4 cup cornstarch
3/4 cup sugar
pinch of salt
2 Tablespoons fresh lemon juice
Whipped Cream

Preheat the oven to 425°F. Roll out the dough and fit it into a 9-inch pie pan. Trim and flute the edges, then bake the pie shell fully. Cool completely before filling.

Dump the berries into a colander and rinse them. Drain well, shaking to remove excess water, then remove the stems. Pick out about 1 cup of whole berries and reserve for garnish. Cut half of the remaining berries into thick slices (or leave them whole if they are small) and set aside.

Put the remaining whole berries in a medium saucepan and crush them with a potato masher. Add the cornstarch, sugar, and salt and stir until the cornstarch has dissolved completely. Cook over medium heat, stirring constantly, until the mixture boils and thickens. Reduce the heat and cook gently for about 1 minute. Remove from the heat and stir in the lemon juice, then cool for 20-30 minutes, stirring 2 or 3 times, until just faintly warm.

Stir in the sliced strawberries. Pour the mixture into the pie shell, and refrigerate for 2-3 hours, until the filling is softly set.

Before serving, prepare the whipped cream and spread it over the pie. Garnish with the whole berries.

Cook's Note: If you want to make this gluten-free, just make a gluten-free pie crust. The pie filling is naturally gluten-free.

Additional Note: The photo above is far from my most stellar effort, but alas it was the best I could get. The coconut crust didn't cut well, so creating a pie-shaped piece wasn't all that easy. But, it was tasty!

Monday, July 11, 2011

Weekend Fare: Peppermint Ice-Cream

Peppermint ice-cream is such a delicious seasonal dessert! And, when it's homemade, it's nothing short of luxury! If possible, make the custard the night before you plan to use it, chilling it in the fridge overnight. If you are in a rush, stir it over the ice bath until very cool.


PEPPERMINT ICE-CREAM
(SimplyRecipes.com)

2 1/2 cups heavy cream (Costco organic is not only very cheap but also very good)
1  1/2 cups whole milk
8 large egg yolks (preferably from free range chickens)
3/4 cup sugar
1/4 teaspoon salt
2 teaspoons peppermint extract
1/2 cup crushed candy canes or hard peppermint candy

Warm the milk, sugar, and salt in a medium saucepan. Make sure the sugar and salt completely dissolve.

Pour the cream into a metal bowl set in a larger bowl of ice and set a medium-mesh sieve on top.

In a separate bowl, whisk together the egg yolks. Slowly pour the warm milk into the egg yolks, whisking constantly, then scrape the warmed egg yolks back into the saucepan.

Stir the mixture constantly over medium heat with a wooden or heatproof rubber spatula, scraping the bottom as you stir, until the mixture thickens and coats the spatula, about 5-7 minutes. Don't think twice when the mixture coats the spoon -- remove it from the heat immediately!

Pour the custard through the strainer and stir it into the cream. Then stir until cool over the ice bath. Chill mixture thoroughly in the refrigerator.

Once the mixture is thoroughly chilled, add peppermint extract, a 1/4 teaspoon at a time, tasting the mixture after each addition, until you reach the desired level of peppermintiness.

Once chilled, freeze in your ice cream maker according to the manufacturer's instructions.

Once the ice cream has been formed in the ice cream maker, it will be fairly soft. Fold in the crushed peppermint candy. Put in an airtight plastic container and place in the freezer for at least an hour, preferably several hours. If it has been frozen for more than a day, you may need to let it sit at room temperature for a few minutes to soften it before serving.

Makes 1 1/2 quarts.

Friday, July 8, 2011

Baker's Delight: Cherry Chocolate Almond Oatmeal Cookies

Do they have a long enough name? :) These are from the wonderful Bon Appetit Dessert Cookbook. I adapted them based on the ingredients I had but they were delicious! I'm going to go ahead an include the recipe as written in the book because I would totally make them exactly as written.

Cookies are one of my favorite desserts - they are perfect for picnics and pitch-ins, most of them freeze very well, and they are usually fairly easy to put together. They are also one of my favorite things to bake!


CHERRY-CHOCOLATE CHIP OATMEAL COOKIES
Bon Appetit Dessert Cookbook
Print This Recipe

1 c. all purpose flour
1/2 tsp. baking soda
1/4 tsp. salt
1/2 c. plus 2 Tb. unsalted butter, room temperature
1/2 c. sugar
1/2 c. (packed) dark brown sugar
1 large egg
1 tsp. vanilla extract
1/2 tsp. almond extract
1 c. old-fashioned oats
1 1/2 c. semisweet chocolate chips
1 c. dried tart cherries
1/2 c. slivered almonds, toasted


Position racks in center and top third of oven and preheat to 325°F. Line 2 large baking sheets with parchment paper. Sift flour, baking soda and salt into medium bowl. Using electric mixer, beat butter, sugar and brown sugar in large bowl until well blended. Mix in egg and both extracts. Beat in flour mixture. Mix in oats, then chocolate chips, cherries and almonds.

Drop dough by rounded tablespoonfuls onto baking sheets, spacing 2 inches apart. Bake cookies 12 minutes. Switch and rotate baking sheets. Bake cookies until golden, about 6 minutes longer. Cool cookies on baking sheets (cookies will firm as they cool). (Can be prepared 1 week ahead. Store airtight at room temperature.)

Wednesday, July 6, 2011

The Salad Bowl: Marinated Mushroom Pasta Salad

Not long ago I woke up on a Wednesday morning and had no idea what I'd be bringing for my lunch that day. I picked a few ingredients from my pantry and voila, this pasta salad was born! I enjoyed my lunch and made another batch of this salad for the weekend.

This "recipe" is not so much specific quantities, but rather the ingredients, so tailor the seasonings to your tastes and pantry supplies. Feel free to add chopped onions or tomatoes. Make sure to add plenty of olive oil.

This is perfect for a summer picnic. To make this gluten-free, be sure to use brown rice pasta.


MARINATED MUSHROOM PASTA SALAD
Print This Recipe


Cooked corkscrew pasta
Jar of marinated Portobello mushrooms and red peppers
Can of Chickpeas, drained and rinsed
Garlic and herb goat cheese, crumbled (feta cheese would be another good  option)
Olive oil
Splash or two of balsamic vinegar
Italian seasoning
Sea Salt and Freshly Ground Pepper to taste

Add all of the ingredients to a bowl and toss to combine. Cool for an hour or two to allow the flavors to meld. Taste and adjust seasonings as needed.

Monday, July 4, 2011

Happy Independence Day!

It's the Fourth of July! A time for celebrating our country and patriotism! May we never forget the men and women who have sacrificed for our freedom and those who continue to sacrifice and serve!


What are your favorite 4th foods? Our family went camping this weekend and enjoyed way too many s'mores. We traditionally attend a concert and fireworks with a picnic dinner at some point during the holiday weekend! We also love going to our town's parade and making homemade icecream, eating buttery corn on the cob, and grilling.


HAPPY 4th of JULY! 


Friday, July 1, 2011

Weekend Fare: Margaritas

Just in time for the holiday weekend - margaritas! We've made a couple of different kinds and both were excellent! They make a great accompaniment for a backyard bbq or fiesta. I usually like them on the rocks but whatever you prefer.


TRADITIONAL MARGARITA
Ina Garten/Food Network
Print This Recipe


1 lime, halved
Kosher salt
1/2 cup freshly squeezed lime juice (about 5 limes)
2 tablespoons freshly squeezed lemon juice (1 lemon)
1 cup Triple Sec
1 cup white tequila (I think we used gold and it was fine!)
2 cups ice, plus extra for serving

If you like margaritas served in a glass with salt, rub the outside rims of 6 glasses with a cut lime and dip each glass lightly into a plate of kosher salt.

Combine the lime juice, lemon juice, Triple Sec, tequila, and ice in a blender and puree. Place extra ice in a cocktail shaker. Fill with margarita mix, shake well, and strain into glasses.


BLACKBERRY MARGARITA 
adapted from Cooking Light, June 2011
Print This Recipe

1 1/2 tablespoons granulated sugar
1/2 teaspoon kosher salt
1 lime
1 cup water
1/2 cup sugar
1 cup 100% agave blanco tequila
3/4 cup Triple Sec (or Grand Marnier as originally called for)
2/3 cup fresh lime juice
12 ounces fresh blackberries

Combine 1 1/2 tablespoons granulated sugar and kosher salt in a dish. Cut lime into 9 wedges; rub rims of 8 glasses with 1 lime wedge. Dip rims of glasses in salt mixture. Combine water and 1/2 cup sugar in a microwave-safe glass measuring cup. Microwave at HIGH 2 1/2 minutes, stirring to dissolve sugar; cool. Combine syrup, tequila, Triple Sec, fresh lime juice, and blackberries in a blender; process until smooth. Strain mixture through a cheesecloth-lined sieve over a pitcher; discard solids. Serve over ice. Garnish with remaining lime wedges.